


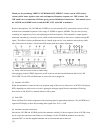
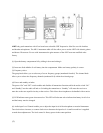
(5) 12 Volt Input
Plug the supplied AC adapter into the 12 volt input on the receiver then into an AC electrical outlet. Use only
the adapter supplied, as other adapters may damage the receiver.
(6) Output Adjustment
Rotate this knob clockwise to increase, or counterclockwise to decrease volume level.
(7) Output (unbalanced)
Using a suitable audio cable (not supplied) connect the 1/4-inch phone jack end to the audio output on the
receiver, and connect the other end of the cable to the suitable mic/line input of an audio mixer or amplifier.
(8) Output (balanced)
Using a suitable audio cable (not supplied) connect the XLR connector to the audio output on the receiver, and
connect the other end of the cable to the suitable mic/line input of an audio mixer or amplifier.
(9) & (10) Frequency select
The group knob (9) allows you to select any of seven frequency groups (numbered from 0-6). The channel
knob (10) allows you to select any of nine frequency channels (numbered 0-8) within the selected group. Any
receiver/transmitter pair must be on the same group and frequency to operate properly. Be sure that both the
transmitter and the receiver are OFF before selecting/changing the frequency.
When using more than one system, all receivers and transmitters must be set to the same group to avoid
intermodulation distortion while all transmitter/receiver pair must be on different frequencies.
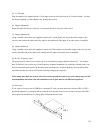
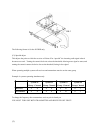
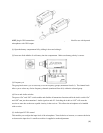
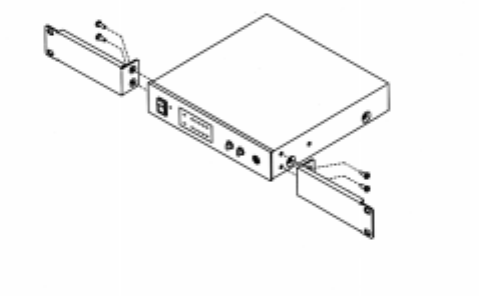
(11) Rack ears
If you wish to use one or two 411DRHs in a standard 19" rack you must attach the rack ears (HR-1 or HR-2
purchased separately) by attaching the ears with the four machine screws (two per side near front). The HR-2
also requires the attachment of a joining plate underneath the two units.
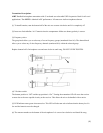
(2)
HR-1