6
PX700DLX/PX900DLX Powered Mixer
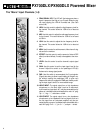
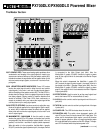
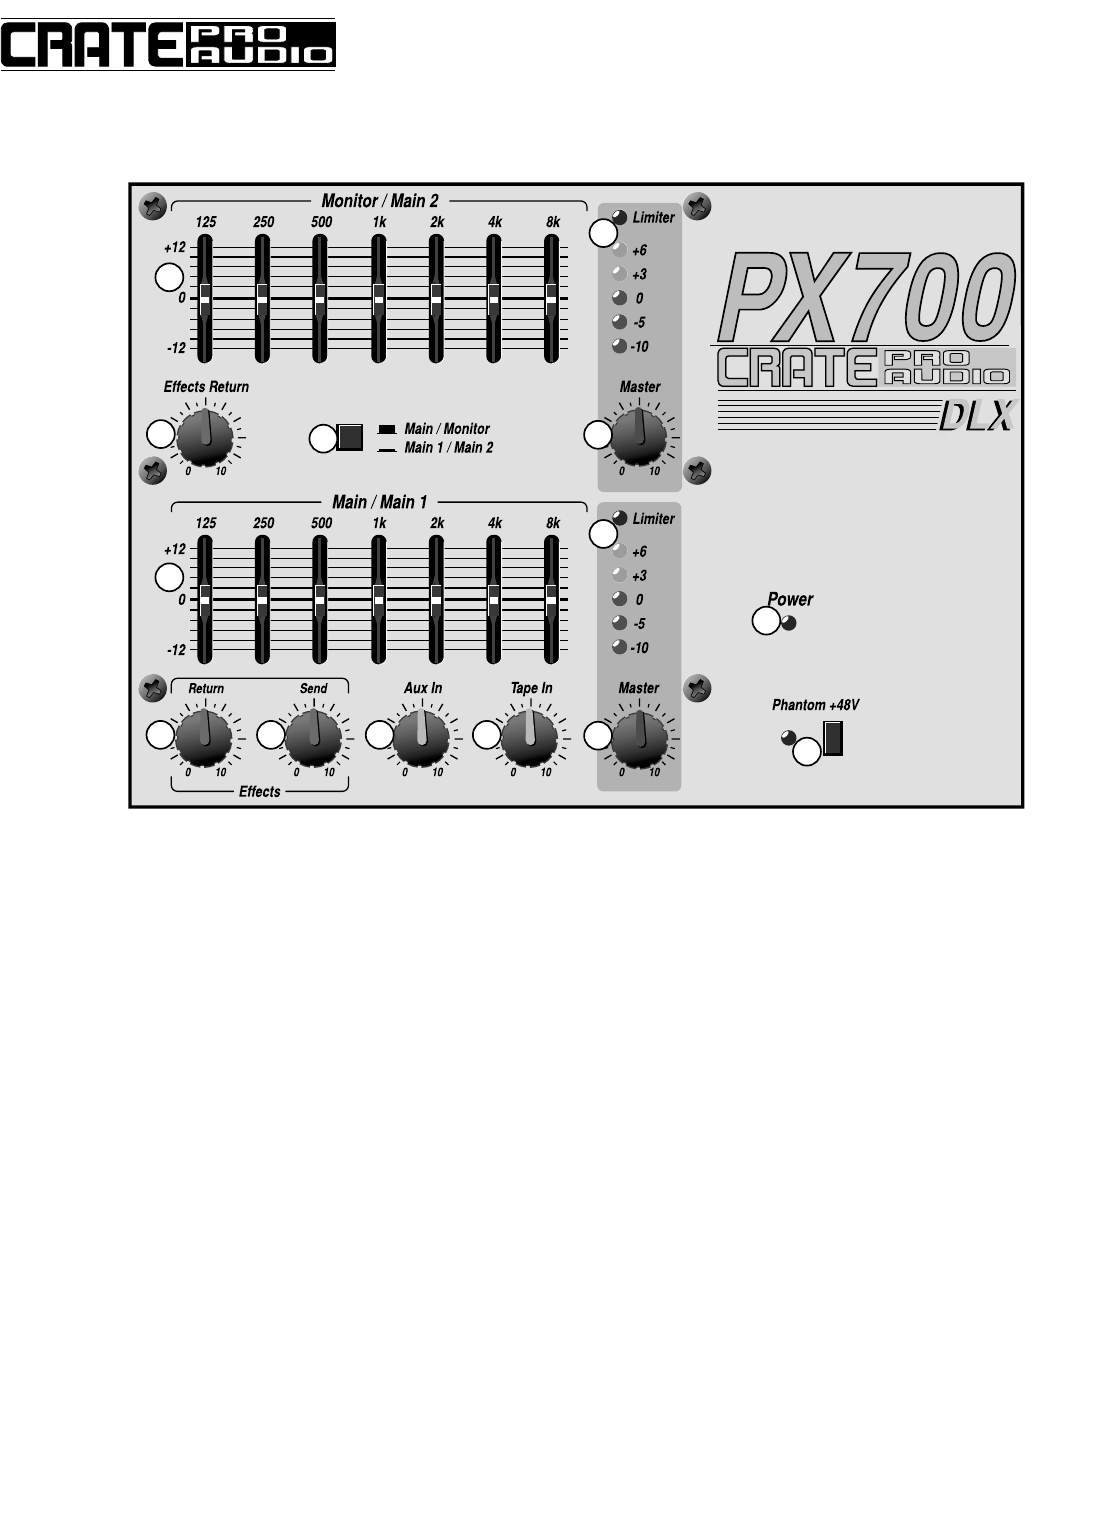
22,27. GRAPHIC EQ’S: These seven band graphic equalizers allow
customization and shaping of the output signals to match room
acoustics and enhance the sound. Use the selector switch (#25)
to determine where the equalization will be applied: either to the
main and monitor output signals, or to the main 1 and main 2 out-
put signals.
23,28. LED METERS/LIMITER INDICATORS: These LED meters
monitor the output signal levels for either the main and monitor
output signals, or the main 1 and main 2 output signals (depen-
dent on the setting of the selector switch, #25). The red LED’s illu-
minate when the internal limiter is engaged to prevent the signal
from being clipped. (Clipping results in overdrive distortion and
should be avoided.) If the limiter LED’s flash continuously or
remain on constantly during use, reduce the output signal levels
until they flash only on strong signal peaks.
24,29. EFFECTS RETURNS: Use these controls to adjust the mag-
nitude of the effects applied to the output signals. Use the selec-
tor switch (#25) to determine where the effects will be applied:
either to the main and monitor output signals, or to the main 1 and
main 2 output signals.
25. MAIN/MONITOR / MAIN1/MAIN 2: Use this switch to select
whether the graphic EQ’s, LED meters, and master level controls
are assigned to the Main and Monitor outputs (switch in the out
position) or to the Main 1 and Main 2 outputs (switch depressed.
When this switch is in the out position, the Main/Main 1 graphic
EQ (#27) controls the signal to power amp #1, the output of which
is connected to the Main Output jack (#44). Also, the
Monitor/Main 2 graphic EQ (#22) controls the signal to power
amp #2, the output of which is connected to the Monitor Output
jack (#43).
When this switch is depressed, the Main/Main 1 graphic EQ
(#27) controls the signal to power amp #1, the output of which is
connected to the Main 1 Speaker Output jacks (#46). Also, the
Monitor/Main 2 graphic EQ (#22) controls the signal to power
amp #2, the output of which is connected to the Main 2 Speaker
Output jacks (#46).
30. EFFECTS SEND: Use this control to set the overall signal level
sent to the internal DSP or external effects (if used).
31. AUX IN: Use this control to set the input signal level of the aux in
jack (#40).
32. TAPE IN: Use this control to set the input signal level of the tape
in jacks (#41).
34. POWER LED: This LED illuminates when the mixer is on.
35. PHANTOM +48V: This switch, when depressed, applies +48
volts DC to pins 2 and 3 of each channel’s XLR input jacks. This
allows use of microphones which require a source of phantom
power for proper operation. (Mics not requiring phantom power
will not be affected by the presence of the DC voltage.) The adja-
cent LED illuminates when the phantom power is on.
The Master Section:
22
27
24
23
26
28
33
34
35
25
29 30 31 32
(continued...––––––––>)


