wwwwww
..
ffeennddeerr..ccoomm
✧
wwwwww
..mmrrggeeaarrhheeaadd..nneett
8
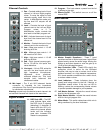
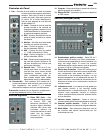
20. Effects Return level - Adjusts the amount of signal
sent to the left and right program mixes from the
effects return.
21. Effects Master level - Adjusts the amount of signal
from the built in DSP effects module to the Left,
Right and Main program mixes.
22. DFX Send level - Adjusts the master level of signal
present at the EFFECTS SEND jack from the
internal effects bus.
23. Aux In level - Adjusts the signal level from the Aux
In jack applied to the Left, Right and Main program
mixes.
24. Tape In level - Adjusts the signal level from the tape
in jack applied to the Left, Right and Main program
mixes.
25. Monitor Out level - Adjusts the overall level of
monitor signal bus to the monitor out jack.
26. System Mode Switch - This switch controls which
mixer programs are sent to the internal power
amplifiers. The options are Left and Right, Monitor
and Main, or Bridged mono mode.
27. Main Master Volume - Adjusts the overall level of
the main program mix, which is a mono sum of the
left and right channels.
28. Power LED - LED is lit when power is applied to the
mixer.
29. Phantom Power Switch - When this button is
pressed, a +48 DC Phantom Power supply is
activated and the adjacent LED illuminates.
Phantom power is necessary for some condenser
style microphones. Before plugging or unplugging
and microphone, make sure the power supply is off.
Ensure the master volume is down before turning on
the phantom power.
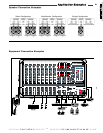
Master Inputs and Outputs
Master Inputs and Outputs
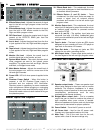
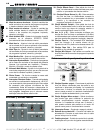
30. Effects Send Jack – This unbalanced, line level
output jack is designed to feed the effects bus to
an external effects processor.
31. Effects Return (L and R) Jacks – These
unbalanced, line level input jacks are meant to
accept a signal from an external effects
processor and transfer it to the left and/or right
program mixes.
32. Monitor Output Jack – This unbalanced, line level
output jack is designed to output the monitor mix to
an external power amplifier or powered monitor
such as the 1270P.
33. Aux In (L and R) – The auxiliary input jacks are
consumer line level (-10 dBm), unbalanced jacks
which provide additional inputs to the Left and Right
program mixes.
34. Tape in Jacks – The tape in jacks are RCA inputs
designed to input a stereo mix from a CD player or
tape deck to the stereo L/R busses.
35. Tape Out Jacks – The tape out jacks are RCA
outputs for use with a recording device.
36. Mix Output Jacks – These output jacks provide a
line level signal of the left and right program mixes.
AC Power and Power Amplifier
AC Power and Power Amplifier
37. Speaker output Jacks – These are speaker level
output jacks designed to feed your main or monitor
speakers. The minimum impedance is 4 ohms;
connecting a load of less than 4 ohms may result in
unsatisfactory performance such as early
overheating and thermal shutdown.
38. Bridged Mono output Jack – This is a speaker
output that can be used to combine the power of
both amplifiers when more volume is needed.
Minimum impedance is 8 ohms, and only the bridge
output can be connected for proper operation.
39. Power Switch – Turns the AC power on and off.
40. AC Power Inlet – Inlet for the AC power cord.
Connect only the supplied cable to this inlet.
41. Main Fuse – This is the main fuse for the unit;
replace with a fuse of the same ratings only.
SS
SS
RR
RR
66
66
33
33
00
00
00
00
//
//
SS
SS
RR
RR
88
88
55
55
00
00
00
00


