


the direction the performer(s) will be speaking from.
4. Insert the 1/4” cable into the jack labeled AUDIO OUT (5) on the
rear of the receiver and connect the other end of the cable to your
amp, effects or mixer jack.
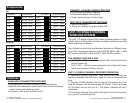
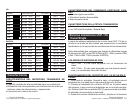
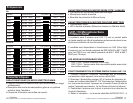
5. Set the channel selector pins (7) on both the transmitter and
receiver to the desired frequency as indicated on the included
Frequency Chart.
6. Adjust the volume using the level control on the front panel.
Note: Effective range between the transmitter and receiver is up
to 250 feet.
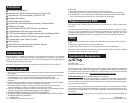
HAND HELD TRANSMITTER OPERATION
1. Slide the battery cavity (9) to open. Insert two (2) AA batter-
ies into the battery cavity (9) according to the polarity indication
marked on the battery housing.
2. Set the channel selector pins (7) on both the transmitter and
receiver to the desired frequency as indicated on the included
Frequency Chart.
3. Close the battery cavity (9).
4. Push the power switch (8) to the ON position. The BATT indica-
tor (10) should ash once briey as you turn on the mic indicating
that the mic has sufcient power. If the BATT stays on, it indicates
that the battery has insufcient power and should be changed. If
the BATT does not light at all and the mic does not work, it indi-
cates the battery is dead and you should change the battery. The
microphone can be muted by setting the switch (8) to the mute
position. If the microphone is not going to be used for any length
of time, push the power switch (8) to OFF and remove the battery.
Do not switch the mic on and off rapidly, because you wont get a
true indication from the BATT indicator.
HEADSET/LAVALIER COMBO AND TRANSMITTER OPERA-
TION
1. Slide the battery cavity (9) to open. Insert two 2 AA batter-
4. Insert the 1/4” cable into the jack labeled AF OUT (5) on the
rear of the receiver and connect the other end of the cable to your
amp, effects or mixer jack.
5. Set the channel selector pins (7) on both the transmitter and
receiver to the desired frequency as indicated on the included
Frequency Chart.
6. Adjust the volume using the level control (4) on the front panel.
Note: Effective range between the transmitter and receiver is up
to 250 feet.
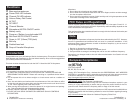
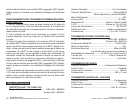
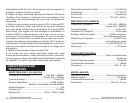
The UHF-216 dual channel UHF series wireless system is two sep-
arate single channel transmitters of different frequencies transmit-
ting to one unit that houses both frequency receivers. There is
also individual level control for each channel.
Two different versions are available and operate on different rang-
es of UHF frequencies between either 682.35 MHz to 697.1 MHz
(US version) and 854.1 MHz to 864.7 MHz (EUROPE version).
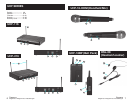
THE MODELS AVAILABLE ARE:
UHF-216M - Which comes equipped with (2) hand held micro-
phone transmitters.
UHF-216HL -Which comes equipped with (2) belt pack trans-
mitters and (2) Headset/ lavalier combos.
UHF-216 DUAL CHANNEL RECEIVER OPERATION:
1. Remove all packing materials. Save the box and packing ma-
terials to transport the unit and in case the unit ever requires ser-
vice.
2. Plug the AC/DC adaptor into the rear of the receiver (6) and an
appropriate AC Outlet. Push the Power On (2) button to turn the
unit on. The power indicator will be illuminated.
3. Extend the two antennas fully vertical and point them towards
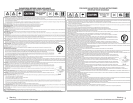
UHF-216 DUAL CHANNEL
WIRELESS SYSTEM
System Control
Control de sistema • Utilisation • Systemeinstellungen
1312
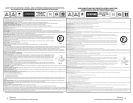
System Control
Control de sistema • Utilisation • Systemeinstellungen
Transmitter Operation