


Evolution eKeys Keyboard User Manual
4
You are probably eager to plug in your eKeys keyboard and get started, but it’s
sensible to check the installation documentation first.
The single USB cable not only powers the keyboard but also sends MIDI data to and from
your computer system.
If you are using Windows XP or Mac OS X you can now simply plug the keyboard in to an
available USB port. Because the eKeys keyboard is class compliant it will work with out
any further installation.
1. Power up your PC.
2. Insert the eKeys Installer CD-ROM.
The installer should open automatically. If not, select run from the start menu and
type d:\setup.exe where 'd' is your CD-ROM drive, then press ENTER.
3. Click on 'install drivers'.
4. Follow instructions on screen.
5. When finished exit setup.
6. Plug in the eKeys.
Windows will proceed with the installation of a USB driver and a MIDI driver. Please re-
start your PC once the installation is complete.
1. Power up your PC.
2. Insert the eKeys Installer CD-ROM.
The installer should open automatically. If not, select run from the start menu and
type d:\setup.exe where 'd' is your CD-ROM drive, then press ENTER.
3. Click on 'Driver Installer'.
4. Follow instructions on screen.
5. When finished exit setup.
6. Plug in the eKeys
keyboard.
Windows will automatically recognise the keyboard and ask for the Evolution
Installer CD-ROM.
7. Select the CD-ROM drive and click OK.
Windows will then ask you to select the CD-ROM drive again for the MIDI driver.
8. If Windows reports the drivers have not been digitally signed, click on
'Continue Installation'.
9. Select the drive once more.
10. Click OK.
Please restart your PC once the installation is complete.
Before You Connect Your Keyboard…
Windows XP & Mac OS X
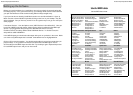
Installing Drivers For Windows 98/ME
Installing Drivers For Windows 2000
13
Evolution eKeys Keyboard User Manual