


WM63-SERIES MIXER • OPERATION AND PARTS MANUAL — REV. #0 (069/27/12) — PAGE 11
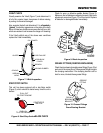
TOW BAR TO MIXER CONNECTION
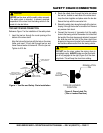
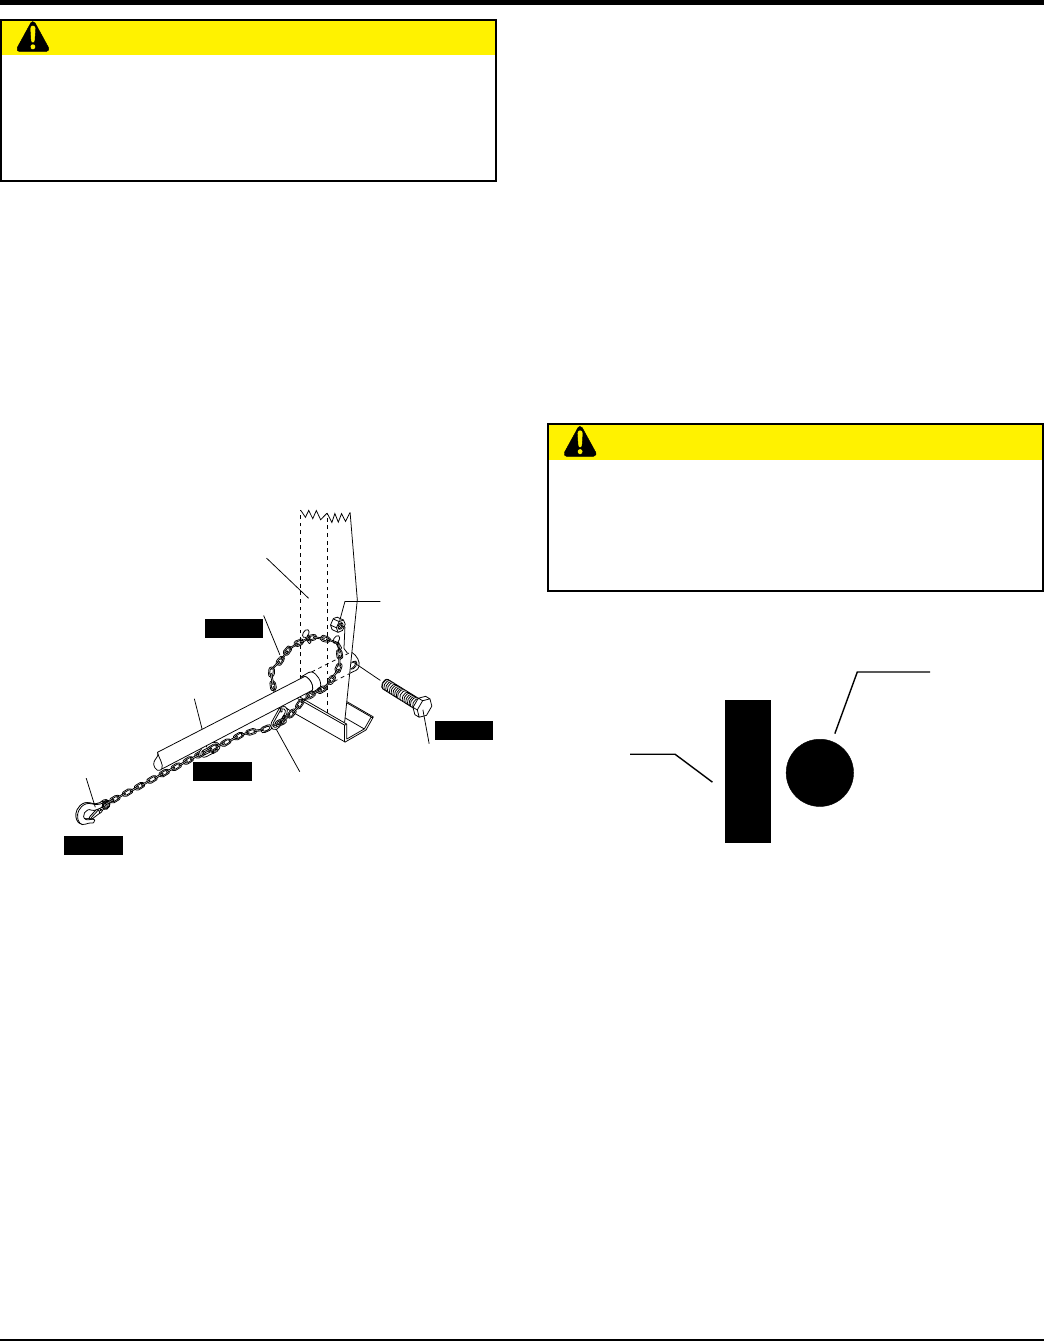
Reference Figure 1 for the installation of the safety chain.
1. Insert the tow bar through the round opening at the
bottom of the mixer stand.
Align the hole on the tow bar with the hole on the mixer
frame, and insert 1/2-inch bolt through tow bar and
frame. Secure tow bar to frame with 1/2-inch nyloc nut.
Tighten to 40 ft.-lbs.
Figure 1. Tow Bar and Safety Chain Installation
CAUTION
NEVER tow the mixer with the safety chain removed.
The safety chain is intended to prevent complete
separation of the mixer from the towing vehicle in the
event of a tow bar failure.
SAFETY CHAIN
CONNECTOR LINK
TOW BAR
CONNECTOR LINK
SAFETY CHAIN
CLEVIS SAFETY HOOK
(TOWING VEHICLE)
MIXER
STAND
SAFETY CHAIN
1/2-INCH BOLT,
GRADE 5
1/2-INCH NYLOCK
NUT, GRADE 5
STEP 1
STEP 2
STEP 3
STEP 4
2. Route the safety chain through the holes just above
the tow bar, located on each side of the mixer stand.
Loop the chain together and place under the tow bar.
Secure the loop with the connector link.
3. Extend the safety chain along the length of the tow bar,
looping it through the tow bar's connector link. Remove
any excess chain slack.
4. Connect the free end of (connector link) the safety
chain to the towing vehicle. Remember it is critical that
the length of the chain be properly adjusted, to prevent
the draw bar and the front of the mixer stand from
dropping to the ground (contact) in the event the draw
bar becomes disconnected from the towing vehicle.
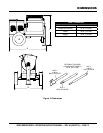
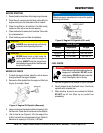
Figure 2. Drum Latch Pin
(Tow or Locked Position)
CAUTION
DO NOT tow the mixer unless the mixing drum is
completely empty. ALWAYS make sure the drum latch
pin is fully engaged to the right (Figure 2) of the drum
stop block. This will keep the drum from rotating.
DRUM LATCH
PIN
STOP
BLOCK
TOW OR LOCKED
POSITION
SAFETY CHAIN CONNECTION