


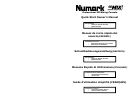

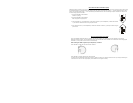


CDMIX3 QUICK SETUP
1. Make sure all items listed on the front of this guide
are included in the box.
2. READ SAFETY INSTRUCTION BOOKLET BEFORE
USING THE PRODUCT.
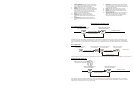
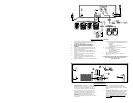
3. Study this setup diagram.
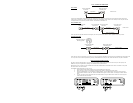
4. Place CDMIX3 station in an appropriate position for
operation.
5. Make sure all devices are turned off and all faders
and gain knobs are set to “zero”
6. Connect all stereo input sources as indicated in the
diagram.
7. Connect the stereo outputs to power amplifier(s),
tape decks, and/or other audio sources.
8. Plug all devices into AC power.
9. Switch everything on in the following order:
• audio input sources (i.e. turntables or CD
players)
• CDMIX3
• last, any amplifiers or output devices
10. When turning off, always reverse this operation by,
• turning off amplifiers
• CDMIX3
• last, any input devices
11. Go to http://www.numark.com
for product
registration.
More information about this product may be found at
http://www.numark.com
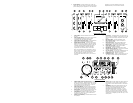
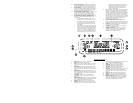
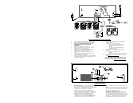
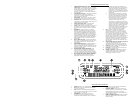
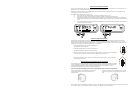
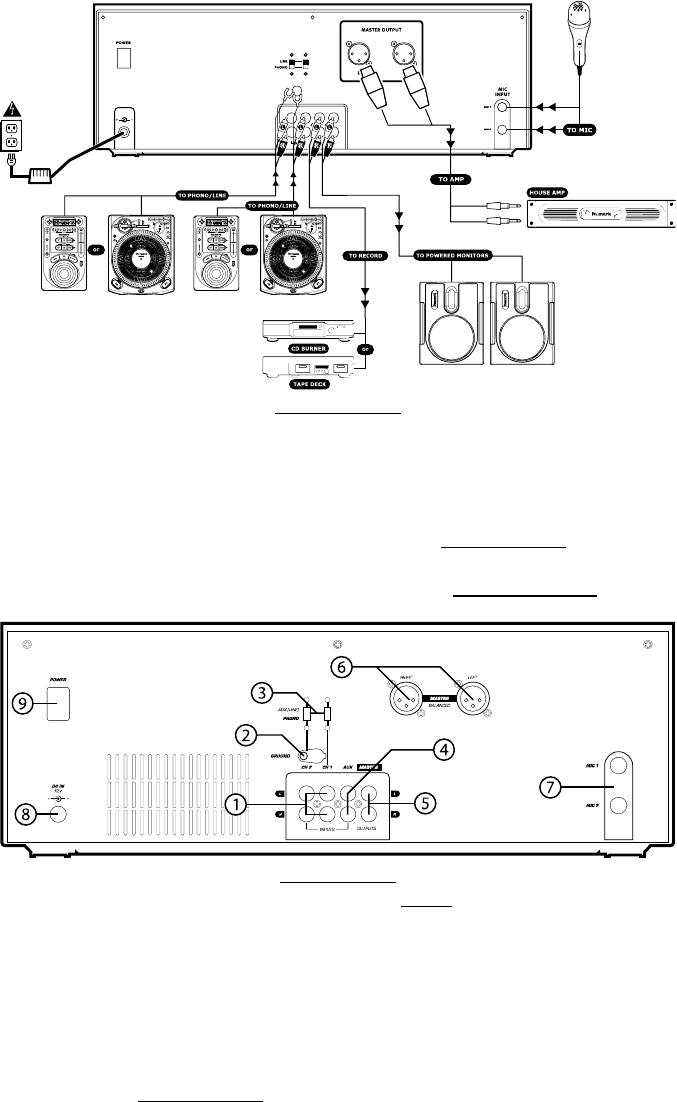
REAR CONNECTIONS
1. Channel Inputs: Unbalanced RCA jacks for
connecting external sources. The Phono/Line input is
selected using the toggle switch on the front panel.
Turntables, HiFi VCRs, cassette and reel-to-reel tape
decks, DAT machines, CD players, laser discs, tuners,
even synthesizers or other mixing consoles can be
connected using these jacks. NOTE: Plug mono audio
sources into both left and right inputs using a “Y”
cable connector.
2. GND: This screw connector should be used to connect
any turntables or other devices that need to be
grounded.
3. Line/Phono Input Switch: Use this to allow either
line level or phono level equipment to be plugged into
your channel inputs. When Phono input is selected,
your signal is fed directly to the high-quality RIAA
phono pre-amplifiers. Use this position only for
turntables. Line level sources will overload the
sensitive phono pre-amps and will sound very bad, so
always be sure to toggle the line/phono switch over to
line before connection of line sources.
4. Third Line Input: Plug in a third line level device
such as a tape deck or additional CD player here.
5. Stereo Master Outputs: Unbalanced RCA connectors
controlled by the Master fader.
6. Stereo Balanced Master Outputs (XLR): low-
impedance XLR type connectors controlled by the
Master fader.
7. Mic Input: Plug your 1/4” Microphone plug in here.
8. AC In: This mix station is designed to work with the
power supply cord that comes with the unit. While the
power is switched off, plug the power supply into the
mix station first, then plug it into the outlet.