


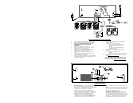

9. Power Switch: Use this switch to turn on the mix
station after all input devices are already connected to
prevent damage to your equipment. Turn the station
on before you turn on amplifiers and turn off
amplifiers before you turn off the mix station.
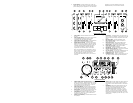
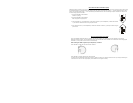
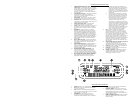
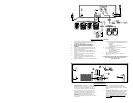
FRONT PANEL FEATURES
1. Input Fader: Controls individual source levels in
the mix.
2. Input toggle switch - Selects which source will be
live to that channel based on what you have
connected to the rear panel input section
3. 2-Band Stereo Equalizer (EQ) - compensates for
differences in source material sound quality.
4. Replaceable Crossfader - Achieves clean segues
between the two input channels. "Hard left" selects
Channel 1. "Hard right" selects Channel 2. With the
crossfader centered, both assigned channels are
live. Use the crossfader for fast and seamless
segues from one selected channel to the other
Note: The crossfader is user replaceable in case of
failure. Simply unscrew the two large screws which
hold it in place, lift it out and disconnect it’s cable.
Re-attach the new crossfader and screw the
mounting plate back onto the unit - you’re back in
business!
5. Fader Start – Activation allows you to start the CD
players from you crossfader. Travel from left to right
will start the right CD player and pause the left CD
player
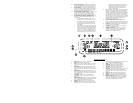
6. Mic Input Fader – Adjusts microphone level.
7. Mic 1 Equalizer (EQ) – Adjusts microphone 1
treble and bass levels.
8. Master Stereo EQ – Adjust final master ouput
equalization of trevle, middle, and bass levels.
9. Master Fader – Controls the overall outuput level.
10. Stereo/Mono Toggle – Changes the master
output between Mono and Stereo.
11. LED METER - Indicates the Master output level.
12. Channel Monitor Selector – Used to route channel
audio to your headphones for cueing.
13. Cue Mix Control – Adjusts the headphone blend of
master output (PGM) and monitor (CUE) sound.
14. Headphone Level – Adjusts cue volume.
15. Headphone Jacks – Used to connect either 1/8” or
1/4” plugs for audio monitoring with headphones.
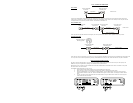
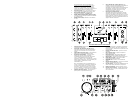
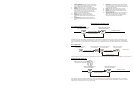
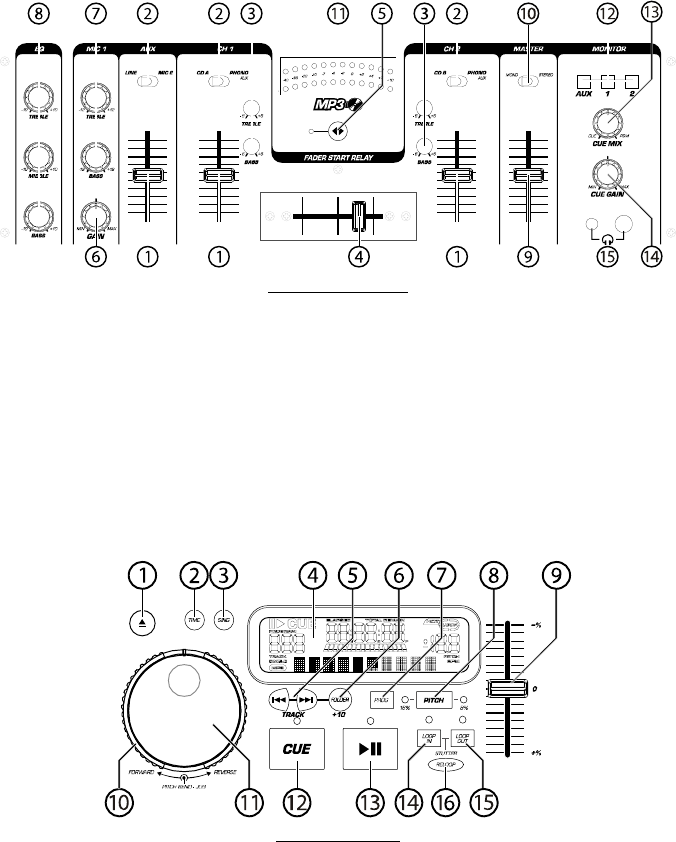
CD PLAYER FEATURES
1. OPEN/CLOSE (Disc Tray Open/Close) - Press to
load or eject the disc. Each press will open or close
the disc tray on the transport. NOTE: Tray will not
open unless the disc has been paused. Tray will
automatically close after 30 seconds.
2. TIME (Time Button) - Switches the time display
between elapsed playing time and remaining time
on the track and remaining time on the entire CD.
3. CONT/SING - Will cause just a single track to play
or all tracks in order by pressing once or twice.
4. LCD DISPLAY - Indicates all the functions, as they
are occurring, with the CD. These functions are
explained in the next section.
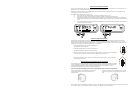
5. TRACK (Track Buttons) - Used to select the track
to be played.
6. Folder/ +10 – Selects folder from which tracks are
to be played. On a disc which contains no folders,
this button is used to advance tracks in increments
of 10
7. PROGRAM - Depress this button and the unit will
stop and the program indicator will light. Select
each track to be programmed and press the
PROGRAM button between selections. You can
program up to 30 tracks. Press PLAY to start the
program. To exit and erase program, either hold
the program button down for more than 2 seconds
while the unit is stopped, open the disc tray, or turn
off the power.