


4
3. Replace the battery compartment
cover and tighten the windscreen.
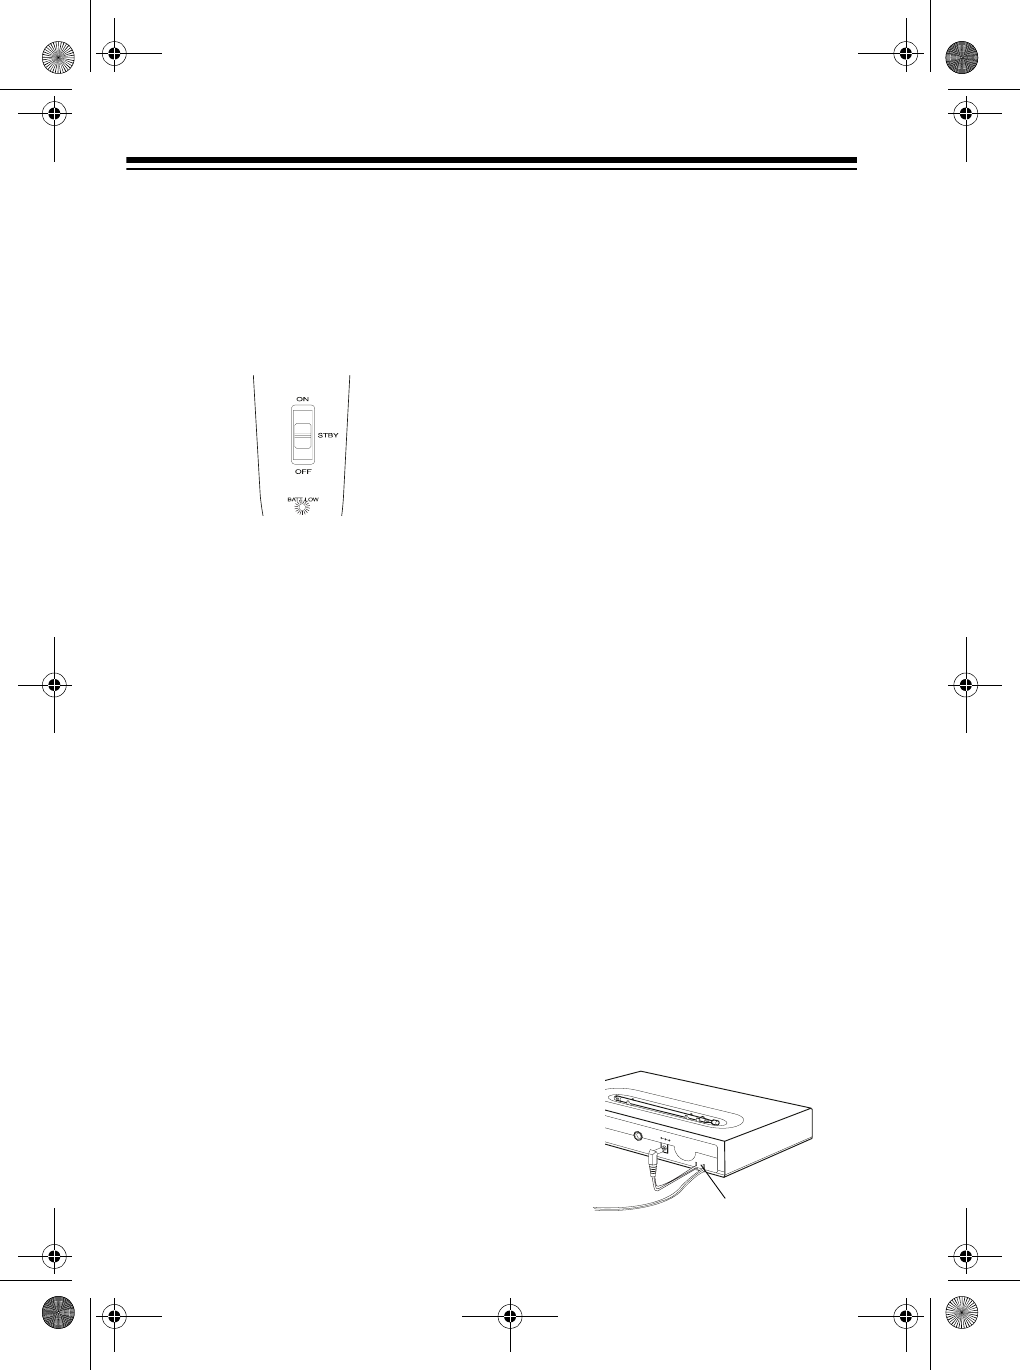
If the battery power is low, the red
BATT LOW indicator lights when the
microphone’s switch is set to
ON or
STBY (standby). Replace the battery.
Warning:
Dispose of old batteries
promptly and properly. Never burn or
bury them.
Caution:
If you do not plan to use the
microphone for a week or more, re-
move the battery. Batteries can leak
chemicals that can damage electronic
parts.
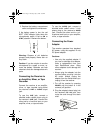
Connecting the Receiver to
an Amplifier, Mixer, or Tape
Recorder
Connect the receiver to an amplifier,
mixer, or tape recorder using either
the receiver’s
LINE or AUDIO output
jack.
To use the
LINE jack, connect a
shielded audio cable’s phono plug to
the receiver’s
LINE jack. Connect the
other end to a line-level input on your
amplifier, mixer, or tape recorder.
To use the
AUDIO jack, connect a
shielded audio cable’s mono
1
/
4
-inch
phone plug to the receiver’s
AUDIO
jack. Connect the other end to a mi-
crophone-level input on your amplifier,
mixer, or tape recorder.
Connecting the Power
Adapter
The receiver operates from standard
AC power, using the supplied 12-volt
DC power adapter.
Cautions:
• Use only the supplied adapter. If
you lose or damage this adapter,
order a replacement from your
local RadioShack store. Using
other adapters could damage the
receiver.
• Always plug the adapter into the
receiver before you plug it into the
AC outlet. Always unplug the
adapter from the outlet before you
unplug it from the receiver.
1. Turn off the receiver by pressing
POWER until the button is in the
outmost (off) position.
2. Plug the adapter’s barrel plug into
the receiver’s
DC 12V jack, then
route the cord through the strain
relief.
AAO3201222
A
A
L
IN
E
AUDIO
DC 12V
100mA(MAX)
Strain Relief
32-1222.fm Page 4 Tuesday, July 6, 1999 4:03 PM