


25
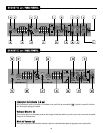
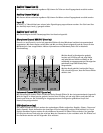
13. Ajusta la Posición del Preset 1 (46), Preset 2 (48) y Preset 3 (50) a los ajustes preferidos.
14. Oprime el interruptor de Selección de Modo (44) para regresar al Modo de Preset.
15. Haz doble clic en Preset 1, 2 ó 3 para salvar los ajustes en esa locación
14. Press the Mode Select (44) switch to return to the Preset Mode.
15. Double-click Preset 1‚ 2 or 3 to store settings in that location.
IInniicciiaacciióónn ddeell FFrreeqq OOuutt
™™
El Freq Out es probablemente la función más única de los amplificadores Ecoustic. El Freq Out
automáticamente elimina la retroalimentación usando filtros digitales precisos y algoritmos
sofisticados. Al usar sólo unos minutos para iniciar el Freq Out correctamente puedes optimizar esta
gran capacidad en tu nuevo amplificador Ecoustic.
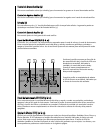
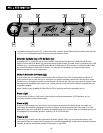
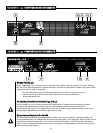
1. 1. Una vez que terminaste los pasos iniciales y estas listo para tocar, ajusta el nivel del canal de
instrumento y asegúrate que los demás canales estén con el nivel abajo. A continuación sube el
nivel y ganancia al nivel deseado. Enciende el Freq Out oprimiendo el interruptor (11 ó 24) una
vez.
2. 2. Toca varios acordes y notas en tu instrumento. Deja que las cuerdas suenen suficiente
tiempo para generar retroalimentación. Debes notar que el Freq Out entra con una
correspondiente reducción de retroalimentación
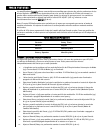
Note: If you initially experience a tremendous amount of feedback‚ first‚ try reversing the phase
switch‚ changing your playing position in relationship to the amp or reducing the overall volume
level. The Freq Out utilizes 8 filters‚ 4 of which lock down after locating and eliminating
feedback. The remaining 4 filters roam continuously searching to reduce feedback problems as
they occur. It is very important that the first 4 filters lock down on actual feedback problems. If
you feel they have locked down because of the position of your instrument or microphone you
may have to reset the Freq Out. To do this‚ simply power down the Ecoustic amplifier and wait
10 seconds before turning the amp back on. Then‚ repeat the procedure below.
3. 3. Ahora repite el proceso con el canal de micrófono..