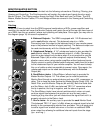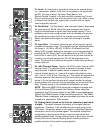
47. COM/PROG Switch: This determines which material you want to send over the intercom line. It
is your option to either speak over the headset mic or send program material from the console. With
the switch in the “out” position, the intercom is set up in “COM” mode. In this mode you may press
the Talk switch (#43) in order to send spoken material over the intercom line. Press the COM/PROG
Switch “in” to send program “PROG” material from the L/R monitor mix of the console. This can be
switched back and forth to allow for a spoken “punch-in” as material from the console is being sent.
48. Call: Press this momentary switch to light up other system call lights (as well as your own)
indicating that you are calling.
49. Call Light: This lamp illuminates when a call signal is either sent or received. This bright light is
intended to grab the operators attention, prompting him to respond to a call via the intercom line.
Talkback
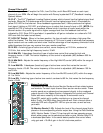
The Talkback section of your mixer is your direct communication with the stage/monitor outputs.
It is intended to allow you to address a particular monitor or monitors via a talkback mic. This is
great for sending messages across the stage during performance and/or sound checks. Assignment
switches are provided to determine which monitor(s) your mic signal is sent to. A level control is also
provided to set the level of your microphone in the monitor outputs. The Talkback feature should not
be confused in any way with the Intercom section of your SRM.
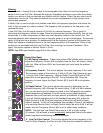
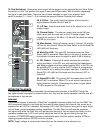
50. Talkback Enable: Press and hold this momentary switch to activate the Talkback Mic (#53).
Pressing this switch will mute the wedge output to prevent unwanted feedback into the Talkback Mic
and/or monitors in the control room.
51. Talkback Assign Switches: These 10 switches are used to route the Talkback Mic signal to
Monitor Outputs 1 through 10 and L/R.
52. Talkback Level: Sets the level of the Talkback Mic signal in the assigned Monitor Outputs.
The range of this control is +4 dB to +52 dB. You will want to be careful not to set this control
any higher than needed since the Talkback Mic is capable of picking up output from a stage
monitor and could produce unwanted feedback.
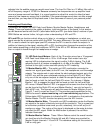
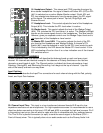
53. Talkback Mic Input: This is a low impedance, balanced XLR microphone input used for house
or stage communication. This jack is inactive until the Talkback Enable switch (#50) is depressed.
The XLR is wired with Pin 2 positive and no phantom power.
IN’S AND OUT’S
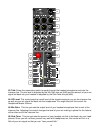
The In’s and Out’s section describes the last portion of the console which contains various inputs
and outputs. Located at the mid right-hand side of your board, these connectors are links for your
PFL, Wedge, and Intercom functions.
54. Wedge Outputs: The Wedge Outputs provide a Left and Right unbalanced (1/4") signal feed
to drive the engineer’s monitors. For mono hookup the Left Wedge Output should be used, as both
the Left and Right signals are mixed together in this configuration. When the Right Wedge Output is
used, the signals are separated into stereo. If PFL or AFL is not selected no output will be present.
The Wedge Level (#18) is used as the master level control for the Wedge Outputs.
13


