12
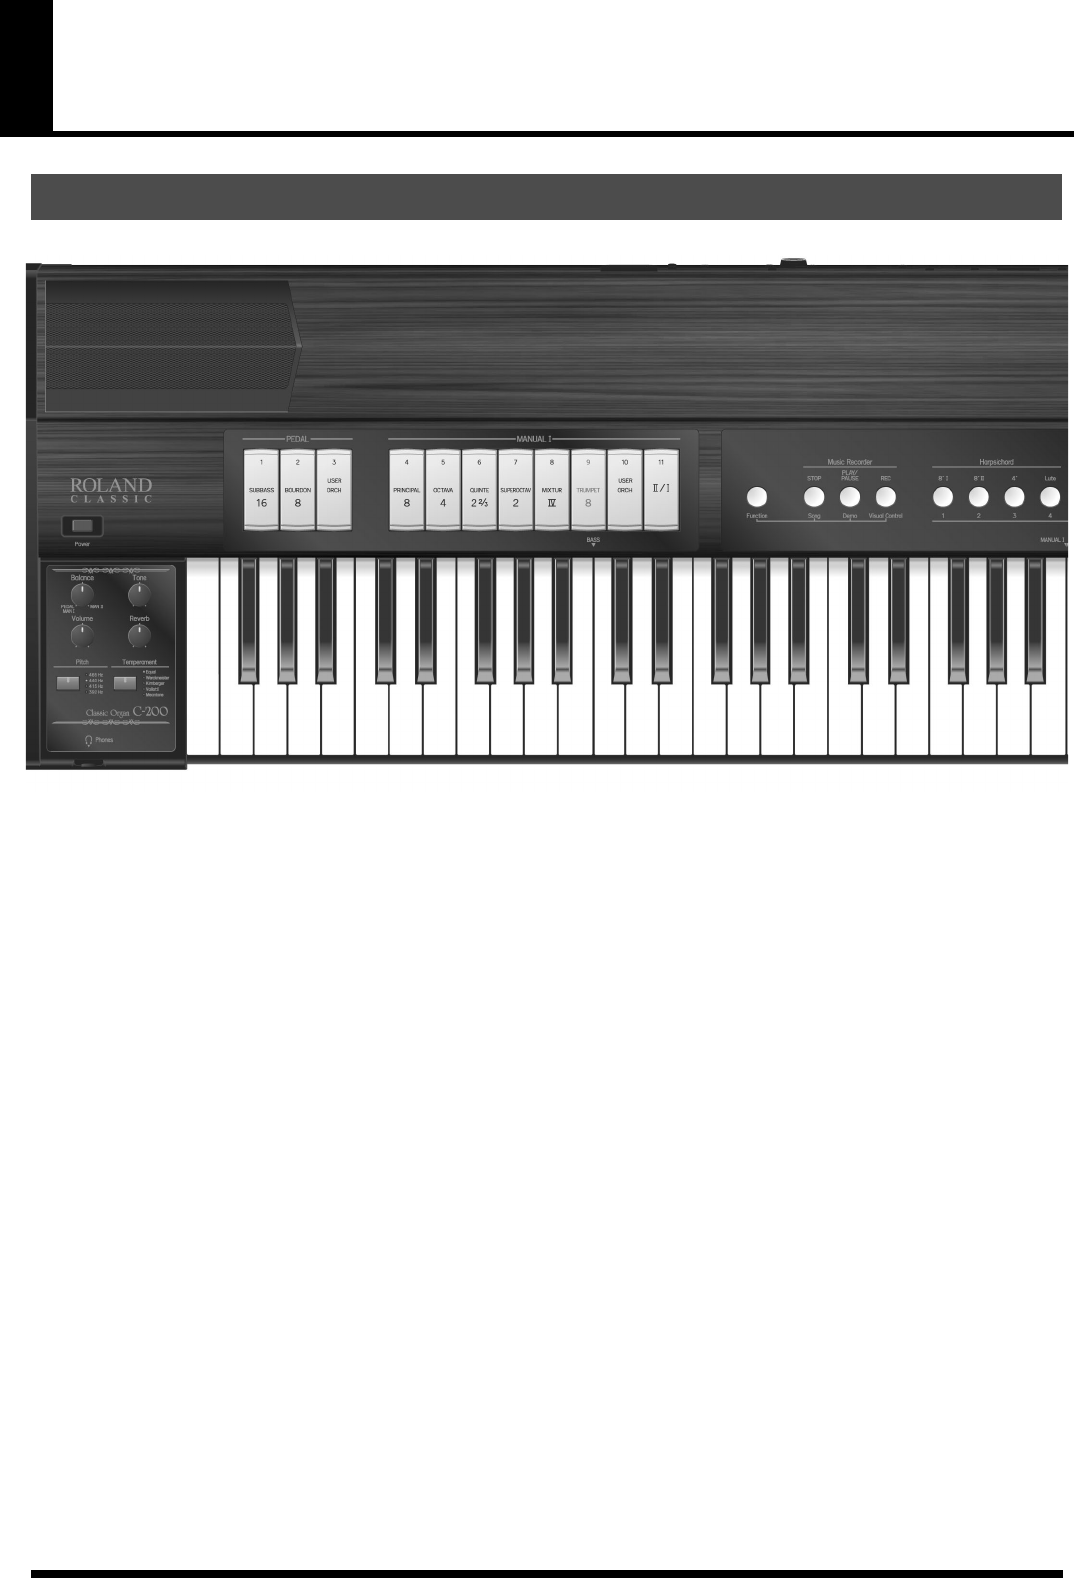
Panel Descriptions
1.
[Power] switch
This switch turns the power on/off.
2.
[Balance] knob
This knob allows you to set the balance between and
manual I + pedal and manual II.
3.
[Tone] knob
This knob allows you to make the sound darker or
rounder.
4.
[Volume] knob
This knob adjusts the volume.
5.
[Reverb] knob
This knob adjusts the depth of the reverberation effect.
6.
[Pitch] button/indicators
Use this button to select the desired reference pitch.
7.
[Temperament] button/indicators
Press this button to switch temperaments. The indicator
for the selected temperament will light.
8.
Phones jack
This is where you can connect a pair of optional head-
phones (Roland RH-series).
9.
PEDAL division tablets
These tilt tabs select stops for the PEDAL division.
10.
MANUAL I division tablets
These tilt tabs select stops for the MANUAL I division.
11.
[II/I] tablet (coupler)
This allows you to assign the MANUAL I sound along
with the MANUAL II sound on the entire keyboard.
12.
[Function] piston
This piston provides access to the Song, Demo, Visual
Control and other functions.
13.
Music Recorder pistons
These pistons allow you to start and stop playback or the
recording of your music. When you hold down [Func-
tion], and [PLAY/PAUSE] allow you to listen to the
demo songs.
14.
Harpsichord pistons
These pistons select harpsichord sounds. The Harpsi-
chord sounds cannot be used at the same time as other
sounds.
Front Panel
[9]
[1]
[2] [3]
[4]
[5]
[4]
[7]
[6]
[8]
[10]
[13][12] [14]
[11]
C-200_e.book Page 12 Monday, April 4, 2011 5:22 PM


