


6
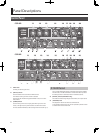
EQUALIZER
11. [BASS] Knob
This adjusts the sound level of the low-frequency range.
12. [MIDDLE] Knob
This adjusts the sound level of the middle-frequency range.
13. [TREBLE] Knob
This adjusts the sound level of the high-frequency range.
* When the LEAD channel Type switch is set to BLACK PANEL, DLX
COMBO (CUBE-80XL only), or TWEED, setting [BASS] knob, [MIDDLE]
knob and [TREBLE] knob all to 0 (zero) stops all sound.
PRESENCE (CUBE-80XL only)
14. [PRESENCE] Knob
This gives the midrange and high end a more lustrous contour. This is
e ective when you want to make the sound more airy and open.
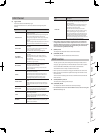
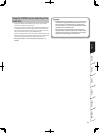
EFX (E ects)
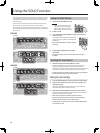
15. [EFX] (Eff ects) Knob
You can adjust the intensity of ve types of
e ects—chorus, anger, phaser, tremolo, and
heavy octave—by adjusting the positioning
of this knob.
The indicator lights up when this is on, and
goes out when it’s o . You can also switch
this on and o using an optional footswitch
pedal.
* The scale indications for CHORUS, FLANGER, PHASER, and TREMOLO
on the panel are just a general guide. Be sure to check the actual
sound as you adjust the eff ect.
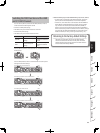
Knob Position Description
CHORUS
This adds a slightly detuned sound to the
original sound, giving the sound greater
breadth and fullness.
FLANGER
This creates a anging e ect that creates a
sort of spinning sensation with the sound.
PHASER
This adds a phase-shifted signal to the
original sound, giving the sound aswirling
sensation.
TREMOLO
This e ect produces cyclical changes in the
volume level.
HEAVY OCTAVE
This adds sound lowered by an octave
to the original sound. Since you can play
chords even when using this e ect, you can
use it to fatten the sound of your chordal
playing as well.
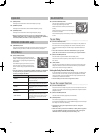
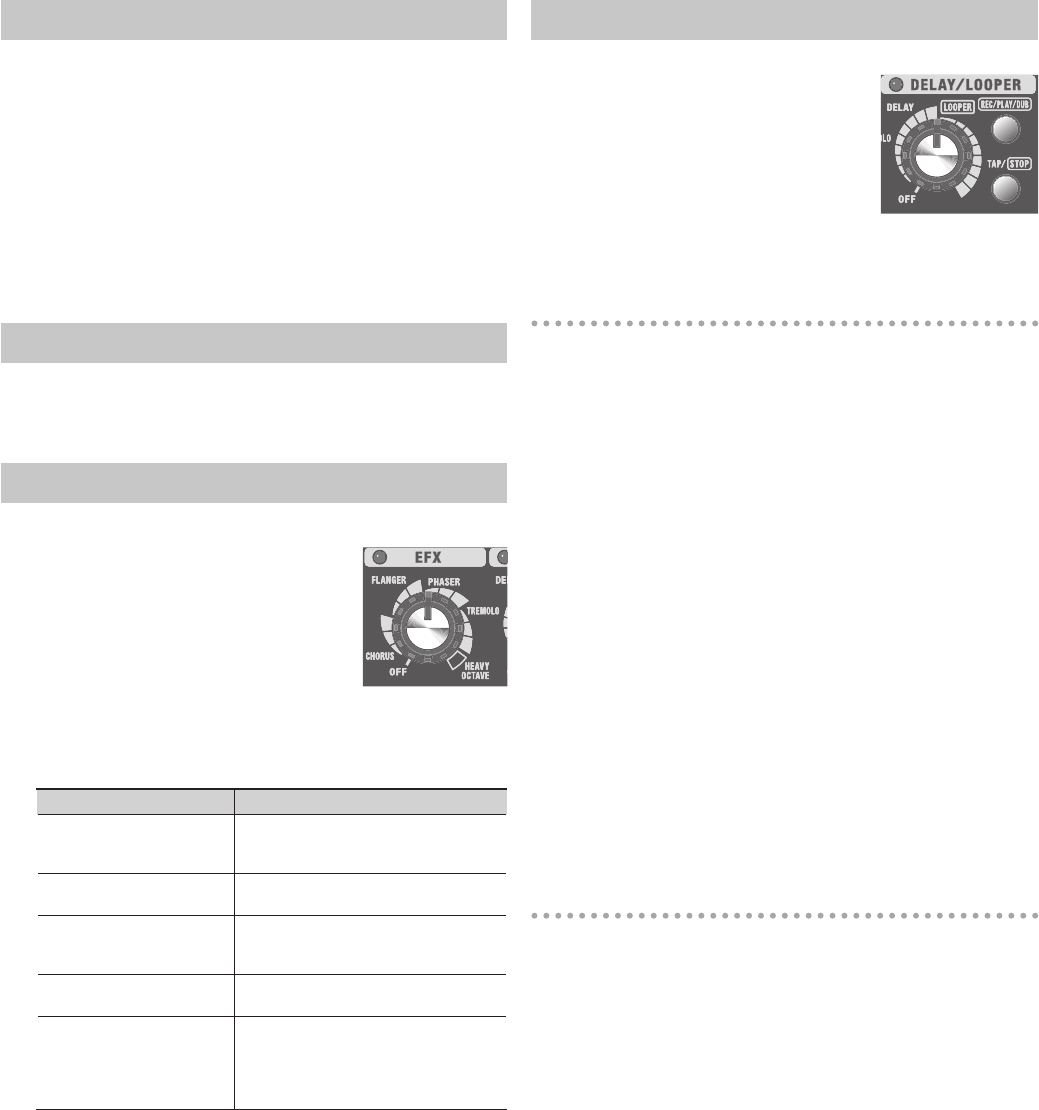
DELAY/LOOPER
16. [DELAY/LOOPER] Knob
You can switch to DELAY or the LOOPER
function by positioning this knob.
When the knob is at DELAY, this functions as
a delay.
When the knob is positioned at LOOPER, this
functions as a looper.
The indicator lights up when delay or looper is on and goes out when
it’s o .
To use Delay
16. [DELAY/LOOPER] Knob
Set the knob in the DELAY position to turn Delay on. The position of
the knob within this range adjusts the volume of the delay sound.
You can also switch delay on and o using an optional footswitch
pedal.
* The scale indications for DELAY and LOOPER are just a general
guide. Be sure to check the actual sound as you adjust the eff ect.
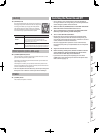
17. [REC/PLAY/DUB] Switch
This will blink in synchronization with the delay time.
You can also use this to specify a short delay time in the range of
90—30 ms.
18. [TAP] Switch
Use this to set the delay time. When you press the switch twice, the
delay time will be set to the time interval at which you pressed the
switch. The maximum length is 2000 ms.
Setting the Delay Time for Short Delay
If you hold down the switch for one second or longer, the delay time
will be set to 30 ms. Each time you then press the [REC/PLAY/DUB]
switch, the delay time will change over four steps (30 ms/50 ms/70
ms/90 ms) to a maximum of 90 ms.
* The short delay cannot be set using the foot switch.
To use the Looper function
16. [DELAY/LOOPER] Knob
Set the knob in the Looper range to turn on the Looper function. The
position of the knob within this range speci es the Looper function’s
playback volume.
17. [REC/PLAY/DUB] Switch
Use this switch to record, play back, and overdub.
18. [STOP] Switch
This switch stops playback or erases the recording.
If the [DELAY/LOOPER] knob is in the LOOPER range, this switch stops
the Looper or erases the recording.
* For details on using the Looper function, refer to ”Using the
LOOPER” (p. 14)
* When the knob is positioned at LOOPER, no delay eff ect is applied.
To use the LOOPER and delay simultaneously, refer to”Using the
LOOPER Function and Delay at the Same Time” (p. 15)