


158
Editing a Sample
Automatically Dividing a Sample
(Auto Chop)
Here’s how you can automatically specify the points at which the
sample is to be divided, and then divide the sample.
1.
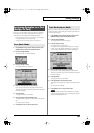
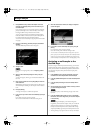
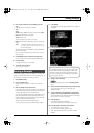
From step 3 of p. 157, press [F6 (Auto Chop)].
The Auto Chop sub-window will appear.
2.
Either turn the VALUE dial or use [INC] [DEC] to select the
method by which the sample is to be divided.
•
Chop Type
Specify how the sample will be divided.
Value
Level:
Divide according to volume.
Beat:
Divide at beats based on the BPM (p. 150) of the
sample.
Divide x:
Divide into ‘x’ number of equal lengths.
3.
Press .
4.
Either turn the VALUE dial or use [INC] [DEC] to set the
value.
•
Level (If Chop Type is Level)
Level at which the sample is to be divided. Lower settings of
this value will cause the sample to be divided more finely.
Value:
1–10
•
Beat (If Chop Type is Beat)
Beat interval at which the sample is to be divided.
Value:
1/32, 1/16T, 1/16, 1/8T, 1/8, 1/4T, 1/4, 1/2, 1/1, 2/
1
•
Times (If Chop Type is Divide x)
Number of samples into which the sample is to be divided
Value:
2–16
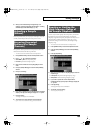
5.
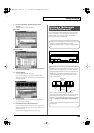
Press [F8 (Exec)].
The sample will be automatically divided according to your
settings, and the points will be specified. A maximum of 15
division points will be set (16 regions).
To cancel, press [F7 (Cancel)].
6.
Audition the sample as described in the section
“Automatically Dividing a Sample (Auto Chop)” (p. 158)
If you want to re-make settings, press [F7 (Cancel)], and move
or delete the point
“Moving a Dividing Point”
(p. 158).
7.
Press [F8 (Exec)].
A message will ask you for confirmation.
8.
To execute the division, press [F8 (Exec)].
* To cancel, press [F7 (Cancel)].
When you execute Auto Chop, a message will ask you whether
you want to execute Create Rhythm.
9.
If you want to execute Create Rhythm, press [F8 (Exec)].
For the rest of the procedure, refer to
“Create a Rhythm Set
(Create Rhythm)”
(p. 152).
* The divided samples will be added to the sample list.
10.
If you don’t want to execute Create Rhythm, press [F7
(Cancel)].
You will return to the Sample Edit screen.
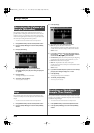
Auditioning the Divided Samples
After dividing the sample, you can press the pads to audition each of
the divided samples.
From the sample nearest to the start point, the samples will be
played by pads [1], [2],...[16]
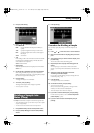
Moving a Dividing Point
1.
Press or to move the cursor to “Point No.”
2.
Turn VALUE dial to select the point that you want to move.
In order from the start point, the points are numbered 1, 2,...15.
3.
Press .
4.
Turn VALUE dial to move the dividing point.
Delet
sj02.7t the point that y 0 0 13u51 TD(In or02 point that yo0 g(sj02.7t the point that y 0 0 13u51 TD(In or02 you can press the pads to au]2rlrM1]e0 01j/T( )T.)Tj9)Tj9int3 6d13dUcau]2rlrM1]e6pudition eaeess )-1958.7( or )-e-18.2272 -42.9501 TD(Turn 1 TT6caut)T2g Tf0 g19.7283 40.57(In or02 pointic/F1 1 Tf13 0 0 13e2],...[16])Tj/F1 1 Tf13 0 0 13 516 9ding a Sa53ntic/F1 1 TfF6022 15.1, 2,...15. 0Turn 1 TT6caut0 0 0he pads to a 0 rg-12.6789ur7i 9ding a Sa530 13u51 TD(In or02 yTD0 T51i*73 014you can press the pads to au]2rCreat. au]2ds TTTf57ao57 0 rg/SF1]e0 01j/83et y 0 0 13s(...[1ss1a( )T.)Tj9)Tj9int3 6d13dUcd. au]2ds TTTf57ao57 0 rprrs312o a 0 rg-1s984you can prei12ogDrg-Ia Tf0 3rg-129 0 0 13 516 9ding a Sa53n3a53Td4you ca6m2-I70rc 56f1ointrhe oi8r02 yTD0 T51i*73 0141153ye4fvntha3u]353Nlh33Nlh33eiasc 56f1 0 0ate Rhythm, p3MT( )Tate 3-r3m0 g( 9ding a 02nDsdit2A3-85.413 0 0 13 5615.)