


E-4
2011 April 8
HT-SL50 ZA904
10
9
8
7
6
5
4
3
2
1
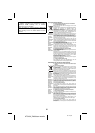
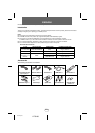
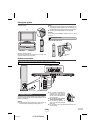
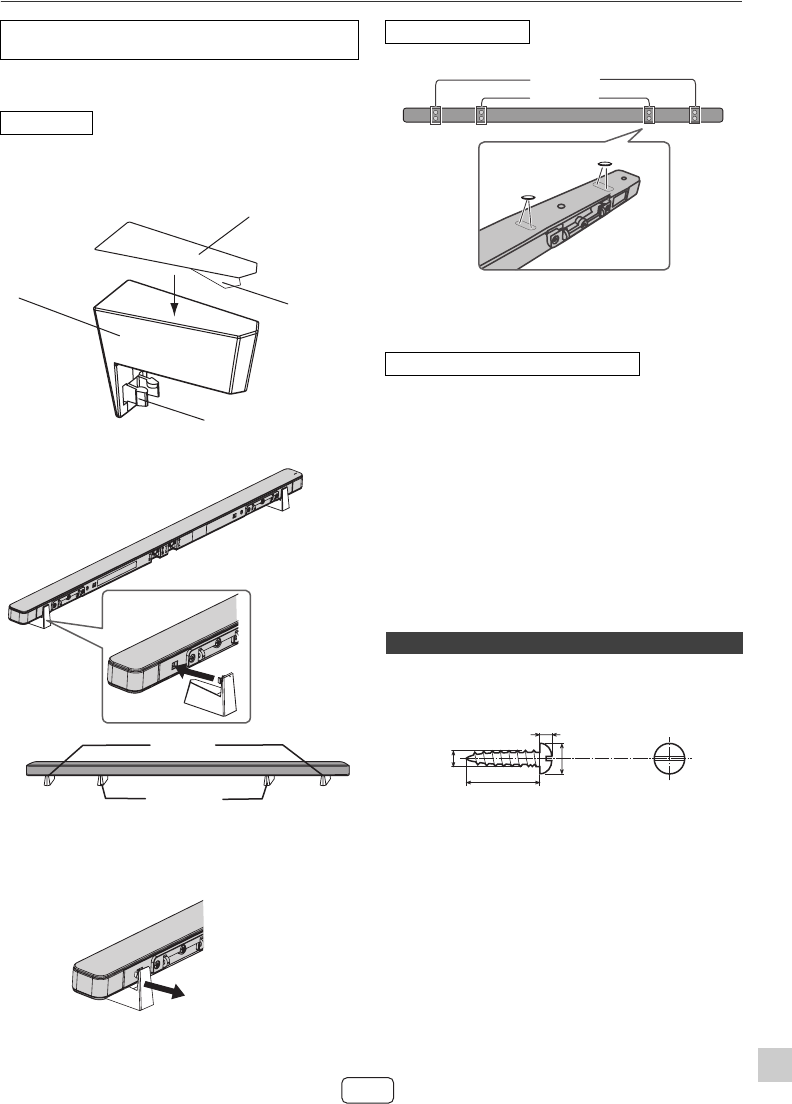
System preparation
Select from three installation methods according to the
preferred position.
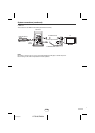
1. Peel off the double sided tape separator and attach the
sound bar stand cushion at the bottom surface of the
sound bar stand.
2. Fix the sound bar stand as shown.
Note:
Sound bar stand can be removed by pulling it off backward
from the sound bar.
Caution:
● Be very careful to prevent the sound bar [0.66 kg
(1.46 lbs)] from falling when mounting on the wall.
● Before mounting, check the wall strength. (Do not put
on the veneer plaster or whitewashed wall. The sound
bar may fall.) If unsure, consult a qualified service
technician.
● Mounting screws are not supplied. Use appropriate
ones.
● Check all wall mount angle screws for looseness.
● Select a good location. If not, accidents may occur or
the sound bar may get damaged.
● SHARP is not responsible for accidents resulting
from improper installation.
● Do not let children dangle on the sound bar once it is
attached on the wall as it can cause damage and injury.
SHARP designed the sound bar so you may hang them on
the wall. Use proper screws (not supplied). See below for
size and type.
Make sure to unplug the AC power lead before
installing the unit or changing the position.
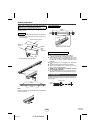
Using stand
Sound bar stand cushion
Double
sided
tape
separator
Sound bar
stand
Hook
Option 2
Option 1
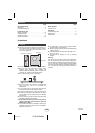
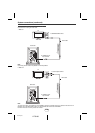
Using foot cushions
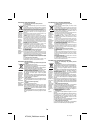
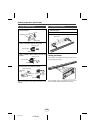
To mount the sound bar on the wall
■ Driving screws
Attach foot cushions as shown
Option 1
Option 2
Option 1
Option 2
3.2 mm (1/8")
9 mm (3/8")
Min. 22 mm (7/8" )
5 mm
(3/16")