ENGLISH
ENGLISH
9
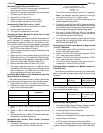
Decreasing Tape Out Level to Mic Level
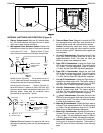
1. Locate R1112 and X511 (the top side of the bottom PC
board, by the L Out XLR connector).
2. Locate R1114 and X510 (the bottom side of the bottom
PC board, by the Tape Out jack).
3. Remove R1112 and R1114.
4. Solder a jumper through the holes at X511.
5. Solder a jumper through the holes at X510.
Increasing the Tape Out Level by +10 dB
1. Locate R669 and R672 on the bottom PC board.
2. Remove these two resistors.
3. The Tape Out impedance is now 6 k:.
Changing the Slate Mic and the Slate Tone to Feed
Only the Tape Out Jack
This modification provides an isolated, unbalanced out-
put for talk-back. For example, the user could talk to a
boom operator though the Slate mic. The Monitor In func-
tion could be used to hear the boom operator’s response.
1. Locate and remove R663, R669, R670, R672, R673,
and R765 from the bottom PC board.
2. Solder a jumper through the holes at X504 (behind the
Tape Out jack).
3. Solder one end of an insulated jumper into the hole at
X600 (about 40 mm [1.5 in.] behind the Tape Out jack).
4. Solder the other end of this jumper to the jumper at X504.
5. Set the Pre-Mast Slate DIP switch (#6) to On.
6. Set the Post-Mast Slate DIP switch (#7) to Off.
7. The nominal Tape Out level is now –10 dBV (aux level).
The Modified Tape Out contains only the Slate tone and
Slate microphone. The Slate tone and Slate micro-
phone are removed from the main outputs.
Providing Mixer Audio in the Headphones when the
Monitor Switch is Activated
This modification allows the user to listen to the monitor
input signal and attenuated mixer audio simultaneously.
1. Locate X501 and X502 on the bottom PC board.
2. Determine the amount of attenuation desired for mixer
audio, using the following table.
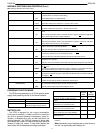
Mixer Audio Attenuation Required Resistor
Impedance
Less than 10 dB Less than 150 k:
10 dB 150 k:
15 dB 300 k:
Greater than 15 dB Greater than 300 k:
3. Solder a 1/8W or 1/4W resistor through the holes at
X501.
4. Solder a 1/8W or 1/4W resistor through the holes at
X502.
5. Activate the Monitor In switch. FP33 audio will be atte-
nuated by the predetermined level.
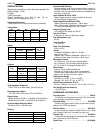
Decreasing the Low-Cut Filter Corner Frequency
(3 dB down point)
1. Calculate a new capacitor value for the lower low-cut
corner frequency. Use the following formula:
C in PF= (85/frequency) - .33
Example for 200 Hz corner frequency
85/200 = .43
.43-.33 = .1 PF
For a 200 Hz corner frequency, use a 0.1 PF capacitor.
Note: The capacitor must be a ceramic or film type,
non-polarized, with a 16 V or higher rating.
2. For Input 1, locate X811 and X812. Solder the new ca-
pacitor between these points.
3. For Input 2, locate X813 and X814. Solder the new ca-
pacitor between these points. Also locate X815 and X816
on the bottom board, just behind the input gain controls.
Solder another new capacitor between these points.
4. For Input 3, locate X809 and X810 on the bottom
board, just behind the input gain controls. Solder the
new capacitor between these points.
5. To raise the corner frequency higher than the factory
preset of 260 Hz, contact the Shure Technical Applica-
tion Group at (847) 866-2525.
Slowing Down Output Level Meters to Approximate
“True VU” Ballistics
1. Locate empty pads C302 and C303 on the top PC
board, behind the power switch.
2. Solder a 150PF x 6.3 V electrolytic capacitor in C302.
The + lead must face the meters.
3. Solder a 150PF x 6.3 V electrolytic capacitor in C303.
The + lead must face the meters.
4. To slow the meter response even more, further in-
crease the PF value of C302 and C303.
Changing Battery Indicators to Monitor Internal or
External Power
The following modifications allow only the internal bat-
teries or the external power supply to be monitored at the
VU meter.
Modification: To monitor external
power only
To monitor internal
battery power only
Procedure: Remove R492 Remove R490
The following modifications allow the Red/Green Power
LED to indicate low voltage status for only the internal bat-
tery or the external power supply.
Modification: To indicate low ex-
ternal power only
To indicate low in-
ternal battery pow-
er only
Procedure: Remove R493 Remove R491
Other Available Modifications
x Changing VU Meter Scale for Battery Voltage Indication
x Converting FP32 to FP32A or FP33 Mix Bus
x Increasing Output Level of Slate Mic
x Power LED Red Flashing Point
x Reduction of Headphone Circuit Output Impedance
x Single Output Level Control
x XLR Connector Change from Female to Male
For further information about these modifications, call
the Shure Technical Application Group at (847) 866–2525.


