


4
SERVICE
WARNING:
Voltages in this equipment are hazardous to life.
Refer servicing to qualified personnel.
Disassembly
The FP42 can be disassembled as follows. Remove four screws
securing the cover assembly to the chassis. Carefully lift the cover
assembly up and away from the chassis, taking care not to snag
any wire leads or components. (It is not necessary to remove the
end caps from the cover for access to the chassis.)
240 Vac Operation
To change the FP42 operating voltage from 120 Vac to 240 Vac, fol-
low these steps.
1. Locate the Power board.
2. Remove the jumper plug from connector J205 (marked
120V), and carefully insert it in connector J206 (marked
240V), making sure all six pins are properly engaged.
3. Insert the T50mA/250V fuse (packaged with the FP42) in
the fuseholder marked F202.
4. Replace the ac line cord (if necessry) with one designed for
the 240-volt source. If the FP42 is to be used outside the
U.S. and Canada, local regulations may require replacing
the line cord with one having wire insulation colors as
follows:
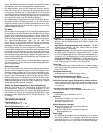
“Live” or “Hot” Neutral
Earth or
Ground
U.S., Canada Black White Green
Europe Brown Blue Green/Yellow
5. Mark the FP42 rear panel with the new operating voltage.
Limiter Threshold Adjustment
To adjust the limiter threshold for a value different from the supplied
+14 dBm:
1. Connect a 600-ohm load and an ac voltmeter in parallel
across one of the Output connectors. Set the Output Mic/
Line switch to Line.
2. Turn on the Tone Oscillator switch.
3. With the Limiter switch set to Out, adjust the Master Level
control (for the left or right output, as applicable) until the ac
voltmeter reads the desired level. Turn the Master control
for the opposite channel to 0.
4. With the Limiter switch set to In, adjust the Limiter Thresh-
old trimmer (R381 or R390) for the left or right output, as
applicable, until the level drops 0.5 dB.
5. Perform the same procedure for the second Output
channel.
Program Monitor in Cue Mode
The cuing mode normally provides the Headphones jacks with the
cued channel output only, removing the program material. To retain
the program material at the Headphones jacks (at 10 dB below the
uncued program level) while cuing one channel, solder a 470-ki-
lohm, 5%, 1/4-watt resistor across points A–B and C–D (drain and
source) of Headphones circuit FETs Q313 and Q314. For program
level reduction greater than 10 dB, use the following resistor
values:
Program Level Reduction Resistor Value
20 dB 2 megohms
30 dB 6.8 megohms
40 dB 22 megohms.