


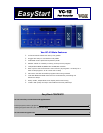
VOX VC-12 EasyStart
Note: When you reload the VC-12’s factory preset programs into the Valvetronix amp, any new custom programs
will be overwritten and lost. If you have stored your own programs, we again strongly recommend that you first save
these programs into the VC-12 Switch #4 area. Then load the VC-12’s factory preset programs into the Valvetronix
amp.
Factory preset program Banks “1 through 4” contain the same programs as Banks “1. through 4.” (as indicated in
the display) - For example, you can use Banks “1 through 4” without change, and edit Banks “1. through 4.”
Store your Valvetronix Programs in the VC-12’s four memories:
1. Turn off the Valvetronix amp and make sure it’s connected to the VC-12’s VOX BUS MAIN
connector.
Note: Don’t connect anything to the VC-12’s VOX BUS SUB connector.
2. On the Valvetronix amp, while holding down the DELAY [TAP] button and the REVERB [TYPE]
button, turn on the amp.
The VC-12’s BANK display shows [bU] BackUp.
3. Press the VC-12’s BANK UP switch.
The VC-12’s BANK display shows [rC] Receive.
Switch LED’s (1-4) that contain no program data are off, while those that do contain program data are on.
4. Use switches 1 through 4 to select the memory (1, 2, 3, 4) into which you want to store the
program data (for example switch #4). The selection method you need to use depends on
whether the switch’s LED is on or off, as follows.
If the switch LED is off, pressing the switch once will select its memory and its LED will flash.
If the switch LED is on, you’ll need to press the switch for at least five seconds in order to select its memory,
and its LED will flash quickly.
If you want to cancel your selection and choose another memory, press the switch again, or press the VC-
12’s RECALL switch. The switch’s LED will stop flashing.
Note: Previously stored program data will be overwritten by the next step and there is no undo. That is why
we recommend using the switch #4 area that is empty the first time you try this out.
5. To store the program data to the selected memory, press the Valvetronix amps [WRITE] button.
The data is transferred from the Valvetronix amp and stored in the VC-12. The corresponding switch LED (1-
4) comes on, indicating that the memory now contains data.
6. Turn off the Valvetronix amp, and then turn it back on again.
This completes the procedure for storing data.
3