


26
CLP-880/860/840/820/820S
Using the Recorder
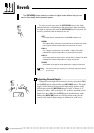
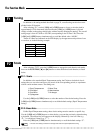
Playback
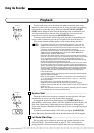
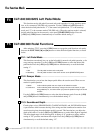
To play back what you’ve recorded, first make sure that the green track
indicators of the tracks you want to play are lit. If not, press the corresponding
track button(s) so that they are lit. Then press the RECORDER [START/
STOP] button. Playback starts from the beginning of the recorded data, and
will stop automatically at the end of the recorded data. You can also stop
playback at any time by pressing the [START/STOP] button.
To mute a track so that it doesn’t play back, press the corresponding track
button so that its indicator goes out (press again to turn the track back on).
The current measure number appears on the display during playback.
• It is possible to play along on the keyboard during playback. In this case, the
playback voice and the voice you play on the keyboard are not the same. The
playback voice is the voice that was set when the data was recorded. The voice
you play on the keyboard is the voice that is selected on the panel.
• The playback volume and tempo can be adjusted by using the [MASTER VOL-
UME] control and [TEMPO
▼
/
▲
] buttons (press both [TEMPO
▼
/
▲
] buttons
simultaneously to recall the default tempo).
• All recorder data will be retained in memory for about one week after the power is
turned off. If you want to keep your recorded data for longer periods, turn the power
on for a few minutes at least once a week. It is also possible to store it to an
external MIDI storage device such as the Yamaha MIDI Data Filer MDF3 by using
the Bulk Data Dump function described on page 36.
• The track indicators will not light automatically when the power is turned on even if
the recorder contains data. It is therefore necessary to press the track buttons so
that the corresponding green indicators light before starting RECORDER playback.
It is also a good idea to press the track buttons to check if the tracks contain data
before recording. If the green indicator lights when the corresponding track button
is pressed, that track contains data which will be erased and replaced by the
newly-recorded data.
• If the metronome is being used during playback, the metronome will automatically
stop when playback is stopped.
• During recorder playback, the volume of a track which is turned off will always be
“0” (i.e. the “Piano Song Part Cancel Volume” function — page 33 — only affects
piano song playback.
• The playback data is not transmitted via the MIDI OUT connector.
• Playback cannot be started when the demo/piano song mode is engaged.
• Playback cannot be started when the recorder contains no data, or when both track
buttons are off.
• When using REVERB or EFFECT during playback, depending upon the conditions
one reverb type and one effect type will take priority.
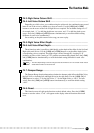
Synchro Start ....................................................................................................................
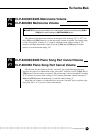
When the Synchro Start function is engaged, recorder playback will begin
automatically as soon as you start playing on the keyboard.
To engage the Synchro Start function press the [START/STOP] button
while holding a track button which is ON. The rightmost dot on the display will
flash at the current tempo. (Repeat the previous operation to disengage the
Syncro Start function.) Playback will then start as soon as you begin playing on
the keyboard.
If you hold a track button which is OFF while pressing the [START/STOP]
button, that track will be turned ON and the Synchro Start mode will be engaged.
Left Pedal Start/Stop .................................................................................................
The left pedal can be assigned to start and stop recorder playback via the
“Left Pedal Mode” function described on page 32. This is convenient for
starting playback of the recorded part anytime after you have started playing.
START
/
STOP
REC
12
RECORDER
START
/
STOP
REC
12
RECORDER