


INTRODUCING THE P-100
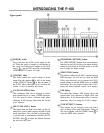
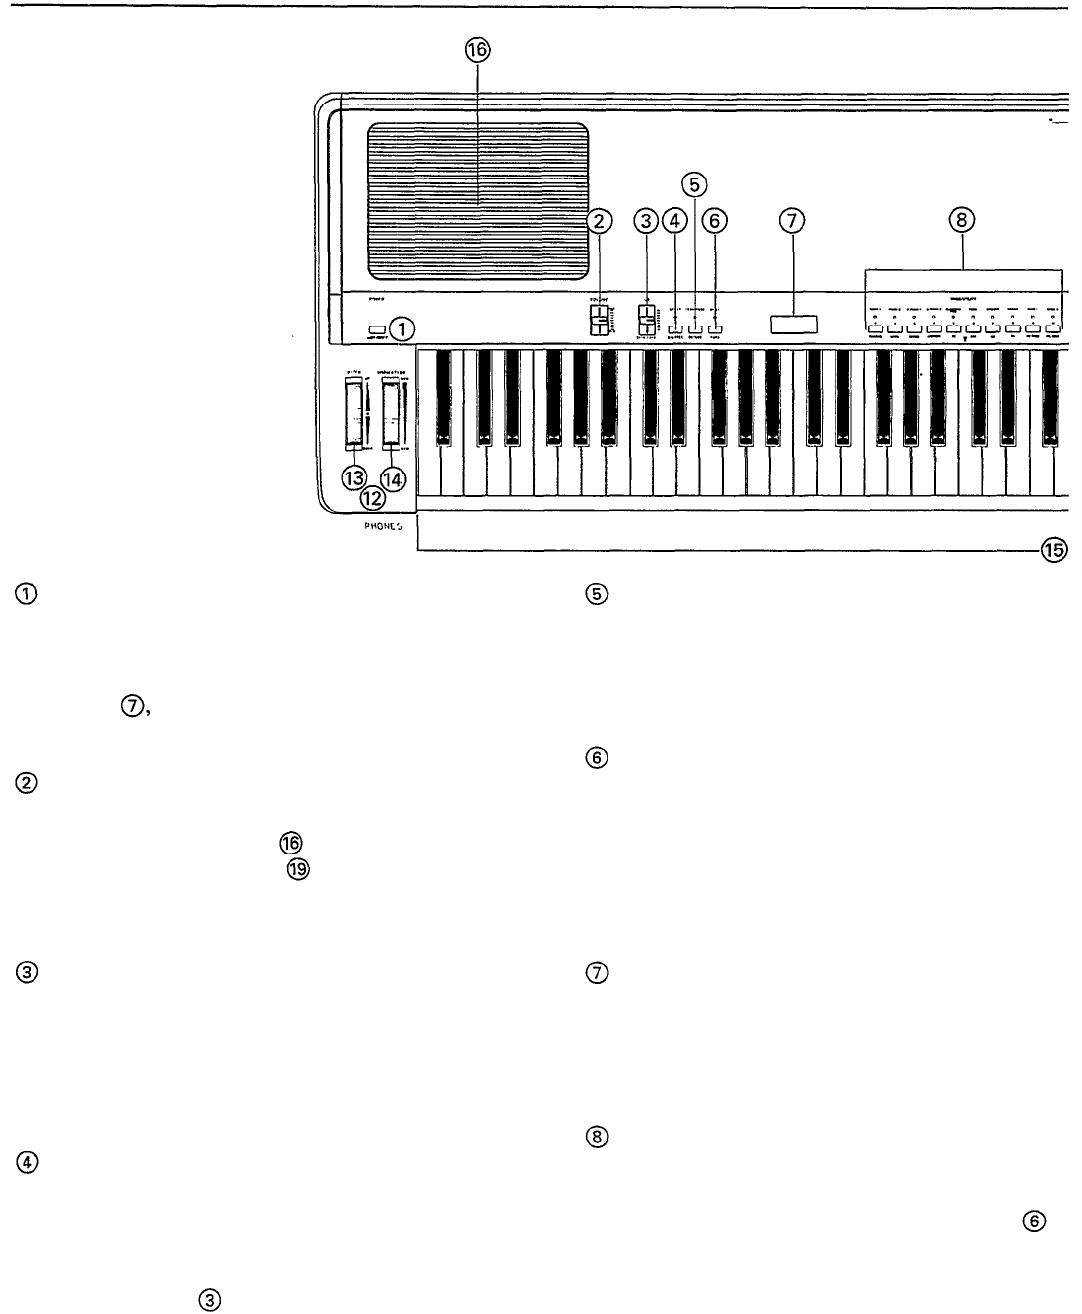
Upper panel
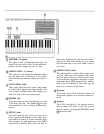
[POWER] switch
[TRANSPOSE (DETUNE)] button
This switch turns the P-100’s power supply on and
off. When the power is turned on, the number of
the voice last selected will appear in the LED
display
and the LED above the corresponding
[VOICE/UTILITY] button will light.
[VOLUME] slider
This slider controls the overall volume of sound
output from the speakers
as well as that output
via the LINE OUT jacks
on the rear panel of
the P-100. Move the slider up to increase the
volume, or down to decrease the volume.
[CS (DATA ENTRY)] slider
This continuous slider can be assigned to control
data transmission for a variety of MIDI functions.
It is also used to select a desired value when
changing P-100 settings other than the current
voice selection.
[SPLIT (BALANCE)] button
This button turns the Split voice mode on and off.
and allows you to make settings related to Split
mode operation. Also. in Dual or Split modes.
it can be used in combination with the [DATA
ENTRY] slider
to adjust the balance between
the main and sub voices.
The [TRANSPOSE] button turns the transpose
function on and off, and lets you make settings
related to this function. In Dual mode, it can be
used to adjust the detune amount.
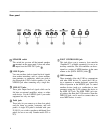
[MIDI (TUNE)] button
This button enables the P-100’s transmission of
MIDI messages. You will use it to select the MIDI
Utility mode functions, and to transmit the P-100’s
current settings to another MIDI device as a MIDI
bulk dump. It is also used to adjust the P-100’s
tuning and select keyboard velocity curve settings.
LED display
This three-digit numeric LED display shows the
current main voice selection in Single, Dual, and
Split modes. It also shows the values of various
parameters when you change the P-100’s settings.
[VOICE/UTILITY] buttons
These buttons let you select the voices you wish to
play in Single. Dual. and Split modes. They are
also used together with the [MIDI] button
to
select the MIDI utility functions.
2