6
As shown in the diagram, set up your pad unit on an electronic drum rack or a standard cymbal stand
(such as a Yamaha CS Series product).
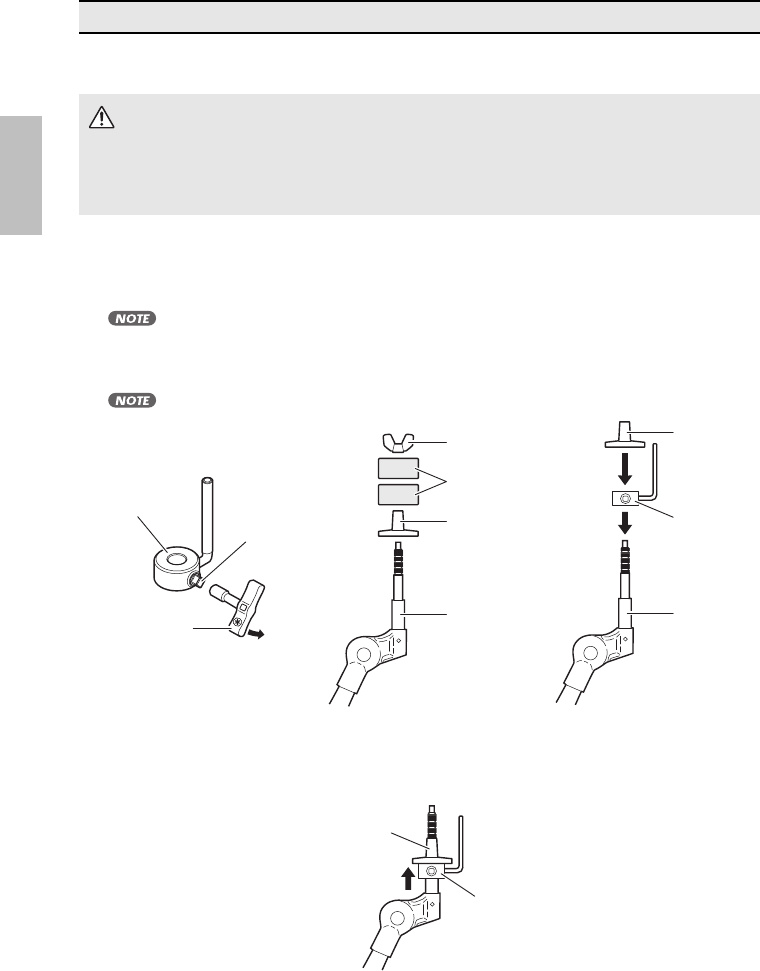
1 Using a tuning key (optional), loosen the stopper’s key bolt. (See Figure 1.)
2 Remove the wing nut, the two felt pads, and the bolt cover from the cymbal holder. (See Figure 2.)
3 Place the stopper on the cymbal holder. (See Figure 3.)
• If the key bolt was not sufficiently loosened in Step 1 above, it may not be possible to pass the
stopper over the cymbal holder’s shaft. In such a case, loosen the key bolt as much as possi-
ble without removing it.
4 Replace the bolt cover. (See Figure 3.)
• When assembling the bolt cover, turn until it no longer rotates.
5 Secure the stopper in place. With the stopper making full contact with the bottom surface of the bolt
cover, tighten the stopper’s key bolt using a tuning key. (See Figure 4.)
Setting Up
CAUTION
• If the clamp bolt and other fasteners are not sufficiently tightened, your pad unit may fall,
possibly causing injury. It is important, therefore, that you mount your pad unit securely on
the drum rack or stand. In addition, you should avoid placing your rack or stand on an
uneven surface as this may cause it to fall over while being played, again increasing the risk
of injury.
Key bolt
Stopper
Stopper
Tuning key
(optional)
[Figure 1]
[Figure 2]
[Figure 3]
Bolt cover
Cymbal
holder
Bolt cover
Cymbal
holder
Wing nut
Felt Pads
Stopper
[Figure 4]
Bolt cover
Full contact
pcy100_135_155_en_om.fm Page 6 Tuesday, November 9, 2010 4:07 PM


