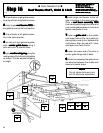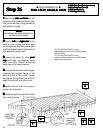
42
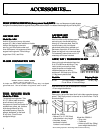
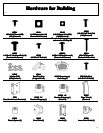
● Parts Needed For ●
Lock Section Roll-Up-DoorLock Section Roll-Up-Door
Lock Section Roll-Up-DoorLock Section Roll-Up-Door
Lock Section Roll-Up-Door
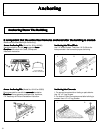
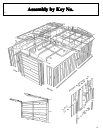
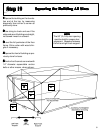
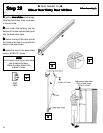
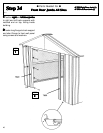
Step 30Step 30
Step 30Step 30
Step 30
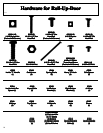
BW42
●●
●●
●
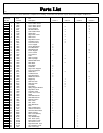
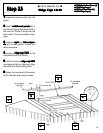
7848 Door Panel (Lock) (1) 7848 Door Panel (Lock) (1)
7848 Door Panel (Lock) (1) 7848 Door Panel (Lock) (1)
7848 Door Panel (Lock) (1)
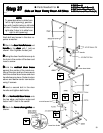
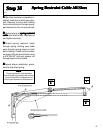
STEP
22
22
2
STEP
11
11
1
STEP
44
44
4
STEP
33
33
3
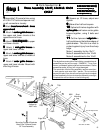
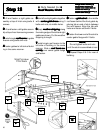
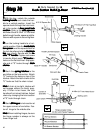
11
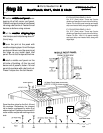
11
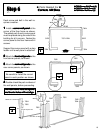
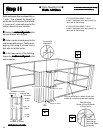
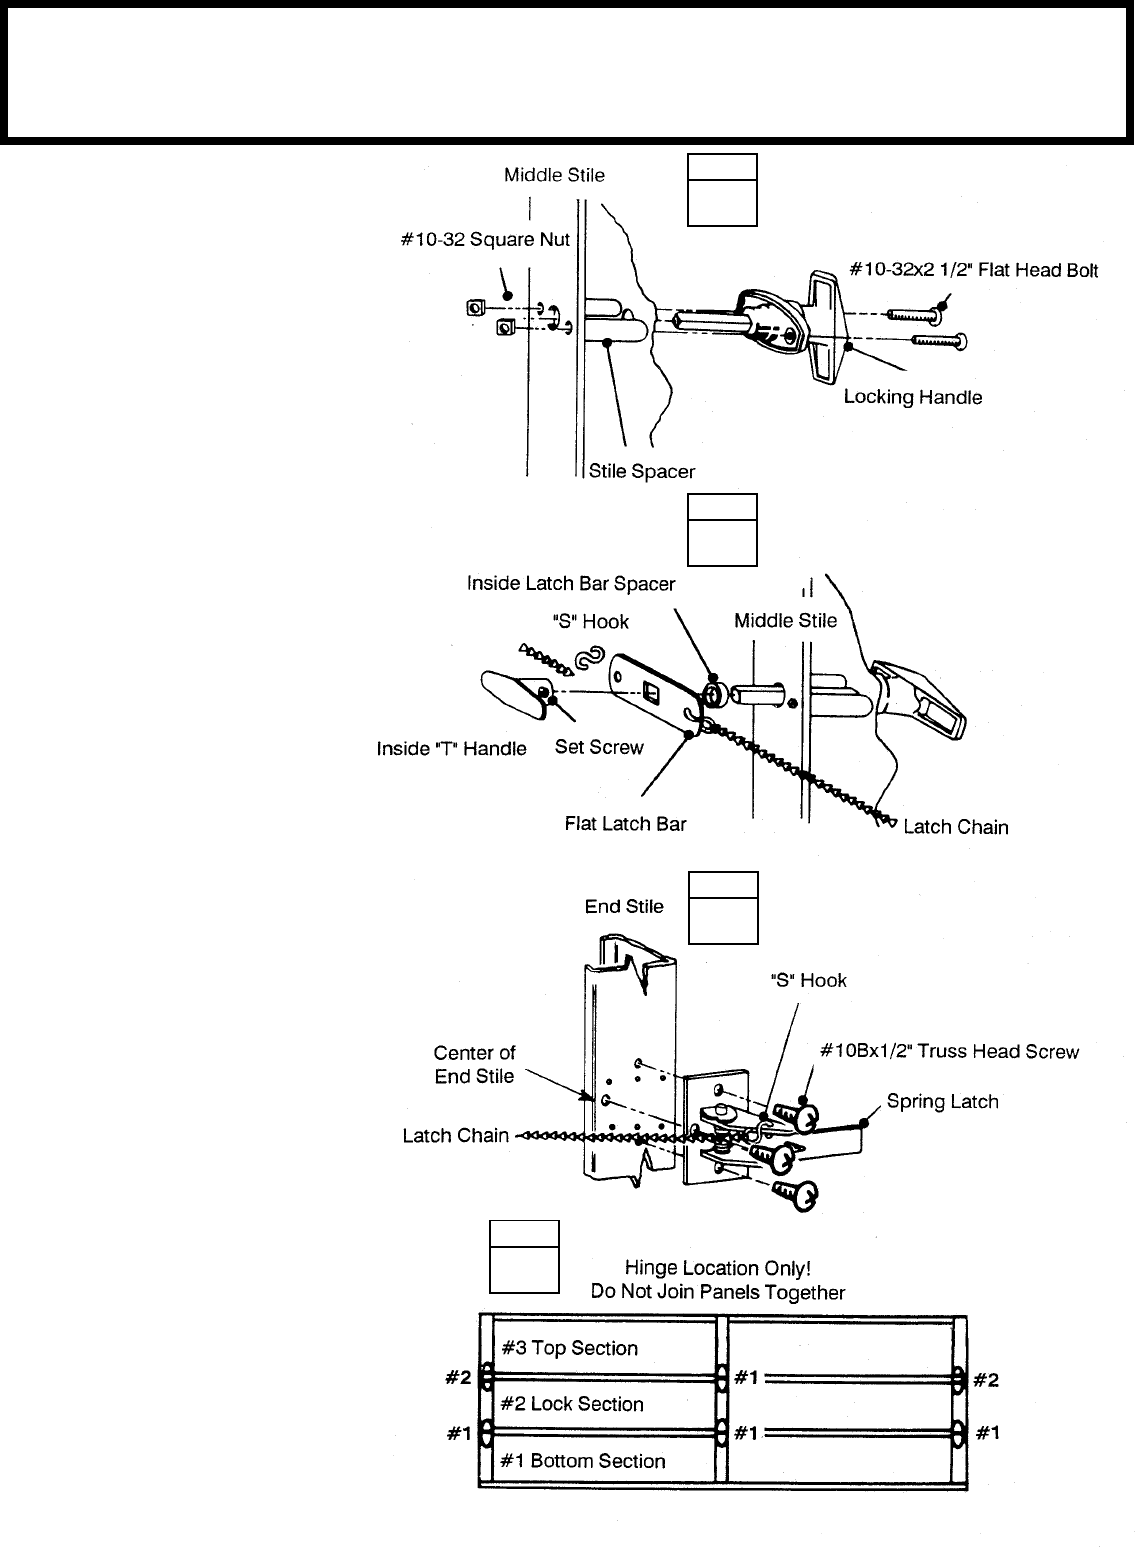
1With the key, unlock the outside
locking handle locking handle
locking handle locking handle
locking handle and rotate the han-
dle to a vertical position. Insert the
square shank through the hole locat-
ed in the center of
door panel lockdoor panel lock
door panel lockdoor panel lock
door panel lock
section. section.
section. section.
section. Slide in the
stile spacersstile spacers
stile spacersstile spacers
stile spacers
and insert the #10-32x2 1/2" flat head
bolts through handle, spacer and stile.
Secure with square nuts and tighten.
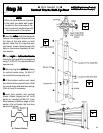
22
22
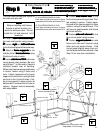
2Turn the locking handle to a hori-
zontal position. Slide the
inside latchinside latch
inside latchinside latch
inside latch
bar spacer bar spacer
bar spacer bar spacer
bar spacer over the square shank of
the lock handle and slip the
flat latchflat latch
flat latchflat latch
flat latch
bar bar
bar bar
bar over shank. Secure with the
in-in-
in-in-
in-
side "T" handle. side "T" handle.
side "T" handle. side "T" handle.
side "T" handle. Tighten set screw
in handle. Attach small
"S" hooks "S" hooks
"S" hooks "S" hooks
"S" hooks to
holes on the flat latch bar. Slip oppo-
site end of "S" hooks through
latchlatch
latchlatch
latch
chains.chains.
chains.chains.
chains.
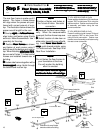
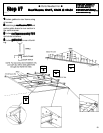
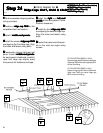
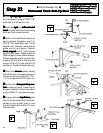
33
33
3Attach the
spring latches spring latches
spring latches spring latches
spring latches to the
end stiles on the lock section. Attach
"S" hooks to the holes on top of the
latches. Attach the latch chains to the
"S" hooks so that the chain is taut.
Hint: Hint:
Hint: Hint:
Hint: If chain is too tight, latches will
not engage strikes (on track) prop-
erly. If chain is too loose, the lock
handle will not retract latches. Adjust
chains by changing the hole location
of "S" hook through chain.
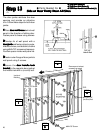
44
44
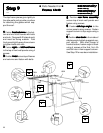
4Attach
#2 hinges #2 hinges
#2 hinges #2 hinges
#2 hinges to lock section at
the upper corners of end stiles. Fas-
ten #1 hinge to the middle stile.
Hint: Hint:
Hint: Hint:
Hint: When installing hinges, be sure
the hinge number is always on the
lower hinge leaf.