724-746-5500 | blackbox.com
Page 28
Chapter 6: Web-Based Browser Management
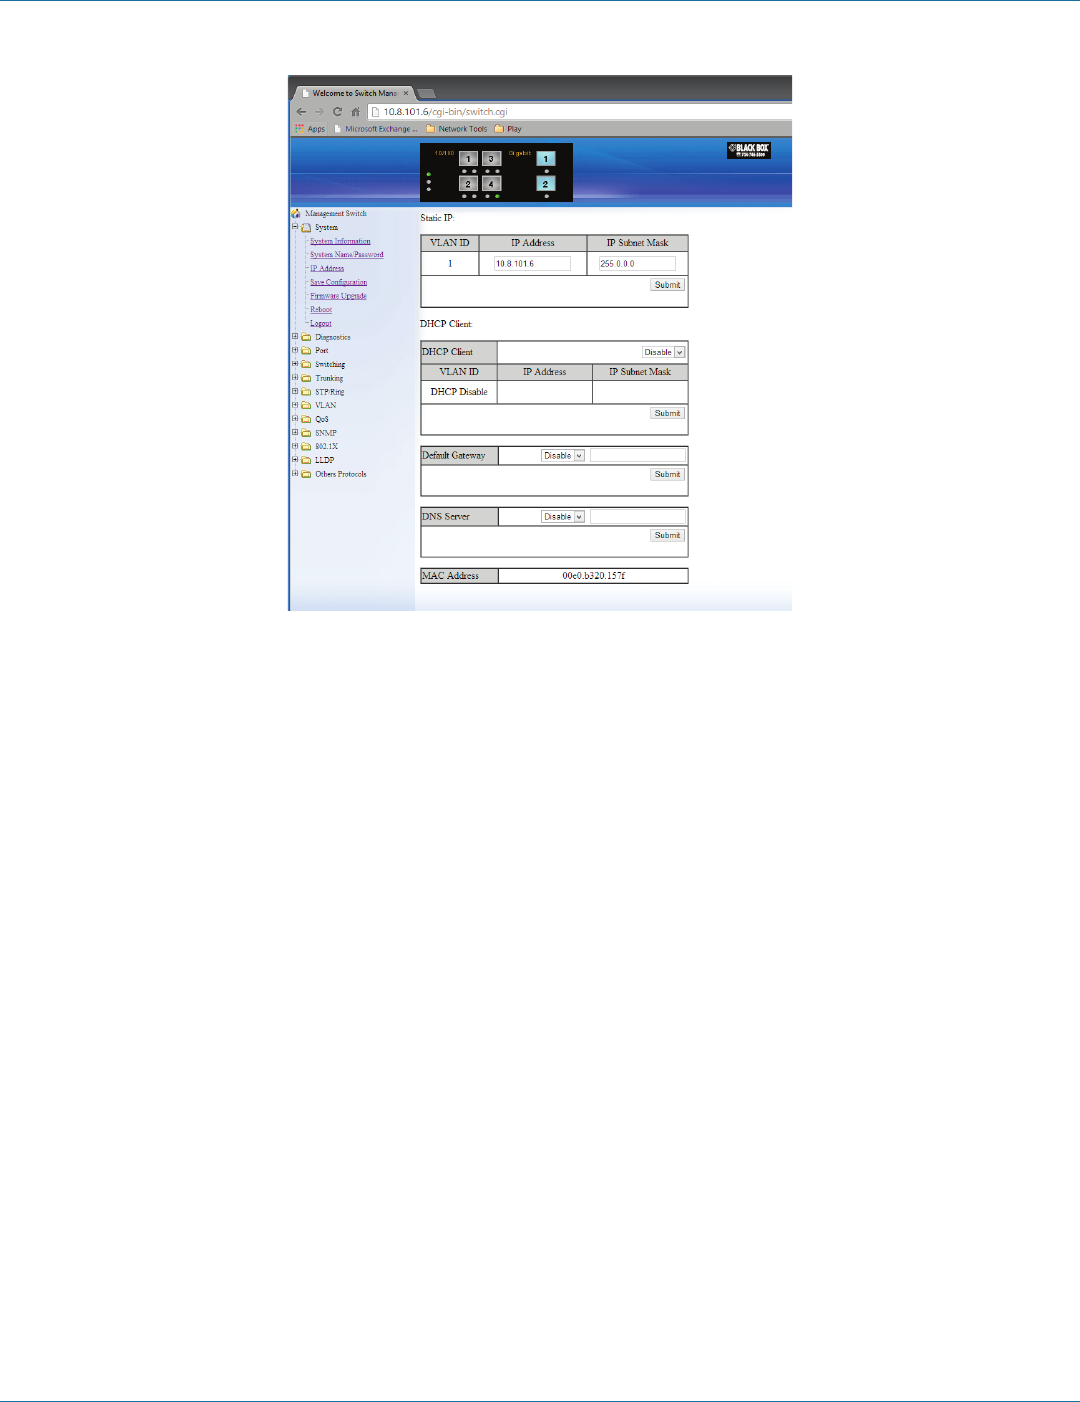
Figure 6-5. IP address screen.
IP Address
1. IP Address: Click in the “IP Address” text box and type a new address to change the IP Address.
2. IP Subnet Mask: Click in the “IP Subnet Mask” text box and type a new address to change the IP Subnet Mask.
3. Submit: Click the “Submit” button after you finish these selections.
4. You need to enter the new IP address on the browser and reconnect to the switch after the IP or subnet mask is changed.
5. DHCP Client: Click the “DHCP Client” drop-down menu to choose “Disable” or “VLAN1” (or other VLAN group) from the
“DHCP Client” drop-down list to disable or enable DHCP Client Setting for the switch. The managed VLAN is VLAN 1 by
default. The managed IP Address will be assigned by DHCP Server when VLAN 1 is chosen as DHCP Client. DHCP Server can
assign the Switch another managed IP Address by choosing another VLAN besides VLAN 1 as DHCP Client when the switch
has multiple VLANs.
6. Submit: Click the “Submit” button after you finish configuring DHCP Client.
7. Default Gateway: Choose “Disable” or “Enable” from the “Default Gateway” drop-down list to disable or enable Default
Gateway Setting for the switch.
Click the text box and type a new address to change the Default Gateway. (You need to choose “Enable” from the “Default
Gateway” drop-down menu.)
8. Submit: Click “Submit” button after you finish configuring Default Gateway.
9. DNS Server: Click the “DNS Server” drop-down menu to choose “Disable” or “Enable” from the “DNS Server” drop-down list
to disable or enable DNS Server Setting for the switch.
Click the text box and type a new address to change the DNS Server. (Need to choose “Enable” from the “DNS Server” drop-
down menu.)
10. Submit: Click the “Submit” button after you finish configuring DNS Server.
