3-14
Storing/Editing Address Book
Registering Destinations in the Address Book
6
Use [▼], [▲] or (Scroll Wheel) to select
<Search LDAP Server>, then press [OK].
7
Follow steps 4 to 7 in “E-mail,” in the
e-Manual to search destinations.
8
Use [▼], [▲] or (Scroll Wheel) to select
the desired destination from the search
results, then press [OK].
You can select up to 32 destinations.
If you want to select the rst 32 destinations,
press the left Any key to select <Menu> and
use [▼], [▲] or (Scroll Wheel) to select
<Select All>. (If a destination is selected,
<Select All> changes to <Clear Selection>.)
If you press the left Any key to select <Menu>
and use [▼], [▲] or (Scroll Wheel) to select
<Register E-mail for I-Fax>, the selected e-mail
address can be specied as an I-fax
destination. To register e-mail addresses as
I-fax addresses, register one e-mail address at
a time.
To cancel a selected destination, select the
destination again, then press [OK] to clear the
check mark.
You can use [◀] or [▶] to restrict the displayed
range of destinations.
–
–
–
–
–
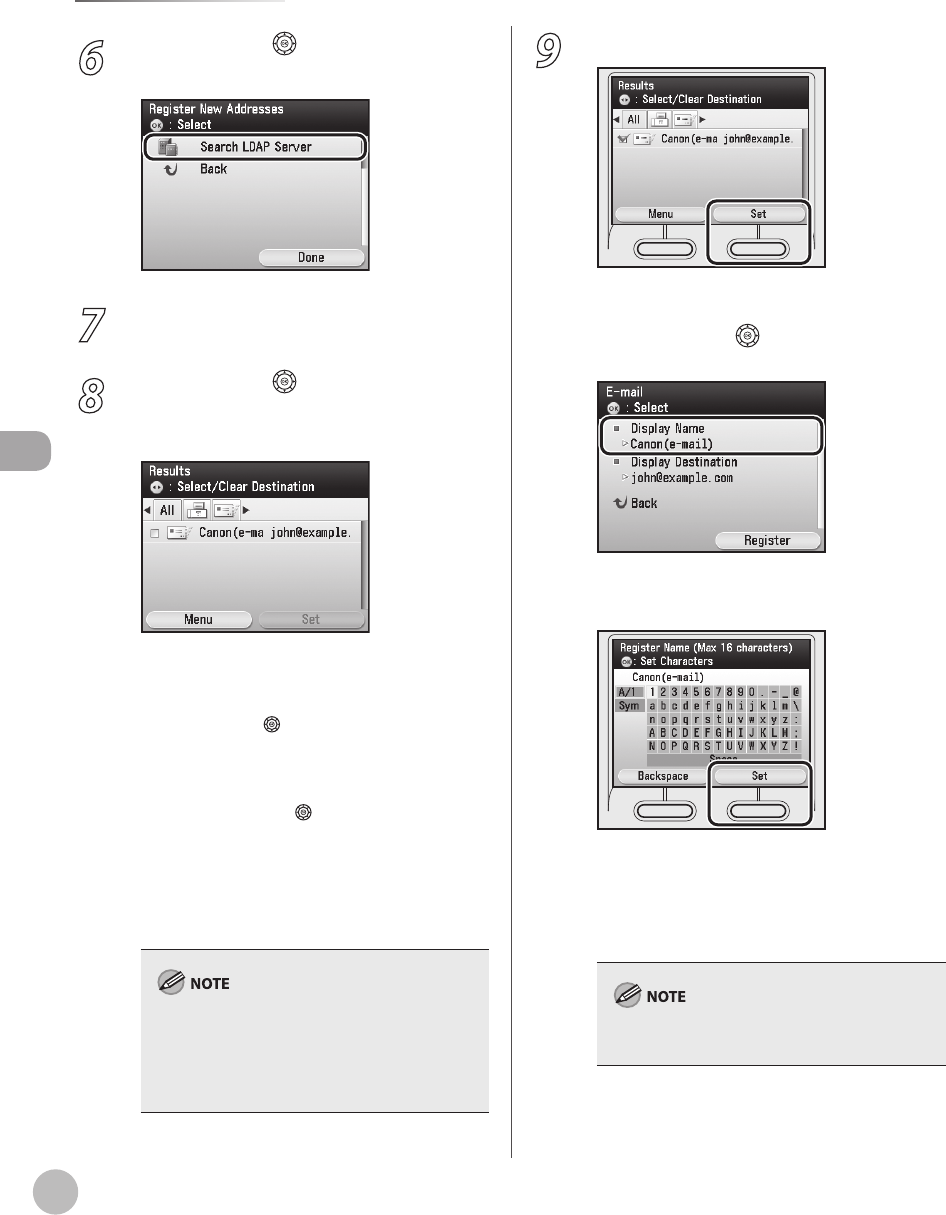
9
Press the right Any key to select <Set>.
■ If only one destination is selected:
①
Use [▼], [▲] or (Scroll Wheel) to select
<Display Name>, then press [OK].
② Conrm the recipient’s name, then press
the right Any key to select <Set>.
If you edit the recipient’s name obtained
from the search results, see “Registering
E-Mail Addresses in the Address Book,” on
p. 3-1
0.
Registered destinations are sorted in the Address
Book by its recipient’s name, in alphabetical order.


