SECTION 1
GETTING ACQUAINTED
3
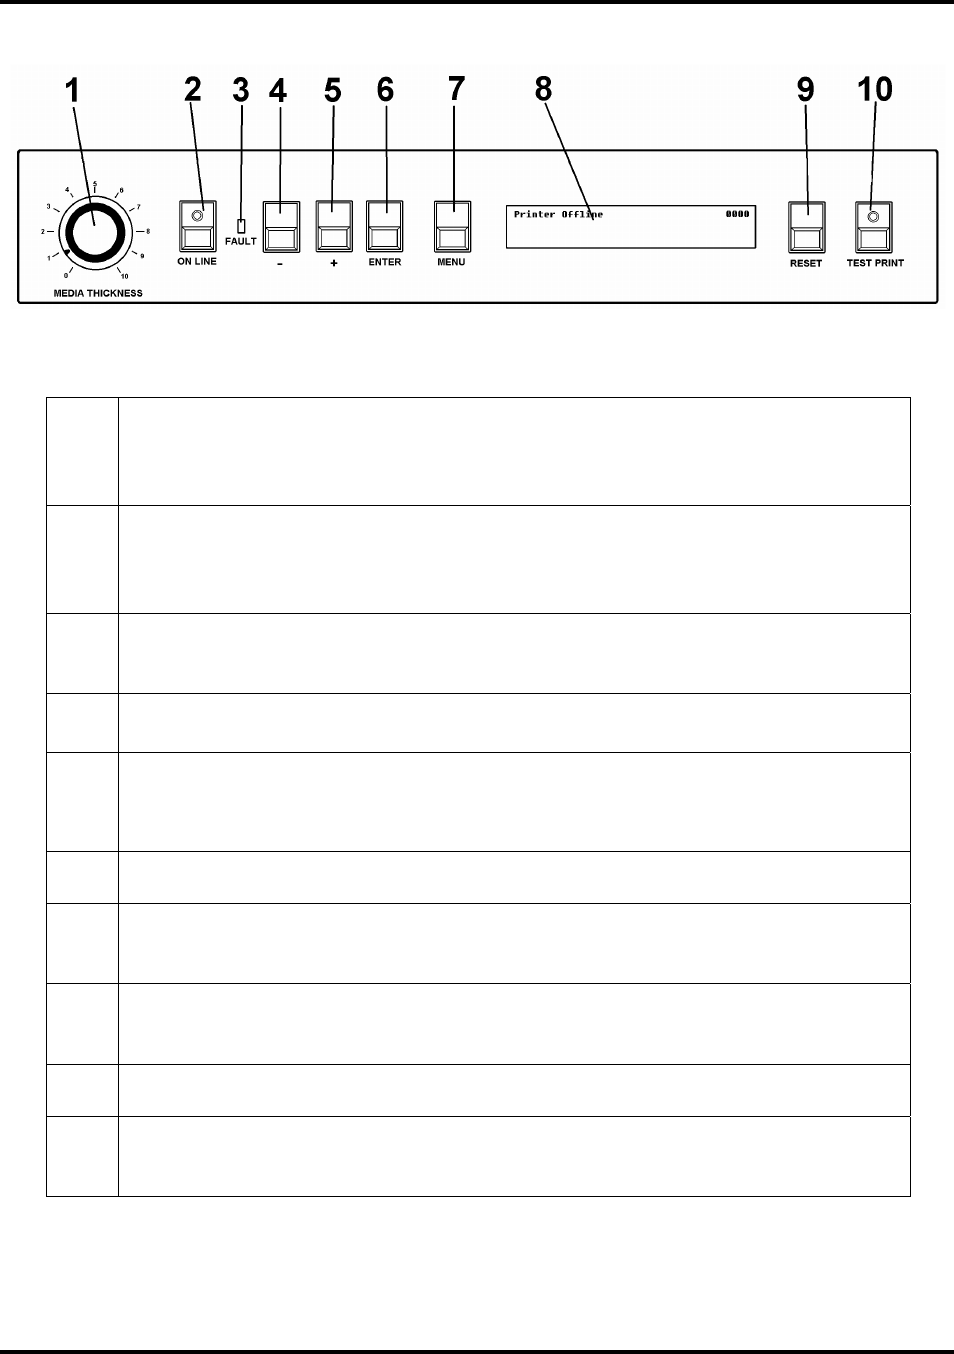
Control Panel
1.
MEDIA THICKNESS – The knob on the right side of the control panel is
used to adjust the height of the print heads to compensate for different media
thickness.
2.
ON LINE key – The indicator on this key lights when data is sent to the
ASTROJET 2600P/2800P and they are ready to begin printing. This key also
turns the printer off line so that the menu mode can be accessed.
3.
FAULT Indicator – This indicator lights when there is a problem with the
printing process.
4.
- key – In the menu mode this key will scroll to the previous selection.
5.
+ key – When the printer is in the menu mode this key will scroll to the next
selection.
6.
ENTER key – This key starts and stops the printing.
7.
MENU key – This key causes the printer to enter the menu mode where several
operator functions can be accessed.
8.
OPERATOR DISPLAY – Indicates the printer’s status including menus and
error messages.
9.
RESET key – This key will reset the printer to its wait state.
10.
TEST PRINT key – Pressing this key will put the printer in the test mode and
send a sample copy to check the printer’s output.
NOTE: A complete description of the functions and operation of the printer keys can be
found in Section 3 – Operating the ASTROJET 2600P/2800P.


