14
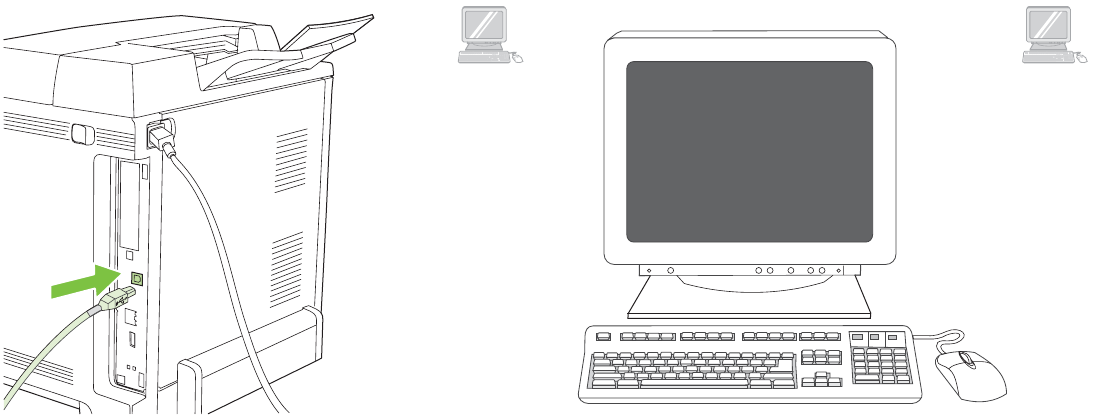
3) Follow the onscreen instructions. When prompted, connect a USB
cable between the printer and the computer.
Note HP does not recommend using USB hubs. Use a USB cable that is
no longer than 2 meters (6.5 feet).
4) Click Finish. If prompted, restart the computer. 5) Go to step 16 on
page 19.
3) Suivez les instructions affichées à l’écran. Lorsque vous y êtes invité,
connectez un câble USB reliant l’imprimante et l’ordinateur.
Remarque HP recommande de ne pas utiliser de concentrateurs USB.
Utilisez un câble USB de moins de 2 mètres.
4) Cliquez sur Terminer. Si vous y êtes invité, redémarrez l’ordinateur.
5) Passez à l’étape 16, page 19.
3) Folgen Sie den Anweisungen auf dem Bildschirm. Schließen Sie bei
entsprechender Aufforderung ein USB-Kabel zwischen Drucker und
Computer an.
Hinweis Die Verwendung von USB-Hubs wird von HP nicht empfohlen.
Das USB-Kabel sollte nicht länger als 2 Meter sein.
4) Klicken Sie auf Fertig stellen. Starten Sie bei entsprechender
Aufforderung den Computer neu. 5) Fahren Sie mit Schritt 16 auf Seite 19
fort.
3) Attenersi alle istruzioni visualizzate sullo schermo. Quando richiesto,
collegare un cavo USB tra la stampante e il computer.
NotaHP sconsiglia l'uso di hub USB. Utilizzare un cavo USB di lunghezza
non superiore a 2 metri (6,5 piedi).
4) Fare clic su Fine. Se richiesto, riavviare il computer. 5) Passare al
punto 16 a pagina 19.
3) Siga las instrucciones que aparecen en pantalla. Cuando se le solicite,
conecte un cable USB entre la impresora y el equipo.
Nota HP no recomienda el uso de concentradores USB. Utilice un
cable USB que no mida más de 2 metros (6,5 pies).
4) Haga clic en Finalizar. Si se le solicita, reinicie el equipo. 5) Vaya al
paso 16 en la página 19.
3) Volg de instructies op het scherm. Als hierom wordt gevraagd, sluit u
een USB-kabel aan tussen de printer en de computer.
Opmerking Wij raden u aan geen USB-hubs te gebruiken. Gebruik een
USB-kabel van maximaal 2 meter.
4) Klik op Voltooien. Als hierom wordt gevraagd, start u de computer
opnieuw op. 5) Ga naar stap 16 op pagina 19.
Windows Windows


