27
Setting input ports using menu
5.4 Setting the menu
If Intelligent Stack with RS-232 connection is used, observe the following. When
inputting image signals to Sub via Main, the operations differ between using
computer signals and video signals such as component and video signals.
Inputting image from Main to Sub - Computer signal
1.
If the STACK menu is already displayed on the screen, proceed to 3 below.
Otherwise press the
MENU
button on the remote control.
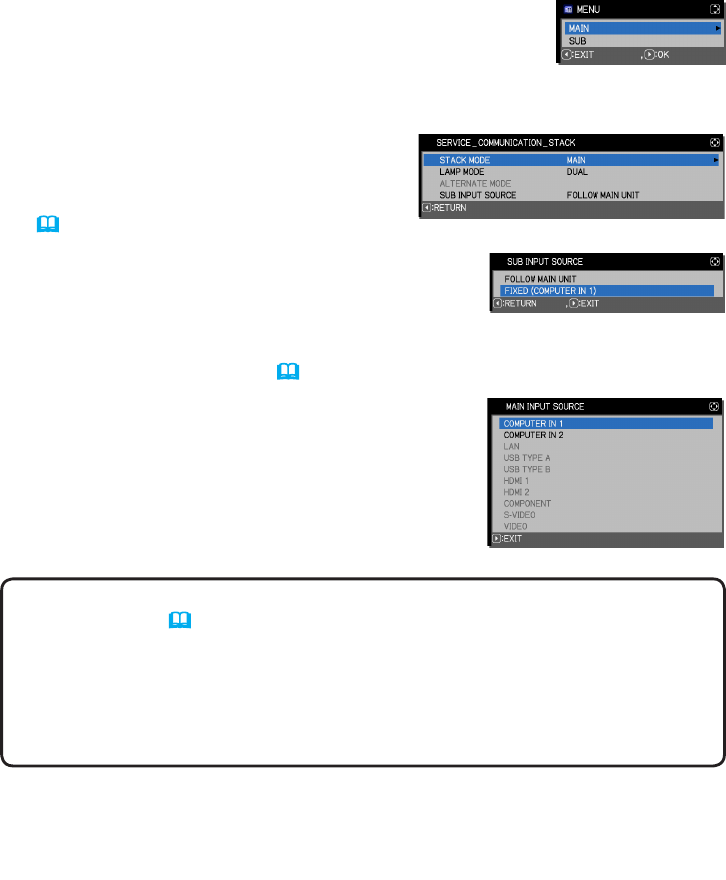
If the MENU dialog is displayed, use the ▲/▼ buttons to
highlight MAIN, and press the ► button. A menu will be
displayed.
If the MENU dialog is not displayed, the STACK menu will appear.
2.
Use the ▲/▼/◄/► buttons to go into the following menu.
ADVANCED MENU > OPTION
> SERVICE > COMMUNICATION > STACK
STACK menu will appear on screen.
(
Operating Guide
→
OPTION menu
)
3.
Use the ▲/▼ buttons to highlight SUB INPUT
SOURCE, and press the ► button to display the
SUB INPUT SOURCE dialog.
4.
Use the ▲/▼ buttons to highlight FIXED (COMPUTER IN 1), and press the ►
button to save the setting. (
19
)
5.
Press any source button on the remote control
or the
INPUT
button of the Main projector. The
MAIN INPUT SOURCE dialog is displayed on
screen. Use the ▲/▼ buttons to highlight the port
to which the signal cable is
connected, and press the ► button to save the
setting.
NOTE • When FIXED (COMPUTER IN 1) is selected, the MONITOR OUT
setting is invalid. (
Operating Guide
→
SETUP menu
)
• When FIXED (COMPUTER IN 1) is selected, you cannot select any input
sources besides
COMPUTER IN1
and
COMPUTER IN2
.
• When FIXED (COMPUTER IN 1) is selected and any source button on the
remote control or the
INPUT
button on the Main projector is pressed, the dialog
for selecting the input source will be displayed.


