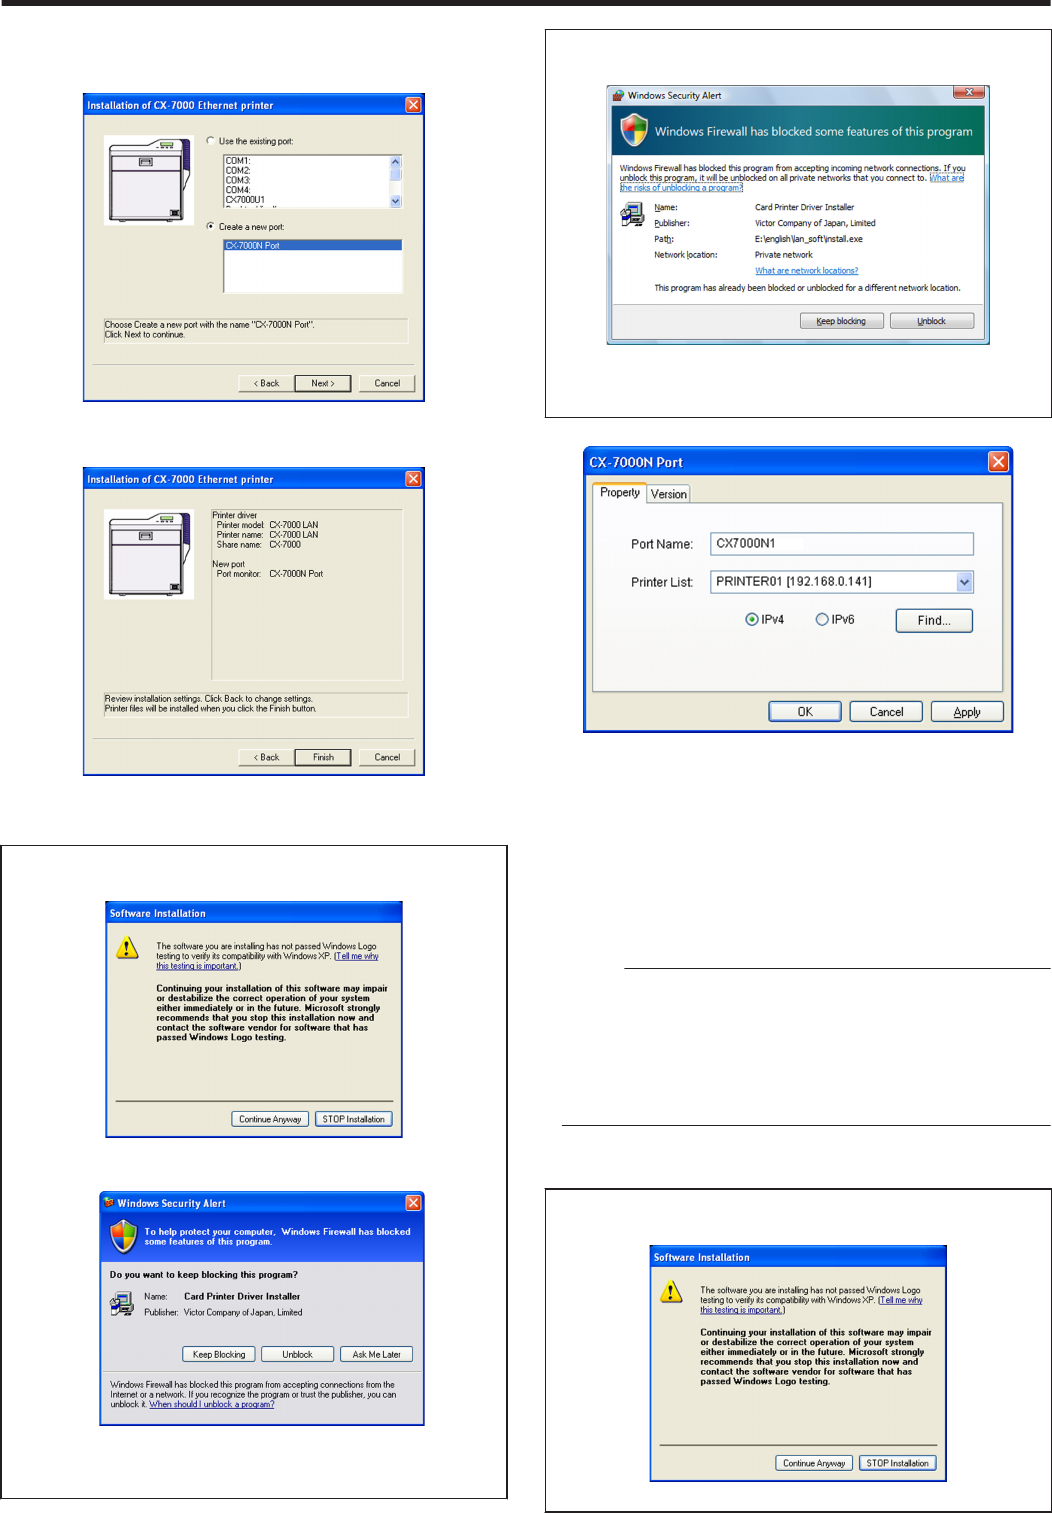
10
Click [Next]
v
A port selection screen appears.
v
Select [CX-7000N Port] under [Create a new port].
.
11
Click [Next]
v
An install information confirmation screen appears.
.
12
Check the installation information, followed by clicking [Finish]
v
To change the settings, click [Back].
m
Windows XP
v
A [Software Installation] screen appears.
.
A Click [Continue Anyway]
v
A [Windows Security Alert] screen appears.
.
B Click [Unblock]
v
The program will fail to function properly if you click on buttons
other than [Unblock].
m
Windows Vista
v
A [Windows Security Alert] screen appears.
.
A Click [Unblock]
v
The program will fail to function properly if you click on [Keep
blocking].
v
A [CX-7000N Port] screen appears.
.
13
Select the [Property] tab
A Select this printer from [Printer List]
v
When connecting using the IPv4 address, select [IPv4], followed
by clicking [Find...] to search for the printer. After clicking [IPv4],
you can search for the printer by directly entering the IPv4 address
in the [Printer List].
v
When connecting using the IPv6 address, select [IPv6], followed
by clicking [Find...] to search for the printer. After clicking [IPv6],
you can search for the printer by directly entering the IPv6 address
in the [Printer List].
Memo:
v
Ethernet (LAN) connection is improper if “Not Connected” appears
in the [Printer List]. If the printer that is currently being installed
cannot be found by clicking [Find...], end the installation process
and reinstall the program.
v
If “Not Selected” appears in the [Printer List], select an item that
coincides with the IP address of the printer that is currently being
installed from the pull-down list.
B Enter the [Port Name]
14
Click [OK]
m
Windows XP
v
A [Software Installation] screen appears.
.
A Click [Continue Anyway]
Setup
71
