Section 5
Lubrication, Maintenance and Adjustment
22
Once a Year or Every 100,000 Miles
(160,000 km)
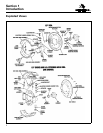
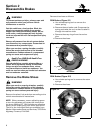
Remove the wheels and drums and inspect and
lubricate the brake as follows:
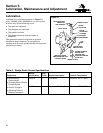
1. Inspect the air system, brake shoes, linings,
drums, spider and dust shields as described in
Section 3.
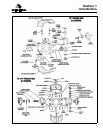
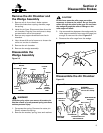
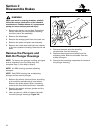
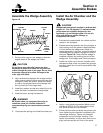
2. Disassemble the plunger housings. Clean
and inspect the housing bores, actuator
components and wedge assembly as
described in Section 4. Lubricate the
components as described earlier in this
section. Assemble the brake using new seals.
Adjust the Brake
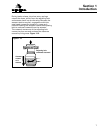
WARNING
You must manually adjust the brake after you
perform maintenance or service. Do not depend
on the automatic adjusters to remove the
excessive clearance created when you back off
the brake during service. The automatic adjusters
are designed to compensate for normal lining
wear. Damage to components and serious
personal injury can occur.
Park the vehicle on a level surface. Block the
wheels to prevent the vehicle from moving.
Support the vehicle with safety stands. Do not
work under a vehicle supported only by jacks.
Jacks can slip and fall over. Serious personal injury
can result.
1. Raise the vehicle so the wheel is off the
ground.
WARNING
When you work on a spring chamber, carefully
follow the service instructions of the chamber
manufacturer. Sudden release of a compressed
spring can cause serious personal injury.
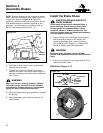
2. If the brake has a spring chamber, cage the
spring. Rotate the drum to verify that the brake
is completely released.
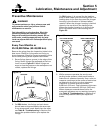
3. Remove the plugs from the adjustment and
inspection slots on the dust shield.
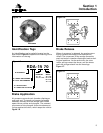
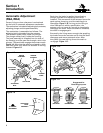
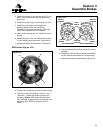
4. While you rotate the drum, use an adjusting
spoon to turn the adjusting bolt until the
linings drag heavily on the drum. Turn the
adjusting bolt 10-20 teeth in the opposite
direction until the lining to drum clearance is
0.020-0.040-inch (0.51-1.02 mm). Operate the
brakes. Use a ruler to measure movement at
the center of the shoe to determine the lining
to drum clearance.
5. Repeat Step 4 for the other adjuster on the
brake.
6. If the brake has a spring chamber, release
the spring.
NOTE:
Meritor KIT 1184 includes an adjusting
spoon plus a seal driver and a brake spring tool.
The kit or the individual tools are available
from Meritor Aftermarket Parts and Services,
7975 Dixie Highway, Florence, KY 41042. Adjusting
spoons available from tool manufacturers
include: Kent-Moore J-34061, Proto 2006 and
Snap-On S-9523.