


mounted in the solid metal ring around the circumference of
the grille when you first take the microphone out of its case.
Remove these screws before using the microphone, and replace
them if you will be transporting or shipping the microphone.
NOTE: The Kiwi will not work properly if the security screws
are not removed.
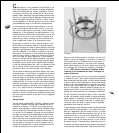
Capsule and Pattern Characteristics
When recording in a unidirectional pattern, the active, on-axis
diaphragm is on the same side of the microphone as the BLUE
logo. The pattern selector switch is located at the rear of the
microphone, and is easily adjusted by hand, with no special
tools required. In addition to the standard cardioid, omnidi-
rectional, and figure of eight patterns marked on the selector
switch, there are 6 intermediate gradations of sub-cardioid
(between omni and cardioid) and super-cardioid (between
cardioid and figure of eight) patterns to choose from.
You will notice that the sound of the Kiwi capsule changes
when adjustments are made to the nine-position pickup pat-
tern switch on the microphone body. In general, the omnidi-
rectional pattern offers the flattest frequency response, with
an absence of proximity effect. As the pattern becomes more
directional (by clicking clockwise through the switch settings,
towards the figure of eight position) bass frequencies increase
proportionally due to proximity effect, and subtle changes
also occur on the high end response. These shifts in overall
timbre can be used to fine-tune the frequency response of
the Kiwi, as well as for creative ends.
Recording Applications
Vocals
Here’s a little-known secret—vocalists love singing into unique
and impressive mics. And in addition to its classic styling, the
Kiwi was developed especially to enhance the airiness and
detail in a voice, while diminishing the proximity-induced
lows which can cloud a mix or produce compression artifacts.
Put it in front of any singer and you are guaranteed to get a
110% inspired performance that sits perfectly in the mix
with little or no additional equalization. The Kiwi is also
outstanding for narration and voice-over work.
For a “big” vocal sound with maximum presence, get the
vocalist within one to three inches of the capsule. There is
no need to worry about overloading the microphone, but be
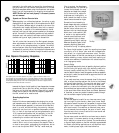
sure to use the optional BLUE “The Pop” metal mesh pop
filter to protect the diaphragm
at close distances. Tilt the Kiwi up
(toward the forehead) for more
projection and head tone, straight
on at the mouth for maximum
brightness and intelligibility, or
down toward the chest for more
robust lows and smoother highs.
Conventional vocal recording is
almost always done using a cardioid
pickup pattern. But the variable
pattern control allows you to ex-
periment with the timbre changes
which occur in sub-cardioid (left
of center on the pattern switch,
towards omnidirectional) and
super-cardioid (right of center,
towards figure of eight) settings.
Whenever possible, spend a few
moments exploring these tonal
shifts while “tuning” the pickup patterns.
The figure of eight pattern is useful for recording two singers
on one mic, or for a “hotter” solo vocal with increased prox-
imity effect (i.e. a typical radio announcer voice). The omni-
directional pattern on the Kiwi can also be put to unique effect,
whether recording a roomy, distant vocal track, capturing an
unusual room ambience in combination with a close vocal mic,
or on large group vocals.
Acoustic Guitar
For a balanced sound with plenty of sparkling high end, position
the Kiwi facing the guitar neck, right where the neck joins
the body (usually around the 12th– 14th frets). For starters,
use the cardioid pattern, keep the capsule as close as possible,
and angle it toward the sound hole to capture a blend of low
end and pick sound.
If you need more lows, move the capsule closer to the sound
hole, or adjust the pickup pattern one click at a time toward
the figure of eight position. For more high end detail, move
the Kiwi farther from the guitar, either at the same neck
position, or above the instrument up by the guitarist’s head.
An omnidirectional pattern setting allows very close placement
to the sound hole without boomy lows, and distant placement
of three feet or more can produce interesting results through-
out the available range of pickup patterns.
Electric Guitar
The Kiwi B6 capsule is useful for any clean amp sound, rang-
ing from bright rhythm chords to warm jazzy tones. Angle
the capsule toward the center of the speaker to capture more
highs, or turn it toward the edge of the cone for a fuller sound
with more low end. For overdriven or distorted tones, move
the mic towards the outer edge of the cone, or back it away
from the amp a foot or more to add a little room sound and
soften the extreme high end.
For even more control over definition and room tone on electric
guitar tracks, it is common practice to use an ambient room
mic in addition to a close mic on the amp. The omnidirectional
or figure of eight patterns on the Kiwi are highly recommended
for distant room miking applications on any amplified instru-
ments, including bass, organ, and blues harmonica.
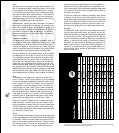
The Pop
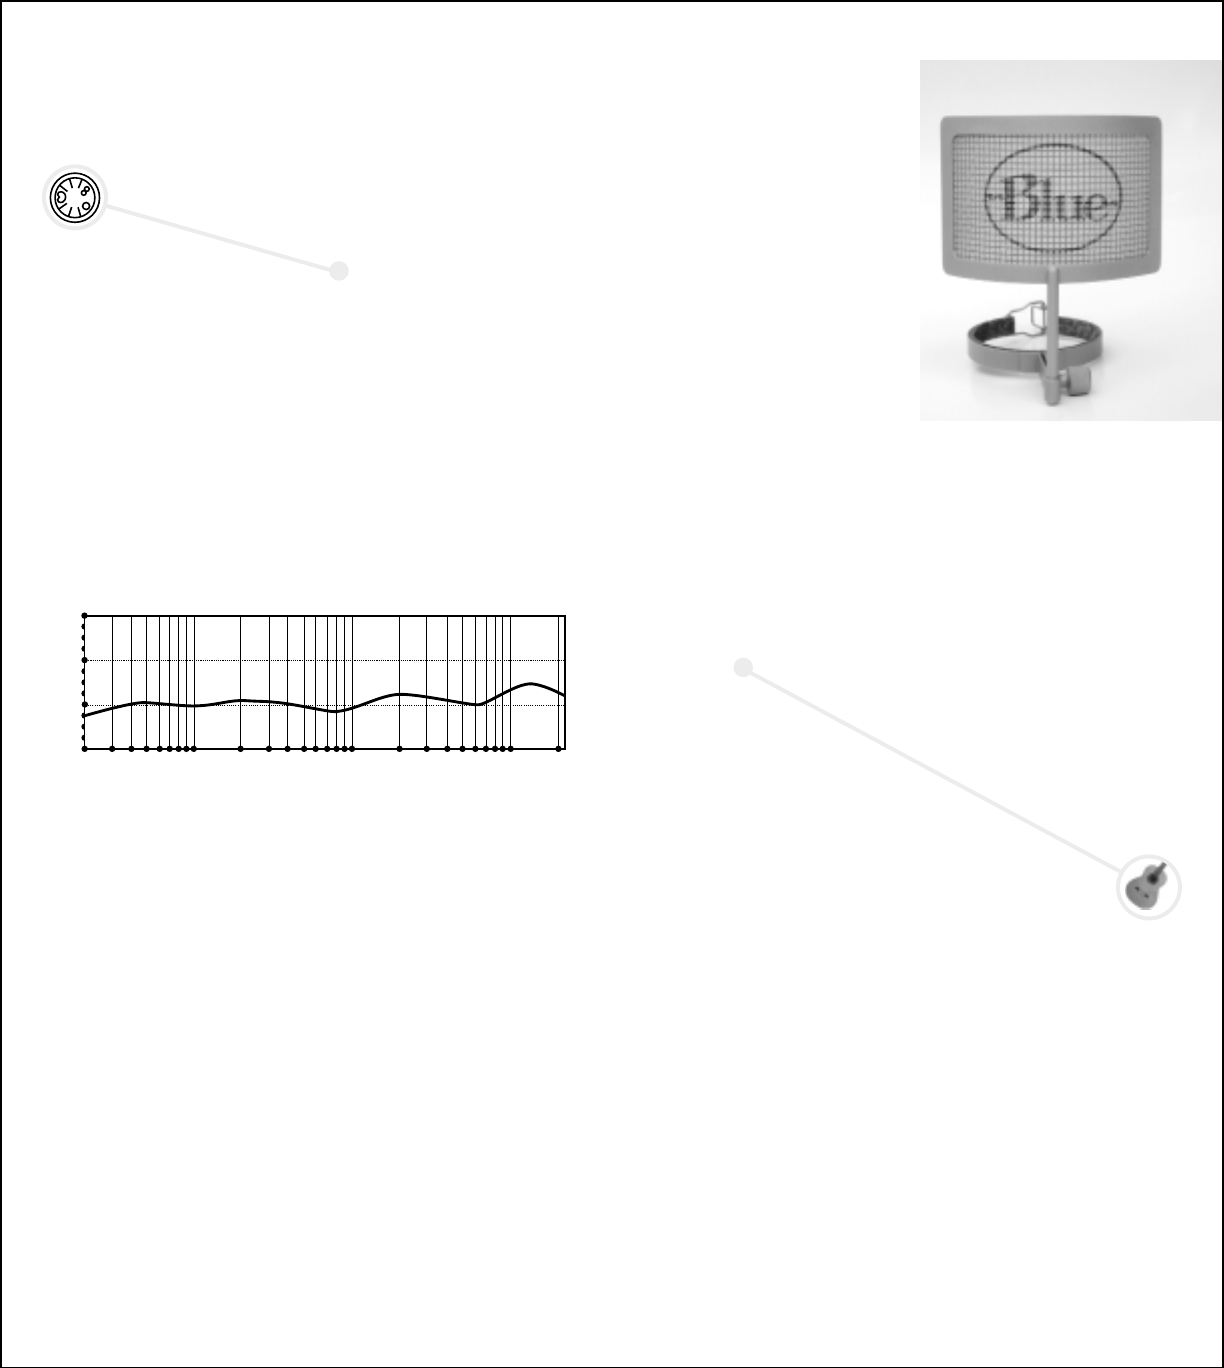
Decibles (dB)
-12
-8
-4
0
20 30 50 70 100 200 300 500 800 2K 3K
5K
7K 10K 22.05K
Frequency (Hz)
Kiwi Capsule Frequency Response
This frequency chart of the Kiwi capsule is only a start. It gives the recordist a basis of the
sound provided. How the microphone reacts in a particular application will differ greatly because of
many variables. Room acoustics, distance from sound source (proximity), tuning of the instrument
and microphone cabling are only a few of the interacting issues. For an artist or engineer, how the
microphones are used creates the basis of the sound.