E-40
Getting Ready
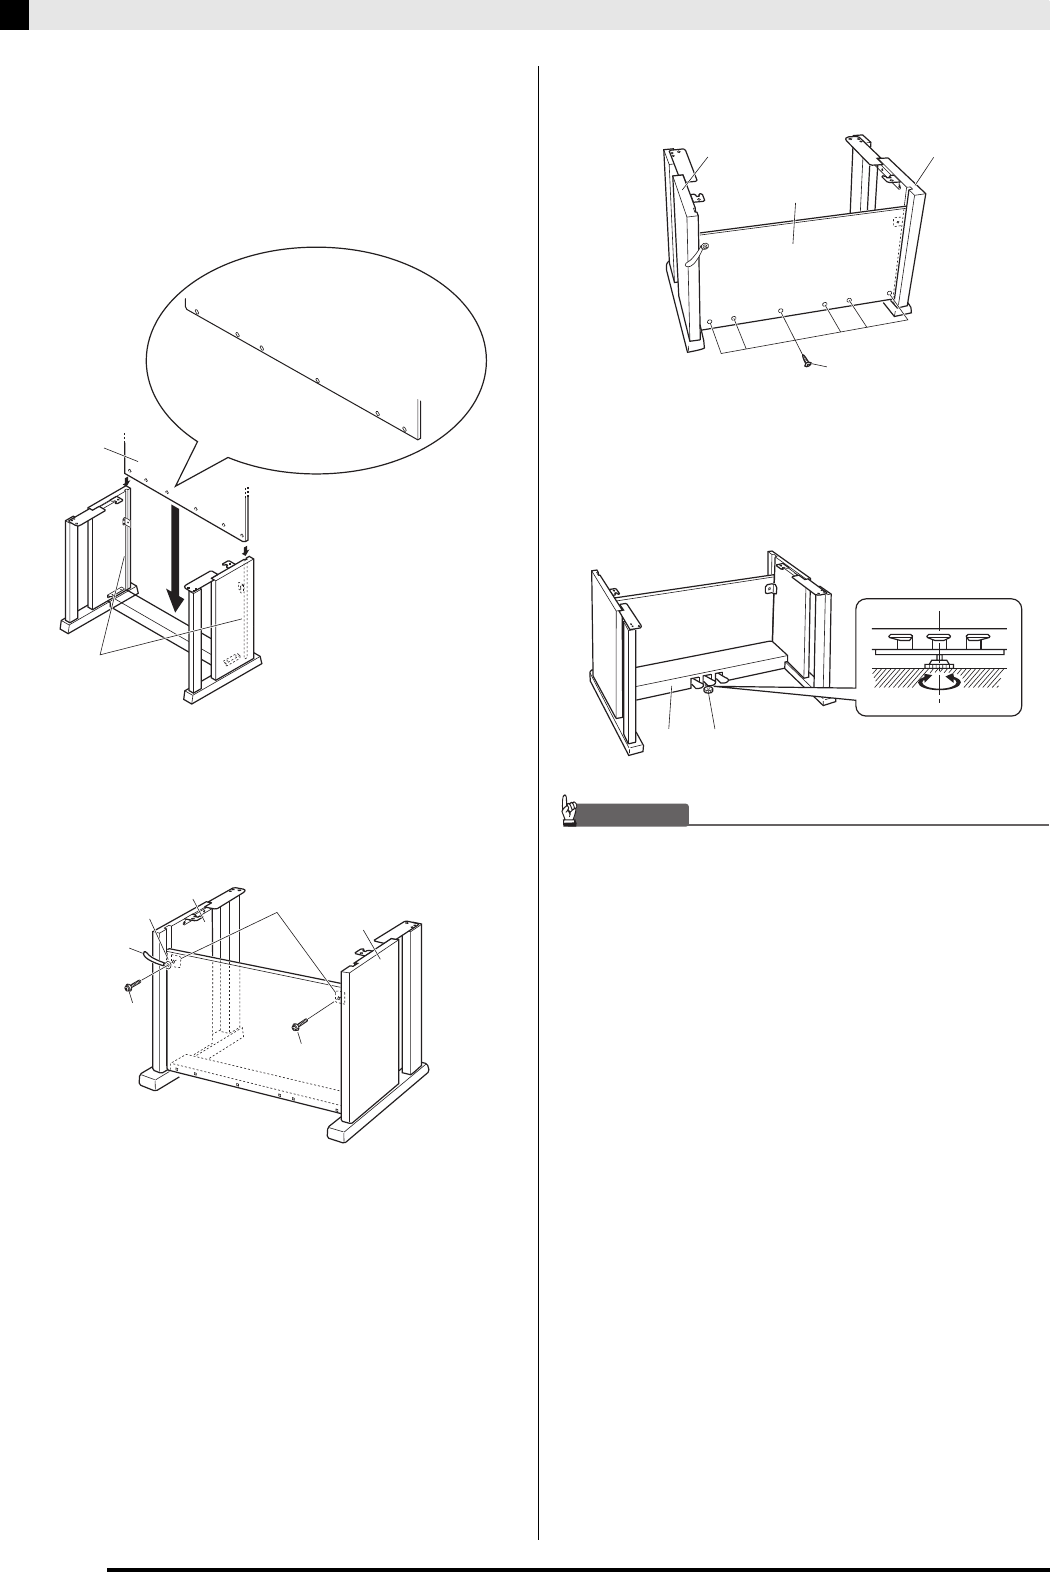
3.
Slide back panel
C
into the grooves
4
of the
side panels.
• Before sliding back panel
C
into place, make sure
that the widely spaced screw holes along the bottom
of the panel are on the left (when viewed from the
front of the stand), and the narrowly spaced holes are
on the right.
4.
Use the two screws
H
to secure the top left
and right edges of the back panel
C
to the
brackets
5
of side panels
A
and
B
.
• At location
6
, slip the clip
G
onto to the screw
H
before installing the screw.
5.
Next, secure the bottom of the back panel
C
with the six
F
screws.
6.
Adjust the height adjustment screw
7
to
provide support so crosspiece
D
does not
bow downwards when the pedals are
pressed.
IMPORTANT!
• Pressing the pedals without adjusting height
adjustment screw
7
can result in damage to
crosspiece
D
. Always make sure you adjust height
adjustment screw
7
before operating the pedals.
C
4
H
H
5
6
G
B
A
C
F
A
B
7D
AP450_e.book 40 ページ 2012年6月20日 水曜日 午前11時11分


