


English
USB Flash Drive
E-49
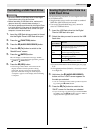
IMPORTANT!
• Be sure to format a USB flash drive on the Digital
Piano before using it for the first time.
• Before formatting a USB flash drive, make sure it
does not have any valuable data stored on it.
• The format operation performed by this Digital Piano
is a “quick format”. If you want to completely delete
all of the data in USB flash drive, format it on your
computer or some other device.
1.
Insert the USB flash drive you want to format
into the Digital Piano’s USB flash drive port.
2.
Press the
cs
(FUNCTION) button.
3.
Press the
ds
(AUDIO RECORDER) button.
4.
Press the
do
(i) button to switch to the
“MediaFormat” screen.
5.
Press the
dp
(ENTER) button.
This will display a confirmation message “SURE?”.
• If you want to cancel the format operation, press the
ct
(NO) or
dm
(EXIT) button.
6.
Press the
ct
(YES) button.
• The message “Please Wait” will remain on the
display while the format operation is being
performed. Do not perform any Digital Piano
operation while this message is on the display.
“Complete” appears on the display after formatting
is complete.
Use the following procedure to save Digital Piano data
to a USB flash drive.
• Song Recorder songs can be converted to standard
MIDI files (SMF format 0) and saved.
• User songs (downloaded songs, etc.) cannot be
saved to a USB flash drive.
1.
Insert the USB flash drive into the Digital
Piano’s USB flash drive port.
2.
Select the data you want to save to the USB
flash drive.
3.
Hold down the
ds
(AUDIO RECORDER)
button until the “LOAD” screen appears for
the data you selected.
• You can cancel the LOAD/SAVE operation any time
by pressing the
dm
(EXIT) button.
4.
Press the
do
(i) button to switch to the
“SAVE” screen for the data you selected.
• If you are saving a recorder song to a standard MIDI
file (SMF), press the
do
(i) button again so “SMF” is
displayed on the right side of the screen.
Formatting a USB Flash Drive Saving Digital Piano Data to a
USB Flash Drive
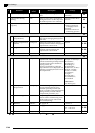
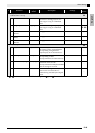
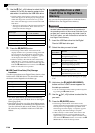
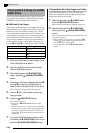
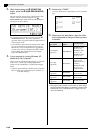
To select this
type of data:*
1
Do this:
User rhythms Select from among user rhythms 001
through 010 (page E-21).
User Music
Preset
Select from among user Music Preset
001 through 050 (page E-29).
Recorder songs Select from among recorder songs 1
through 5 (page E-35).
Registrations
*2
Press the
bn
(RHYTHM) button so the
RHYTHM lamp next to it is lit.
*1For more information about data types, see page
E-47.
*2All registration data (24 banks × 4 areas) is saved
in a single file.