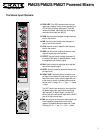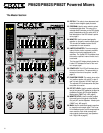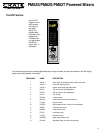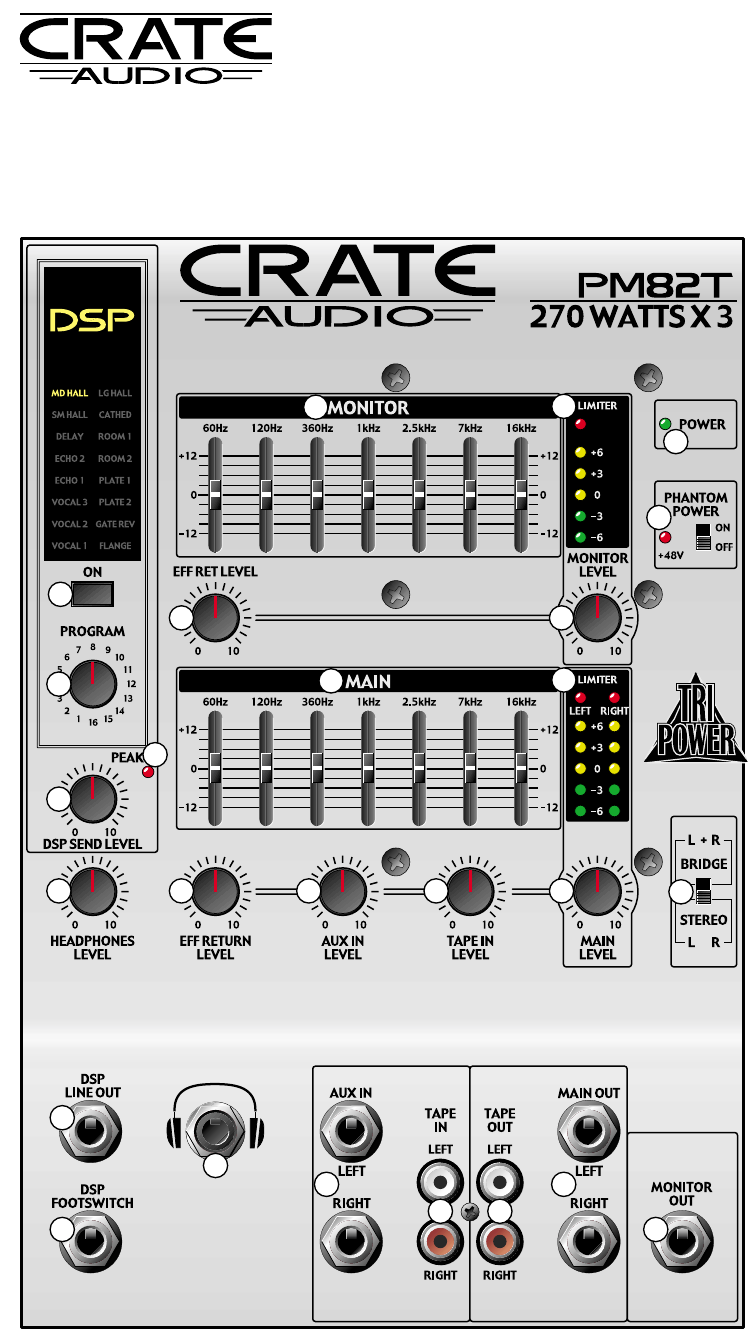
The Master Section:
22
23
32
34
42
40
41
43
44 45
46
47
35 36 37
24
30
28
38
39
29
25
31
26
27
33
6
PM62S/PM82S/PM82T Powered Mixers
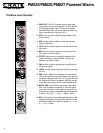
22. DSP ON: This switch, when depressed, acti-
vates the internal digital signal processor.
23. PROGRAM: Use this rotary switch to select
the desired digital effect. The name of the
selected effect illuminates on the DSP display
panel (located above the On switch, #22). A
brief description of the DSP effects is provid-
ed on page 9.
24. MONITOR: Use this seven band graphic
equalizer to shape the monitor output signal.
This is useful for feedback control and to
compensate for room acoustics.
25. LIMITER/LED METER: The mixer employs
internal limiter circuits to prevent overdrive
distortion from being reproduced by the
amplifiers. The Limiter LED illuminates when
the monitor amplifier’s internal limiter circuit
is activated.
The five-step LED display directly below the
Limiter LED indicates the level of the moni-
tor’s output signal.
26. POWER LED: This LED will illuminate when
the mixer is turned on. (The power switch is
located on the mixer’s rear panel - see #51,
page 9.)
27. PHANTOM POWER: This switch, when at the
“on” position, applies +48 volts DC to pins 2
and 3 of each channel’s XLR MIC input jack.
The adjacent LED illuminates when the phan-
tom power is turned on.
28. EFF RET LEVEL: Use this control to adjust the
level of the internal DSP applied to the signal at
the Monitor Out jack (#47) and the Speakers -
Monitor jacks (PM82T only - #50, page 9).
29. MONITOR LEVEL: Use this control to adjust
the overall level of the signal at the Monitor
Out jack (#47) and the Speakers - Monitor jacks
(PM82T only - #50, page 9).
30. MAIN: Use this seven band graphic equalizer
to shape the main output signal. This is use-
ful for feedback control and to compensate for
room acoustics. Each slider controls both
main outputs simultaneously (see Speakers -
Left / Right, #48 on page 9).


