


40
7.MIDI mode
7. MIDI mode
In MIDI mode you can make MIDI-related settings, and dump
exclusive data. Press the MIDI mode key to enterMIDI mode.
To exit MIDI mode, press the mode key for the previous mode.
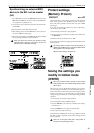
If you turn off the power without Writing, the settings you
made in MIDI mode will be lost. If you wish to keep the
modified settings, you must execute the Write operation
(refer to p.41 "Saving the settings you modify in MIDI
mode").
MIDI channel settings
(MIDI ch)
MIDI CH 1...16
This sets the MIDI channel. The same MIDI channel is used for
both transmission and reception.With the factory settings this
will be “10”
1. Use the cursor keys to make the parameter select LEDs indi-
cate MIDI CH.
2. Rotate the dial to select the channel.
Setting the MIDI note
number for each part
(Note No.)
NOTE NO. C-1...G9
Here you can specify the MIDI note number for each part.
If you specify the same note number for two or more parts, the
sounds of those parts will be played simultaneously when that
note is received from an external MIDI device.
1. Use the cursor keys to make the parameter select LEDs indi-
cate NOTE NO.
2. Press the part key whose note number you wish to change
(the key will light).
3. Rotate the dial to select the note number.
The factory settings are as follows.
Part Note number Note name
Percussion Synth 1 C2 36
Percussion Synth 2 D2 38
Percussion Synth 3 E2 40
Percussion Synth 4 F2 41
Audio In 1 G2 43
Audio In 2 A2 45
Hi-hat (Close) F#2 42
Hi-hat (Open) A#2 46
Crash C#3 49
Handclap D#2 39
The correspondence between note names and note num-
bers will differ by manufacturer. Please refer to the owner’s
manual for the device you have connected.
Transmit/receive dump
data (MIDI Data Dump)
DUMP Ptn, SnG, ALL
Transmission
Here's how system exclusive data (pattern data, song data, or
Global mode settings) can be transmitted from the ER-1mk
II
to
an external MIDI data filer or computer connected to the MIDI
OUT connector.
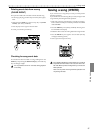
1. Connect the MIDI OUT connector of the ER-1mk
II
to the MIDI
IN connector of an external MIDI device that is able to re-
ceive MIDI data dumps (another ER-1mk
II
, or a computer that
is running a MIDI data filer program or editing program, etc.).
2. Set the MIDI channel of the external MIDI device and the ER-
1mk
II
to match. However when transmitting to a data filer, it
is not normally necessary to match the MIDI channel.
3. Use the cursor keys to make the parameter select LEDs indi-
cate DUMP.
4. Rotate the dial to select the data that you wish to transmit.
Ptn: All pattern data
SnG: All song data
ALL: All data (pattern data, song data, Global data)
5. Press the Play/Pause key to transmit the data dump.
Reception
Here's how ER-1mk
II
system exclusive data can be received from
an external MIDI data filer or computer connected to the MIDI
IN connector.
1. Connect the MIDI IN connector of the ER-1mk
II
to the MIDI
OUT connector of the external MIDI device that will trans-
mit the MIDI data dump (another ER-1mk
II
, or a computer
that is running a MIDI data filer program or editing program,
etc.).
2. Set the MIDI channel of the external MIDI device and the ER-
1mk
II
to match. However when transmitting from a data filer,
it is not normally necessary to match the MIDI channel.
3. Use the cursor keys to make the parameter select LEDs indi-
cate DUMP.
4. Transmit the data dump from the external MIDI device.
Details on data dumps are provided in the MIDI implementa-
tion chart of the ER-1mk
II
.
Consult your local Korg distributor for more information on
MIDI implementation
Do not touch the keys of the ER-1mk
II
while a data dump is
in progress.
When the parameter select LEDs indicate DUMP, system
exclusive data can be transmitted or received even if the
MIDI Filter parameter "E" is set to "-."
If the MIDI Filter parameter "E" is set to "O," system exclu-
sive data can be transmitted or received in any mode.