4
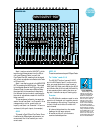
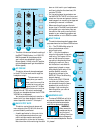
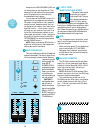
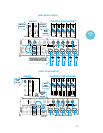
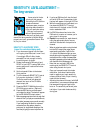
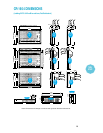
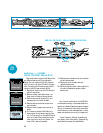
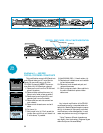
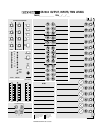
All the knobs and buttons on the CR-1604’s
front panel can be broken down into sixteen
identical input modules (channel strips) plus
one Master Output section that’s divided into
Aux Return and General Output sections (see
nifty diagram at right).
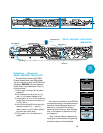
Each input channel strip can be divided
into four specific sections:
• The AUX SENDs, with knobs color-coded RED
• EQUALIZATION, color-coded BLUE
• PAN control, color-coded black, and
• the channel LEVEL CONTROL faders
All modern mixing boards utilize some
variation of this input module arrangement.
Once you’ve mastered the CR-1604’s input
module layout, you should feel ready to take
on that old 132-channel Neve mixing desk
gathering dust in your Aunt Hattie’s garage.
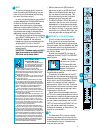
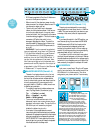
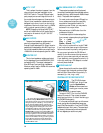
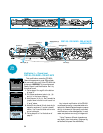
AUX SENDS
AUX 1, 2, 3 & 4
These controls are used to send the signal
out to outboard parallel effects processors
such as reverbs and delays. You may also use
an Aux Send to create a separate monitor mix
for stage monitors or headphone cues or gen-
erate separate mixes for recording.
There are a total of seven Aux Sends on
each CR-1604 channel strip. A combination of
four may be used at the same time.
NOTE: All of the
CR-1604’s Aux sends have
a very wide range of gain.
The first half of the
control’s rotation reaches
from the off position to Unity Gain (0dB).
This half of the control’s range corresponds to
the full range of a conventional mixer. The
second half of the control’s rotation provides
you with even more gain, from Unity to
+15dB. For example, when you want a sound
super-“wet” (mostly reverb), the extra gain al-
lows you to bring the channel fader down
(and the send way up) so that the sound is
composed of predominantly reverb return
with just a touch of “dry” signal.
AUX 1/MON
This particular Aux control could be
viewed as the King of Sends, because of its
varied functions.
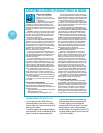
IMPORTANT
SENSITIVITY
ADJUSTMENT
PROCEDURE
To fully achieve the
CR-1604’s impressive noise
and headroom specs, you should “tune” chan-
nel sensitivity of each channel to your
particular setup.
Can you run the mixer without this adjust-
ment? Sure. Chances are that you’ll get pretty
good sound. But take a moment to adjust
things properly and you’ll get excellent sound.
After all, it’s your music.
Because we really want you to make this
adjustment, we’ve included a slightly more
detailed description of the process on page 19.
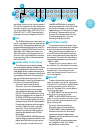
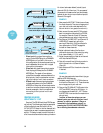
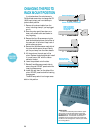
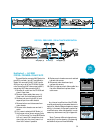
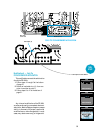
The basic procedure for adjustment is as
follows.
A. Set EQ controls approximately the way
they’ll be used for that channel. If you don’t
know in advance, just set them flat .
B. Turn the channel’s PAN control all the way
to either the right or left.
C. Set Channel Fader to Unity (center detent).
D. Turn the channel’s SENSITIVITY control
fully counter clockwise (+4 UNITY).
E. Press the channel’s SOLO button and the
SOLO TO MAIN button over on the main
output section of the mixer.
F. Play through the channel at the same
volume and intensity that the channel is
going to handle during use. Turn the
channel’s SENSITIVITY control clockwise
until the level on the CR-1604 meter (left
or right side, depending on which way you
have the PAN set) reads around OdB.
G. Set the EQ the way you think you’ll want it,
then repeat step F.
H.Turn the channel’s SOLO button off and
return the PAN control to center detent
position.
I. Repeat this procedure for each channel,
using the appropriate kind of source which
will be used with that channel.
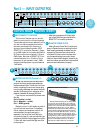
1
Part1— A GUIDED TOUR OF THE
CR-1604’S CONTROLS
QUICK
START
VERY IMPORTANT
AUX
U
1
2
3
4
5
6
U
U
U
+1500
+1500
+1500
+1500
5/6
SHIFT
+15–15
0
HI
+15–15
0
MID
+12–12
0
LO
EQ
MON
1
VERY IMPORTANT
+15–15
0
HI
+15–15
0
MID
+12–12
0
LO
EQ
0
RL
PAN
SOLO
MUTE
ALT 3/4
OL
+20
U
00
9
+4 –40
15
U
–10
•
9
-20
-16
-12
-8
-4
0
+2
+4
+8
CLIP
+4 –40
15
U
–10
•
9
A
B
E
C
F
D