Congratulations on your purchase of the MXL 990 USB Stereo mic which uses
two gold diaphragm capsules in an X/Y pattern for stereo recording. MXL micro-
phones are the result of world-class engineering and manufacturing capabilities.
They are designed to provide you with outstanding performance and exceptional
value. While we encourage you to review this entire manual, there are a few key
points about handling this microphone that we want you to familiarize yourself
with right from the start.
The MXL USB mics are a professional quality, condenser microphone designed
specically for recording. Unlike microphones designed for live performance or
lesser dynamic model microphones, this instrument requires careful handling.
Hence, you should observe the following…
ALWAYS… handle the microphone carefully, avoiding sudden shocks such as
dropping or bumping the microphone into other objects.
ALWAYS… maintain a distance of approximately 4 – 6 inches when speaking
or singing into the microphone. You are encouraged to use a pop
lter for added protection of the sensitive capsule and to shield
the instrument from saliva and sudden bursts of air.
NEVER… tap the microphone to check if it’s working. The RED LED
behind the microphone’s protective grill will tell you it’s on and
that the correct side is facing you.
NEVER… blow into the microphone to check if it’s working. The RED LED
behind the microphone’s protective grill will tell you it’s on.
By following these few basic handling procedures, you can expect a long and
trouble-free relationship with your new microphone. Again, thank you for your
purchase of this outstanding MXL microphone.
A Little Background Information
MXL stereo microphones use what is known as a X/Y pattern, which is two cap-
sules facing 90º apart. Each capsule will send the audio information it receives to
the corrosponding right or left side of a stereo track on the computer. The capsule
behind the “L” is more sensitive to sound waves arriving from the left side of the
microphone as opposed to those arriving from the right side. The capsule behind
the “R” is just the opposite. Unlike other MXL models, this microphone benets
from being a USB (Universal Serial Bus) device—meaning this is a plug and play
microphone that will interface with Windows and Macintosh computers without
the need for any special drivers. As a USB device, it carries the added benet of
not requiring an external microphone preamp, as is the case with most condenser
microphones.
We’ve already mentioned the importance of proper handling, but should you nd
yourself recording an outdoor performance, you would be well advised to use a
windscreen as protection for your microphone.
2 11
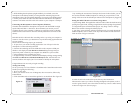
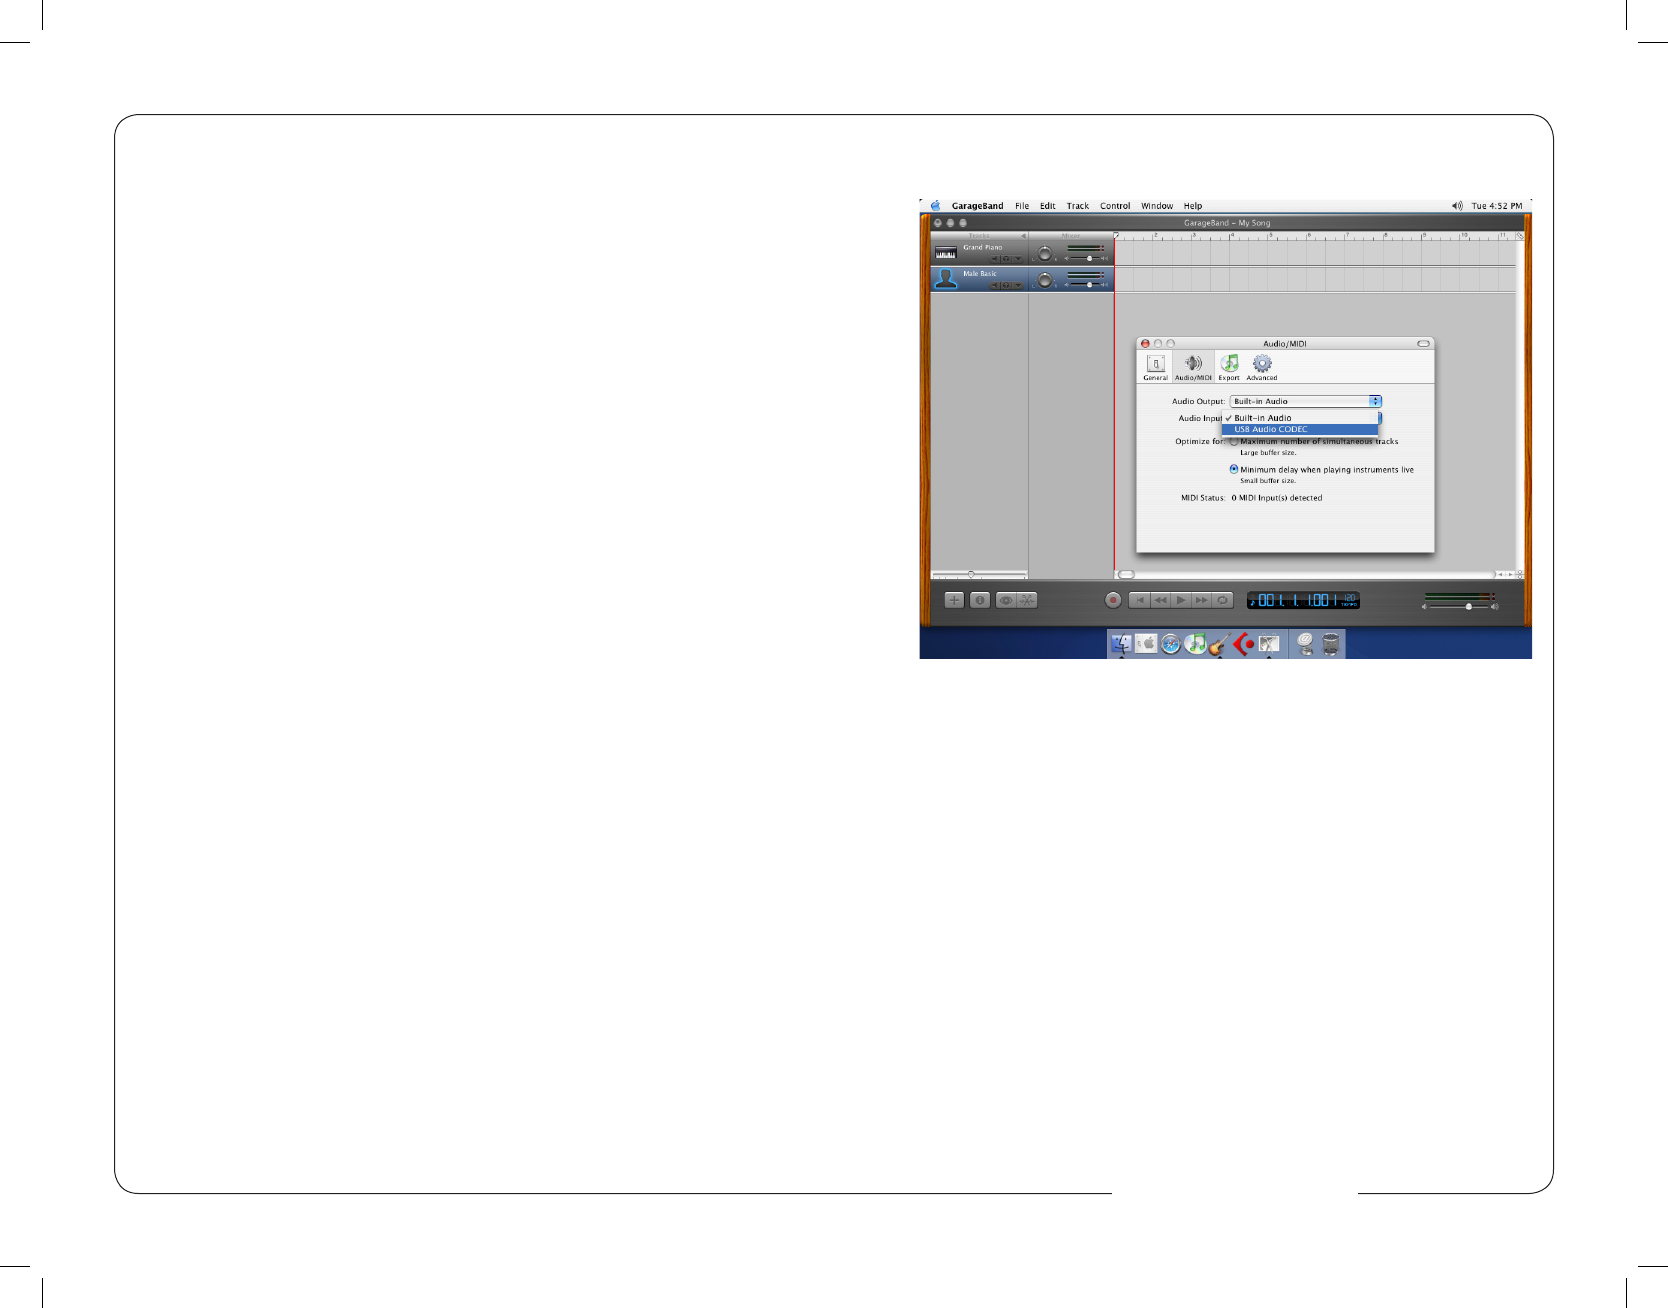
7. Then select the Audio/MIDI icon in the top row. From the drop down menu
under Audio Input, select the USB Audio Codec as shown in Figure #13 below.
Figure #13
8. You will then be asked if you really want to change the driver. Select Yes.
The computer will then say it is initializing the audio driver. Wait until this is
done, then close the window.
9. At this point, you should see the meter move when you speak into the micro-
phone. You can now click on the Record button and record your vocals or dialog
using your microphone.
PLEASE NOTE: As long as the microphone is plugged in when Garage Band is
started, the audio input source settings in Garage Band will be saved until you
change them again, even if you close the program or start a new project.
For More Information
For additional information about your MXL USB microphone, how to contact
technical support, as well as information on other products manufactured by
MXL, please visit us online at www.mxl-usb.com.
www.mxl-usb.com


