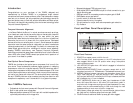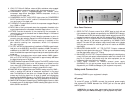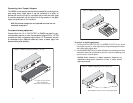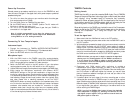
TAMPA Controls
Setting Levels
TAMPA has the ability to provide a massive 66dB of gain. Due to TAMPA’s
Temporal Harmonic Alignment technology,higher overall levels (also called
“soft clipping”) bring increased levels of harmonics that commonly
translate to the ear as greater warmth.Still, the signal level at the line input
of the device receiving the TAMPA’s output signal will ultimately be the
determining factor in where you set TAMPA’s gain controls.
Since setting levels on the TAMPA may include the use of the Compressor
section as well as the OUTPUT PAD switch, please refer to the sections,
“Setting the Compressor” and “Using the Output Pad” for more
information.
To set the signal level:
1. Make certain that the +20dB switch is set to the OFF position.
2. If you are using analog outputs, make certain that the 20dB PAD is set to
the OUT position.
3. While supplying a representative signal to the input source,slowly rotate the
GAIN control clockwise until the OUTPUT meter begins to register a
change in level. If you have rotated the GAIN control completely clockwise
and are still not showing a level on the OUTPUT meter,then reset the GAIN
control to the minimum position,engage the +20dB switch and slowly rotate
the GAIN control clockwise until the OUTPUT METER registers.
NOTE:At this time, you may want to begin to examine the signal level
showing up at the receiving device that the TAMPA is connected to.
It is not unusual for the TAMPA to register a relatively low level on
its output meter, while the receiving device is showing sufficient level
for recording or other purposes.
4. Experiment with GAIN control while continuing to provide a
representative source signal. Technically, you want to find a high GAIN
meter reading without triggering the CLIP indicator.Since the threshold for
the CLIP indicator is 4dB below digital clip, however, you may still have
plenty of headroom available. Here again, you must use your ears to find
the setting that sounds best.
5. If possible, adjust the input stage of the mixer, recording gear or other
devices that are connected to TAMPA’s output in order to get an optimal
signal. (Possible external device adjustments include operating level, trims,
faders and pads.) If TAMPA’s GAIN adjustment is the only level adjustment
in your signal chain, then adjust it according to the desired level on the
device receiving the TAMPA’s signal.
NOTE: If you find that TAMPA’s digital output is lower than desirable
when compression is engaged, try summing the identical left and
right digital outputs together. You’ll get 6dB more overall level and
3dB greater signal-to-noise ratio.
9
Power-Up Procedure
Normal power-up procedure would be to turn on the TAMPA first, and
then the rest of the gear in the signal chain, with power amps or powered
speakers being last.
1. Turn off or turn down the volume on your monitors and/or the other gear
that receives a signal from TAMPA.
2. Turn the GAIN control on TAMPA all the way down.
3. Set the POWER switch to the “POWER” position. The VU meters will
illuminate to indicate that power is on.
4. Turn on or turn up each successive piece of gear that your TAMPA is
connected to in the signal chain.
Note: It is highly recommended to turn down the volume on your
monitors and/or other gear that receives a signal from TAMPA before
turning TAMPA on or off or making connections.
Connecting To Your Tampa’s Inputs
Instrument Input:
1. Connect the instrument to TAMPA’s MICROPHONE/INSTRUMENT
INPUT using either a 1/4” TRS balanced or TS unbalanced cable.
2. Switch the INST/MIC switch to the INST position.
Microphone Input:
1. With the GAIN knob on the TAMPA turned fully counterclockwise,
connect the microphone to TAMPA’s MICROPHONE/INSTRUMENT
INPUT using a cable with a standard XLR male connector.
2. Switch the INST/MIC switch to the MIC position. If your microphone
requires phantom power, flip the +48V switch to the +48V position.
3. Use the GAIN knob to apply the microphone’s output signal to the TAMPA input.
4. While testing the microphone, experiment with different INPUT
IMPEDANCE settings to find the best combination of signal level and
tonality for a given microphone.Experimentation is required because there
is no standard impedance across mics, or even standard methodology of
load balancing. Vintage mics and many modern tube mics typically work
best when loaded with a matching impedance, so set the INPUT
IMPEDANCE selector as closely as possible to the impedance spec of the
mic. On the other hand, start with the 2400 setting for modern solid-state
condenser mics because most are intended for connection to higher
impedance loads (even though they might have low impedance specs).
Again, we recommend experimentation because the only rule of thumb is
to use the setting that produces the best sound.
8


