


CM100
- The Leader in DJ Technology
©1999 Industries - 9 - http://www.numark.com
EQUALIZER
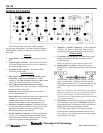
12. 5-Band Stereo Graphic Equalizer (EQ) -
compensates for differences in source material sound
quality. In ultra-compact mobile systems this EQ can be
used to tailor the sound to the acoustical requirements of
the room. Center frequencies are 63Hz, 250Hz, 1kHz,
4kHz and 16kHz. Faders have a center detent for an
accurate "flat” response.
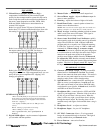
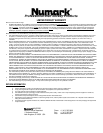
Below is a typical "house" EQ curve. Notice how the
knobs above "0" balance out the knobs below. Start with
this setting if you've never used a graphic EQ before:
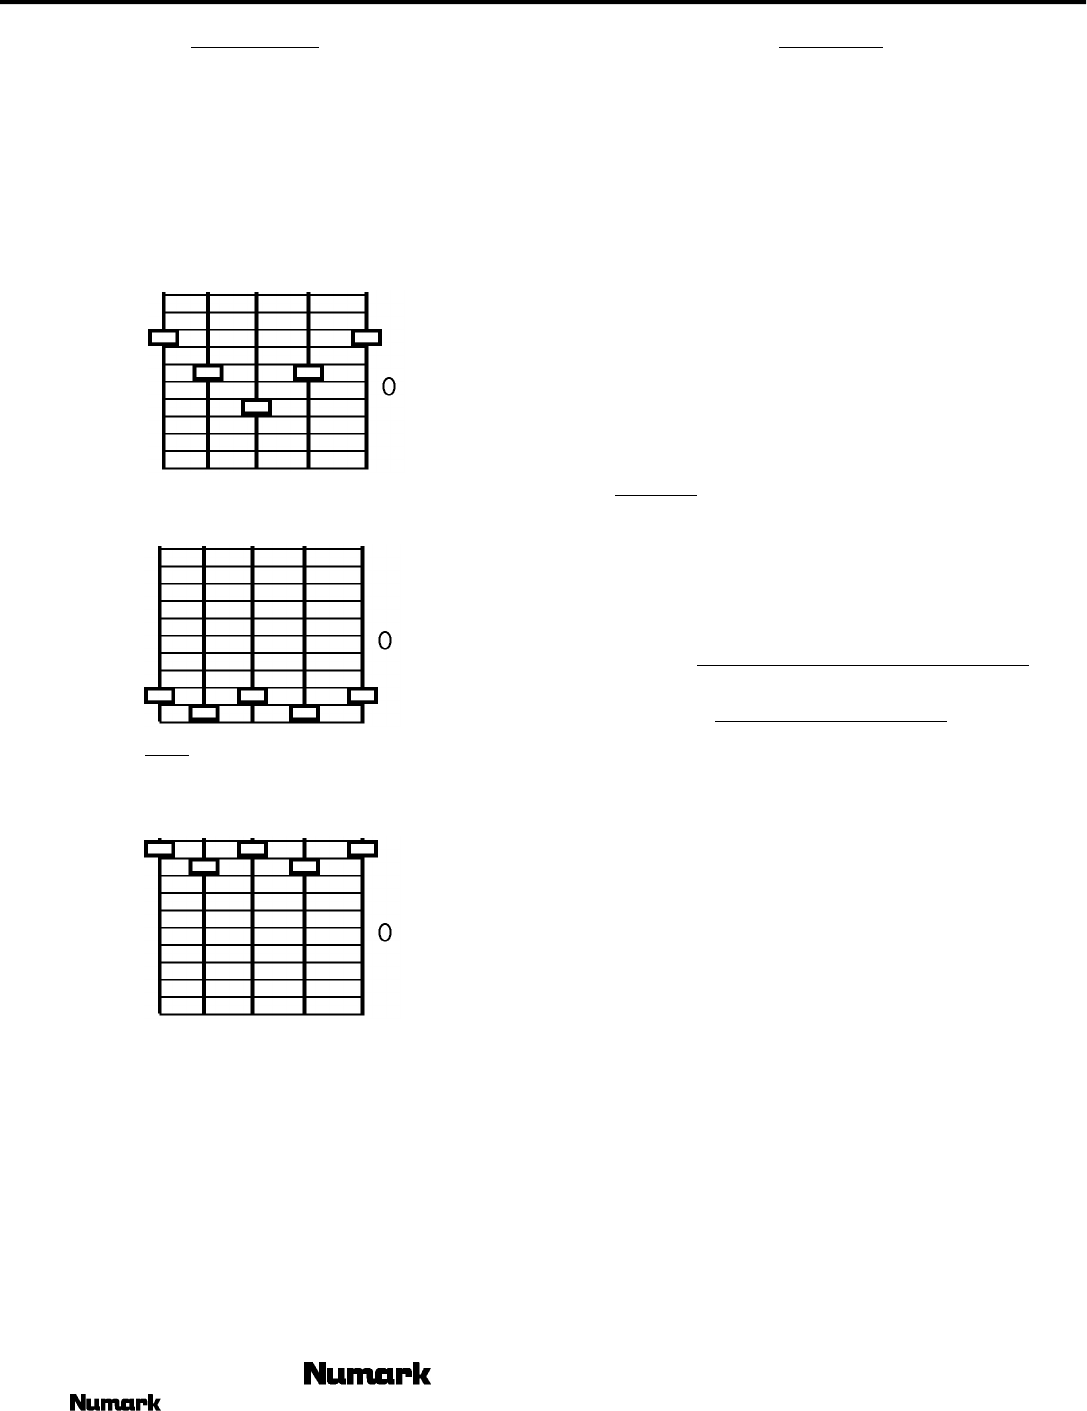
Below is an example of a poor EQ curve because it cuts
the output volume down by 6-12dB. You have to
compensate by running the Master output higher:
Below is the
worst
sort of curve to use because you are
using EQ to add volume. With exaggerated boost, you can
easily run your power amplifiers into “clipping” and
damage your speakers.
GENERAL EQ HINTS
• Boost the 63Hz band for deep bass tones and solid kick
drum sound. Use sparingly because this dramatically
increases demand on power amplifiers and could drive
them into “clipping” .
• Cut slightly at 250Hz and more at 1kHz for extra
clarity.
Note: Cutting is preferable to boosting.
• Boost 16kHz for a little "sizzle".
• As a general rule, less equalization is
better!
13. EQ ±6/12dB adjust – sets the amount of adjustment
you can make with the equalizer.
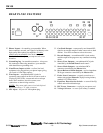
OUTPUTS
14. Master Fader – to control the overall output level.
15. Stereo/Mono toggle - adjusts the Master output for
stereo or mono operation.
16. Panning – adjusts the balance of right to left audio.
17. Booth/Zone Fader - controls speaker volume for a
remote zone or booth monitors.
NOTE: This can also be used to supply line level audio to a
lighting controller or to lights that are sound activated.
18. Meter Assign – determines whether pre-fader or master
audio is sent to the stereo LED meter. PFL signal is
determined by the cue assign switches.
19. Stereo Auto Peak Hold Level Indicator- quickly
and accurately tracks level of audio sent to it by the meter
assign. The red LEDs for +3dB, +5dB and +8dB hold
program peaks for a second or two. With peak metering,
it's OK to be "in the red" as long as +5dB or +8dB aren't
constantly
lit. When using as a master output
meter, set the crossover, equalizer and power amp inputs
to avoid distortion at each step in the audio chain. Proper
attention to the peak meter results in the punchiest
possible sound without audible distortion. When used
to adjust the PFL levels, accurately match channel
levels with the Pre-fader gain controls before mixing them
together.
The idea is to properly match PFL
inputs
, not
the input with the stereo output meter!
HEADPHONE CUEING
20. Channel Cue/Send Assign - are used to route PFL
channel audio to the Monitor Section. The channel
faders do not control the Cue send volume. This audio is
also sent to a rear panel output for use with an external
sampler or other source such as booth monitor.
21. Split/Blend Cue – controls how PFL and Program
audio are sent to your headphones. In split mode, the
PFL audio can be heard in your left ear and PGM audio
can be heard in your right ear. In blend mode, both PFL
and PGM can be heard in both ears.
22. Headphone Mix - controls the mix of PFL and PGM
signals to your headphones. When the slider is moved to
the left, all you will hear is the cue source. When the
slider is all the way right, you will hear what is playing
through the master output. By blending, beats can be
matched exactly and segues can be smooth when a song is
cued.
23. Headphone Level – to adjust cue volume.
24. Headphone Input – for your 1/4” headphone.
25. 12V BNC Connector allows a 12-volt gooseneck
lamp to be connected directly to the mixer. This light is
readily available from your Numark dealer.
26. Power Button – turns unit off and on.