


Post EQ Patch (8)
Similar to the Pre EQ Patch(4), these jacks are post EQ. The same notes apply. The return level
should still be monitored for its strength. In addition, the Post EQ Patch can be taken in and out of
the signal path via the footswitch.
Master Reverb (9)
Adjusting this control clockwise will result in more reverb content in the output of the amp. The
reverb can be defeated by rotating the control counterclockwise or via the footswitch.
Master Gain (10)
The Master Gain controls the overall volume level of the amplifier. The final adjustment to this
control should be made after the desired sound/tone has been achieved.
Power LED (11)
The Power LED illuminates when power is supplied to the amp. If this LED is lit, the amp is on.
Power Switch (12)
Placing this switch in the ÒOnÓ position will result in power being supplied to the unit. The Power
LED (11) will illuminate when the amp is on.
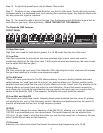
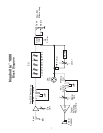
REAR PANEL
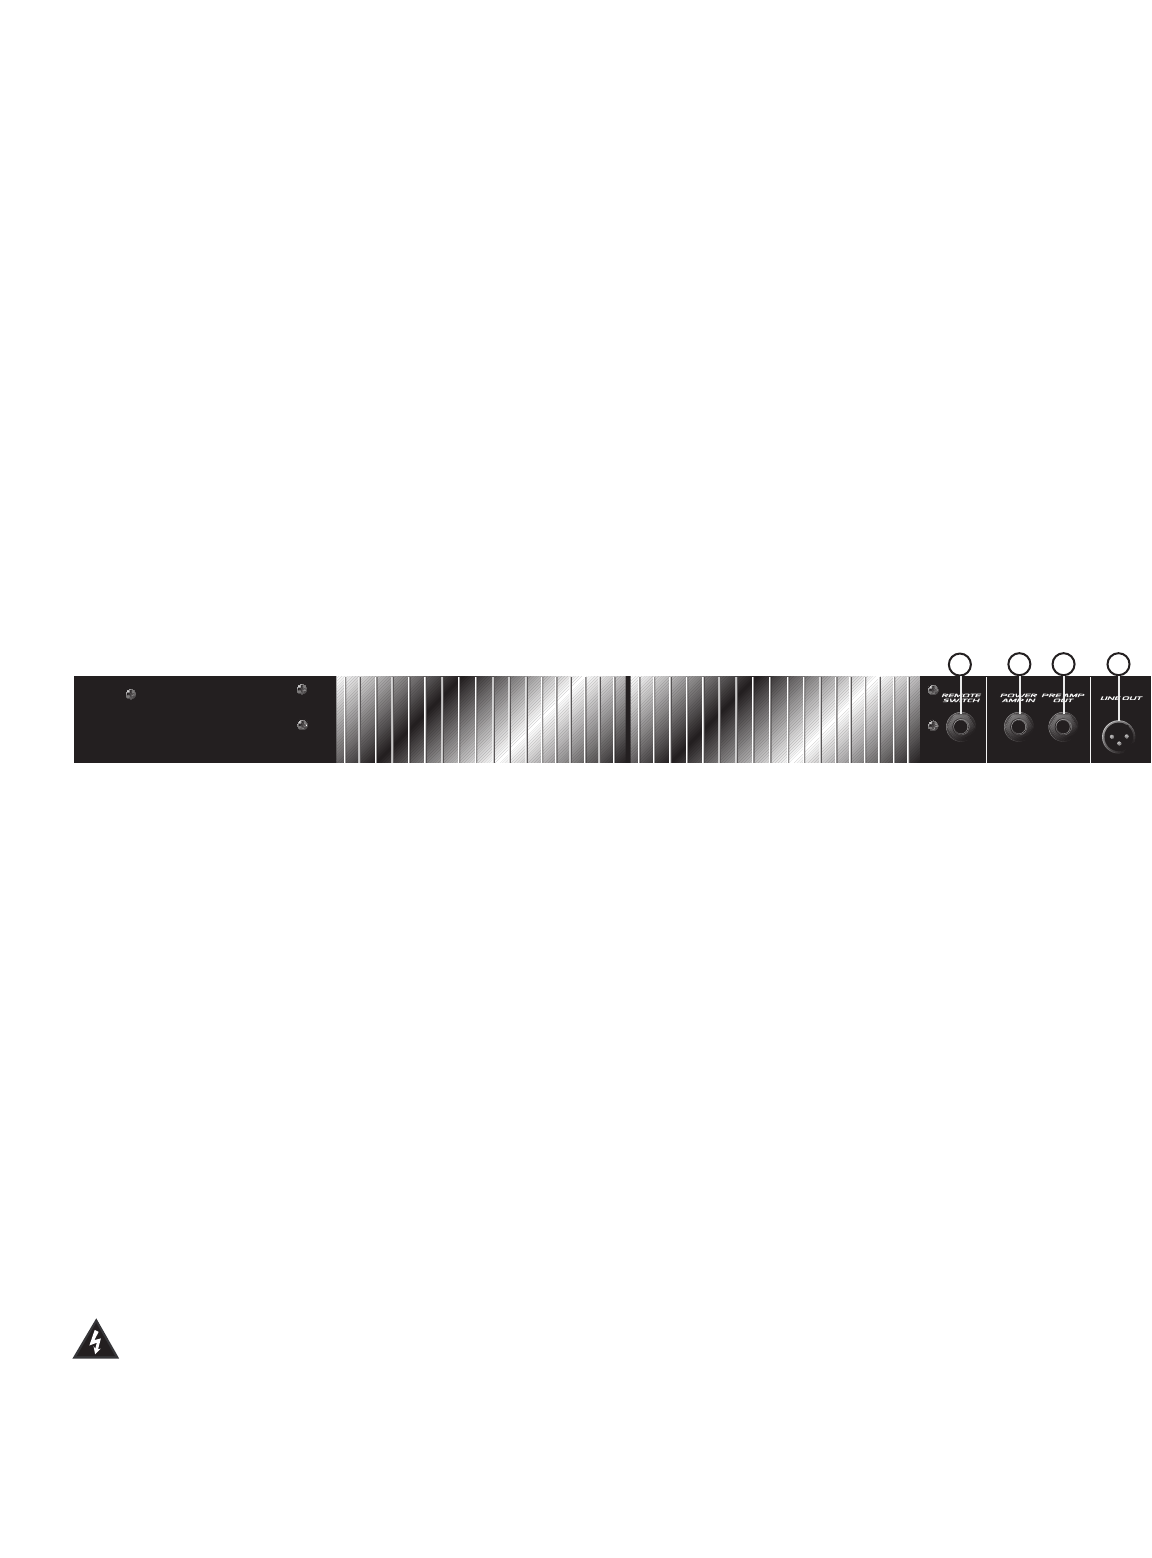
Remote Switch (13)
This jack is provided for the connection of the supplied footswitch. The footswitch is a multi-function
type, allowing you to to defeat the Reverb and/or the Post EQ Patch loop. To use the footswitch,
insure that the footswitch plug is inserted fully into the jack.
Power Amp In (14)
This mono 1/4" jack provides an input to the power amplifier. When used in conjunction with the
Preamp Out jack (15), an effects loop is formed allowing the use of external equalizers and effects.
Preamp Out (15)
This mono 1/4" jack provides an output from the preamp. When used in conjunction with the Power
Amp In jack (14), an effects loop is formed allowing the use of external equalizers and effects.
Line Out (16)
The Line Out XLR jack offers you a balanced, low impedance output to go to a mixing board or
snake. This can help to eliminate mics on stage as well as loud levels. This results in less chance
of feedback as well. Use quality mic cables to make this patch.
Removable AC Power Cord
This receptacle is for the IEC line cord (included), which provides AC power to the unit. Connect
the line cord to this connector and to a properly grounded AC supply. Damage to the equipment
may occur if an improper line voltage is used (see voltage marking on unit). Never remove or cut the
ground pin of the line cord plug. This unit is supplied with a properly rated line cord. When lost or
damaged, replace this cord with one of the proper ratings.
5
13
14 15 16