


Much of the setup of the Escort
®
is similar to the setup of other sound systems, and many aspects require plain common sense.
Safety should always be your rst concern. Always use grounded outlets and three-wire extension cords. Run sound system cables
in a way to prevent the danger or tripping and tape them down when necessary. Place the speaker stands and mixer on a solid,
level surface. Following these guidelines will help prevent personal injury and equipment damage.
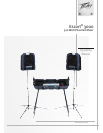
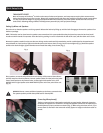
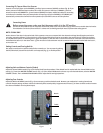
Remove the speaker stands from the case. Be sure the legs on the stands are fully extended to provide a stable base for the speakers and
are positioned on a level surface. Tighten the thumbscrew on the base so that it is snug, but do not overtighten (Fig. 4). Raise the speaker
stands to the desired height, tighten thumbscrew and install the safety pin as shown (Fig. 5).
THINK SAFETY FIRST!
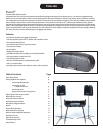
Quick Setup Guide
Setting Up Mixer and Speakers
Place the unit so that the speakers are facing upward. Release the latches by lifting up until the latch disengages. Remove the speakers from
the Escort package.
NOTE: The latches can be closed once the speakers are removed and it is recommended that they be closed to protect the latch and avoid
interference with removal of componets. Close the latch by pushing in until it is ush with the side of the case, and then down until it locks.
Fig. 4
Fig. 5
8
WARNING! Do not connect additional speakers to the Escort
®
powered mixer.
The system speakers provide the optimal load for the amplier.
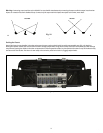
Place speakers on stands and position them so that they will face toward the audience
and face away from the microphones. Connect speaker cables from the jack on the lower
front of each speaker to the powered mixer, connecting the left speaker to the LEFT
OUTPUT and the right speaker to the RIGHT OUTPUT jacks on the rear panel of the unit
(Fig. 6).
Fig. 6
Fig. 7
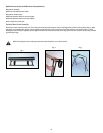
Connecting Microphone(s)
The Escort powered mixer is designed to work with any good-quality, balanced, dynamic or
condenser microphone such as the PV
®
i microphone supplied. Connect the microphone(s) to
the XLR (three-pin) input connectors as shown (Fig. 7). When using more than one mic, try to
connect them to channels in the same order as they appear on stage to make them easier to
control.