


8
<DRB1315>
En/Fr
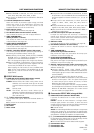
L
R
White plug
Red plug
CONNECTIONS
MIC 2MIC 3CH-4CH - 1CH - 2CH - 3CH - 4
CONTROLCONTROLCONTROLCONTROL LINE 1LINE 3LINE 5LINE 7
LINEPHONO
LINEPHONO
LINEPHONO
LEVEL
LEVEL
ATT .
MASTER
TALK OVER
SIGNAL
GND
/ LINE 2/ LINE 4
PHONO 1PHONO 2
/ LINE 6
PHONO 3PHONO 4
R
L
R
L
R
L
R
L
R
L
L
L
R
RLR
RL
(MONO)
RL
(MONO)
LR12
BOOTHMASTER
MASTER OUT 2
MASTER OUT 2
DIGITAL OUT
REC OUT
SEND
SEND
RETURN
RETURN
OUT 1 MONITOR
BOOTHMASTER
OUT 1 MONITOR
1 GND
2 HOT
3 COLD
CH - 1
CH - 2
CH - 3
CH - 4
LINE 1
LINE 3
LINE 5
/ LINE 2
PHONO 1
/ LINE 4
PHONO 2
/ LINE 6
PHONO 3
LINE 7PHONO 4
RLR L
R L
DJM-3000
1
2
3
DJM-3000
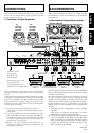
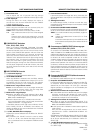
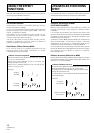
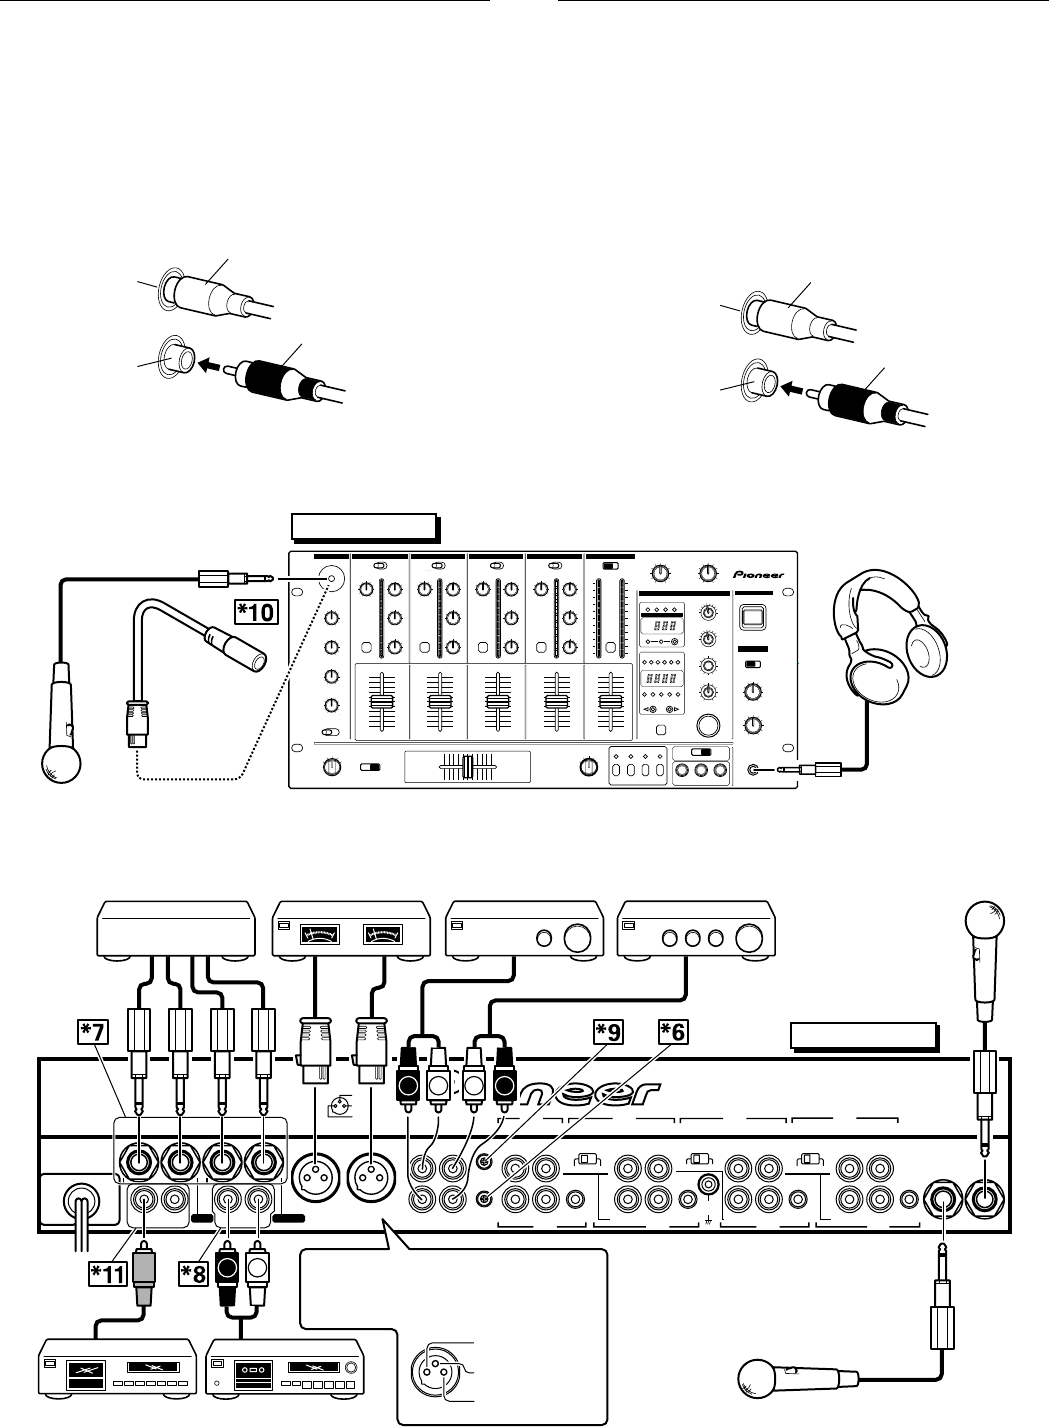
2. Connection of Outputs, Microphones,
etc.
Microphone 1
Microphone 1
Headphones
Casque
Power amplifier
(Supports RCA input)
Amplificateur de
puissance (Compatible
avec entrée RCA)
Power amplifier
(For booth monitor)
Amplificateur de puissance
(Pour moniteur de cabine)
MIC 3
(CH-4 PHONO 4 cannot be used when
microphone is connected to MIC 3.)
MIC 3
(Les jacks PHONO 4 de CH-4 sont
inopérants si un microphone est branché
sur MIC 3.)
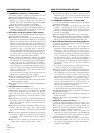
XLR terminal polarity is as shown in
the diagram below.
Le schéma ci-dessous montre la polarité
de la borne XLR.
COLD (–)
FROID (–)
GND
TERRE
HOT (+)
CHAUD (+)
Power amplifier
(Supports XLR input)
Amplificateur de
puissance (Compatible
avec entrée XLR)
Cassette deck, etc.
Platine-cassette, etc...
External effector
Effecteur externe
Microphone 2
Microphone 2
CD recorder, etc.
Enregistreur CD, etc...
RACCORDEMENTS
*4 When connecting a cassette deck, set the PHONO/LINE
switch to the LINE position.
*5 When connecting an analog record player, set the
PHONO/LINE switch to the PHONO position.
Connecting audio cords
Use the cords with the red and white pin plugs.
Connect the white plug to ”L“ and the red plug to ”R“. Make
sure to insert the plugs completely.
*3 Comme les bornes d’entrée PHONO de l’appareil ne
fonctionnent qu’avec le système MM, il faut utiliser des
cassettes de type MM dans le lecteur analogique raccordé.
*4 Si vous branchez un lecteur de cassette, réglez le sélecteur
PHONO/LINE à la position LINE.
*5 Si vous branchez un lecteur de disque analogique, réglez le
sélecteur PHONO/LINE à la position PHONO.
Raccordement de cordons audio
Utilisez les cordons munis d’une fiche rouge et blanche.
Raccordez la fiche blanche à “L” et la fiche rouge à “R”. Veillez
à introduire les fiches à fond.
L
R
Fiche blanche
Fiche rouge
2. Raccordement de périphériques, de
microphones, etc..