


4 – Pyle Pro Mixer Owner’s Manual
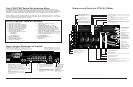
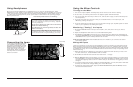
Features and Controls: PYD1942 Mixer
Equalizer On/Off Switch
Effect Switch
(Send/Receive)
Lets you
connect a sound effect
device, such as reverb,
sampler, etc. and either play
the signal from it or play
another input through it.
BNC Lamp Adaptor Allows
you to connect a 12V/3W
lamp to light the panel
Headphone Jack
Accepts headphones with
1/4” plug
Headphone Level Control
Headphone CUE/PGM
Control
Allows you to listen
simultaneously or separately
to the CUE material or the
active program
Zone Level Control Lets you control the mixer’s
o
verall ZONE volume level, if you set up remote
speakers or DJ booth monitors
Zone Mono/Stereo Selector
Zone Balance Control
Master Mono/Stereo Selector
Channel Assign Switch Lets you select the input source to be mixed
b
y the Crossfade Slider Control
Crossfade Slider Control Allows you to smoothly switch between
the input sources assigned to Channel A and Channel B
MIC Talkover Allows you to lower the
lev
el of the input sources so you can talk
them using the DJ Mic
MIC1/2 Level Controls Lets you control
the MIC levels as they enter the mix
MIC1/2 Tone Controls
10-Band Equalizer Allows you to tailor the mixer output to suit
y
our taste or performance environment. Each frequency range can
be cut or boost by up to 10dB.
Dual Display Meter Indicates the levels of Left and Right Master
Channels
Channel CUE Switch Allows you to monitor the selected audio
input source and prepare it prior to mixing it in.
Channel Input Selector Lets you choose the input source to play
for each channel
Channel Gain Control Lets you adjust the gain of the input source
MIC Frequency Kill Switches Allows
y
ou to kill the selected frequency range
instantly for interesting effects. LED
lights to indicate kill is activated.
MIC 2 Input Jack (on input panel)
F
or connecting a balanced or
unbalanced low impedance microphone
with 1/4” plug
MIC 1 Combo Input Jack For
connecting a balanced or unbalanced
low impedance microphone with XLR
-
type or 1/4” plug
Sound Effect CUE Switch Lets you monitor the
selected sound effect before mixing it in
Sound Effect Volume Control Lets you control
the v
olume level of the sound effect within the mix
Sound Effect Speed Control Lets you control
the pitch of the selected sound effect
Digital Sound Effects Selectors Lets you create
special sound performance mix
es from the eight
preprogrammed special effects
Master Balance Control
Master Level Control Lets you control mixer’s overall volume level
Power Switch
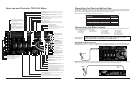
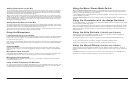
Presetting the Controls Before Use
Since sudden high output levels from your Pyle Pro mixer can damage not only audio devices connected
to the mixer output but your hearing as well (especially if you are using headphones), please adjust
the mixer’s controls BEFORE connecting AC power or turning on the unit.
Set up the mixer controls like this before you start:
5 – Pyle Pro Mixer Owner’s Manual
Power On/Off
Balance
Gain
Tone Controls, Treble, Mid & Bass
MIC 1/2, CH 1/2/3/4, Master & Cue Levels
Crossfader
OFF
MID
MID
0
0
CENTER
CONTROL SETTING
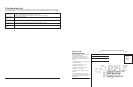
Two Microphones
Eight CD players
Two Microphones
Two Turntables
Three CD players
Three Cassette Decks
Two Microphones
Two Turntables
Four CD players
One Rhythm Synth
One Cassette Deck
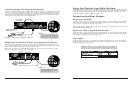
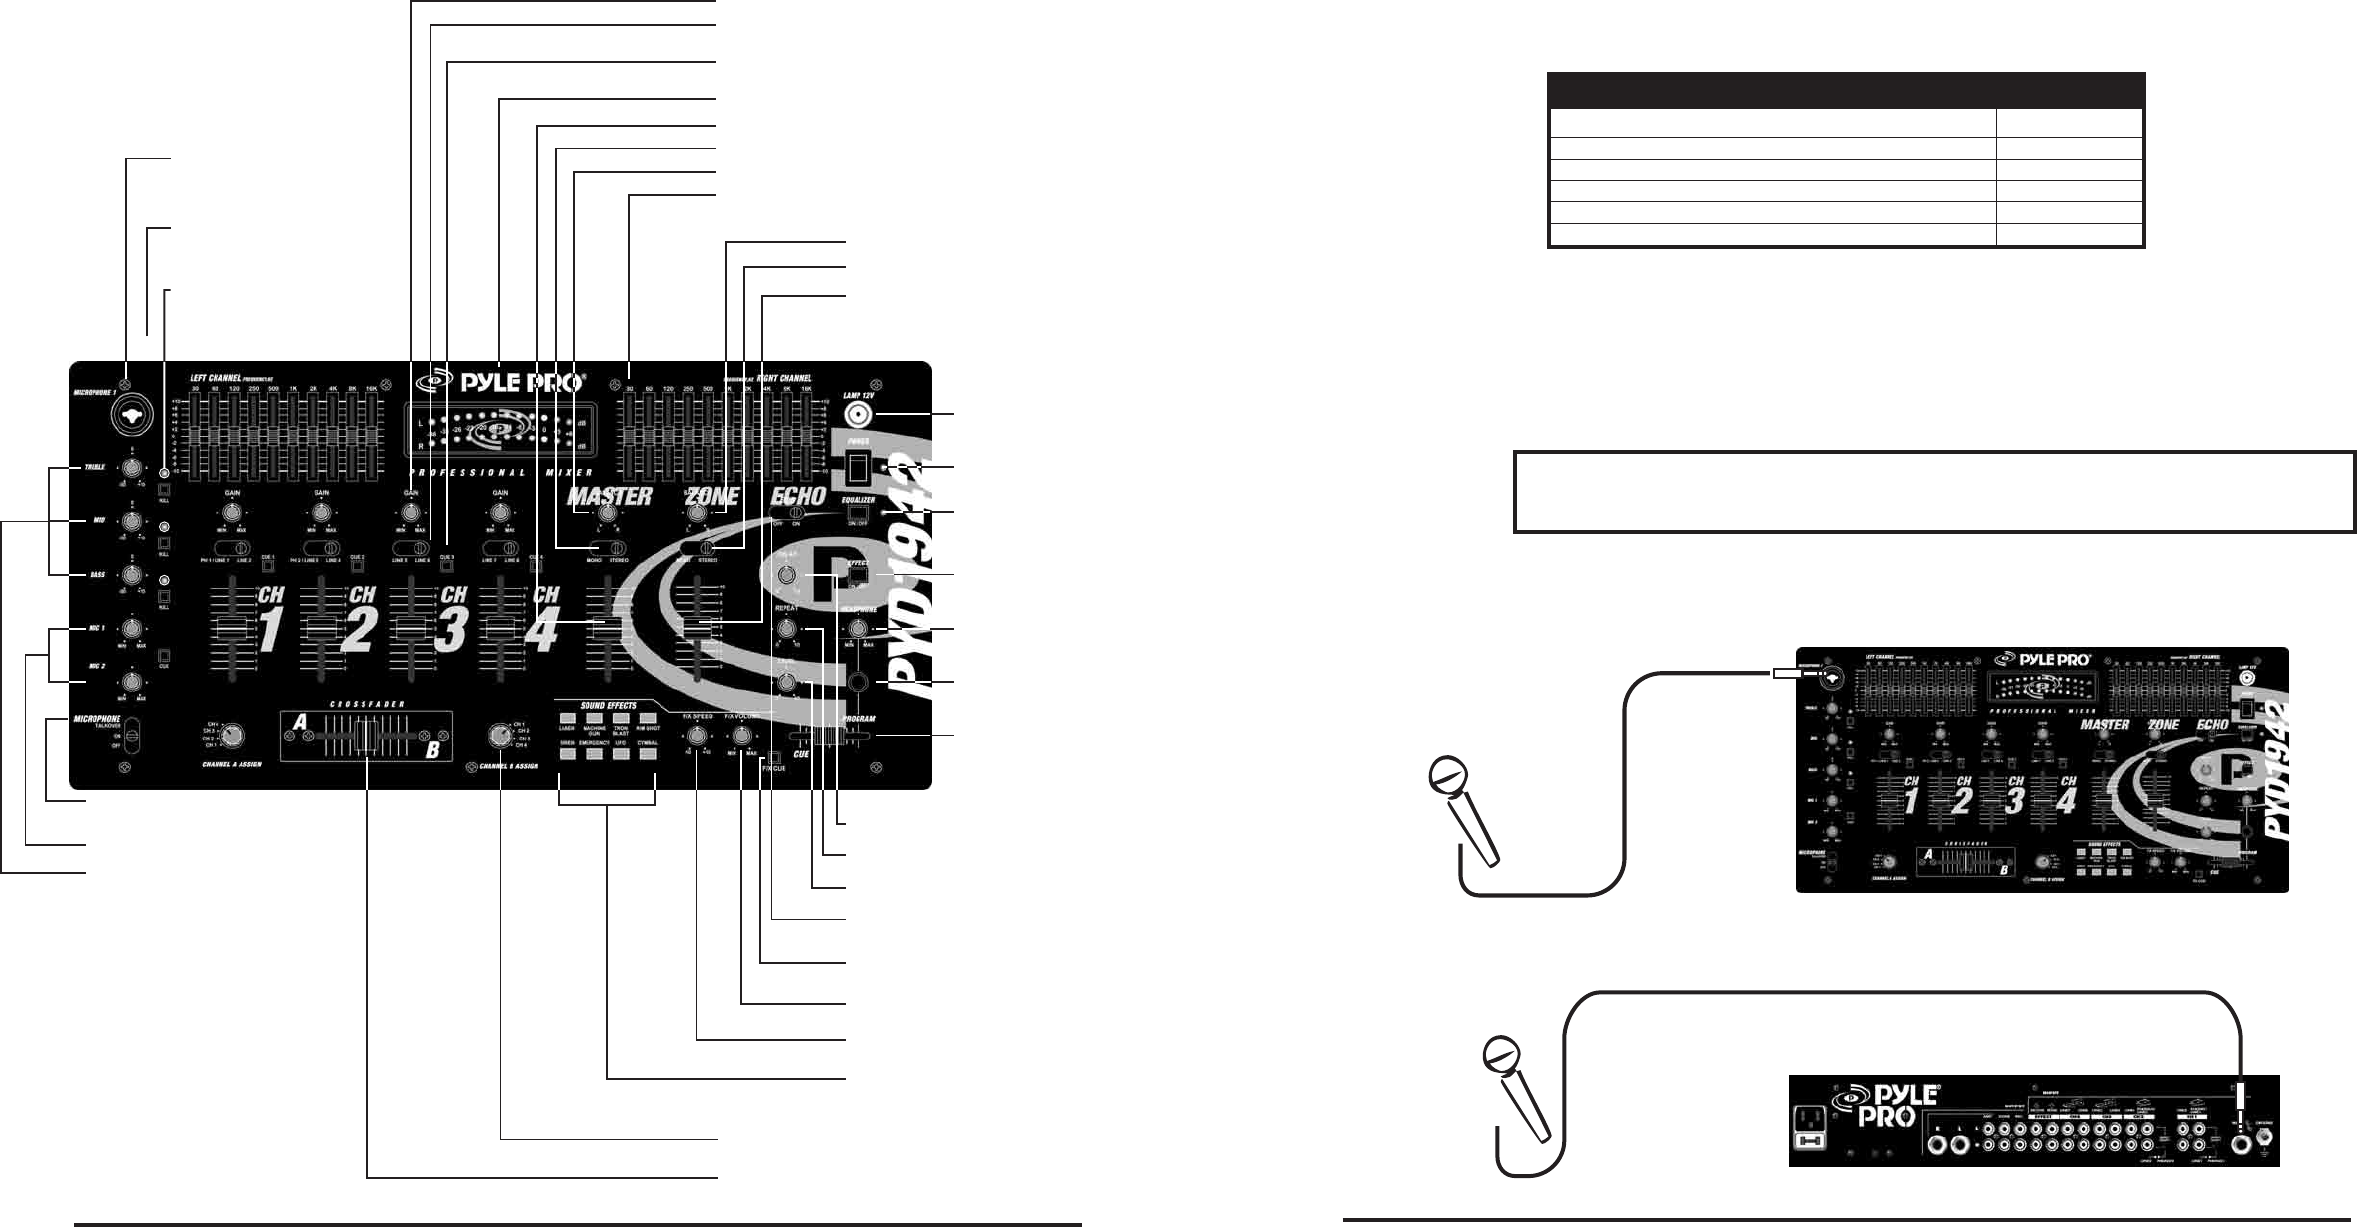
Connecting Microphones
Microphone 1.
Connect a balanced/unbalanced low impedance (600 Ohm) XLR type MIC OR a low
impedance MIC with a 1/4” plug to the MIC 1 jack in the upper left corner of the mixer control panel.
Microphone 2. Connect a high quality balanced/unbalanced low impedance (600 Ohm) microphone
with a 1/4” plug to the MIC 2 jack on the lower left corner of the mixer’s back panel.
MIC 2
Use 1/4”
jack
MIC 1
Use 1/4” or
XLR-type jack
ECHO On/Off Switch
ECHO Level Control Controls the depth of the
echo effect
ECHO Repeat Control Lets you control the time
period during which the echo is repeated
ECHO Delay Control Lets you adjust the delay
time for the echo
This mixer permits connection of up to eight (8) audio input sources,and two microphones. Such a
system might include, for example:
Please observe
the following:
Do not connect any audio source with a HIGH LEVEL OUTPUT to the
LOW LEVEL
PHONO 1 or PHONO 2 mixer audio input jacks (an audio
source output with a volume control is HIGH LEVEL).
Connecting the Mixer Inputs
Two Microphones
Two Turntables
Six CD players