


8
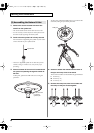
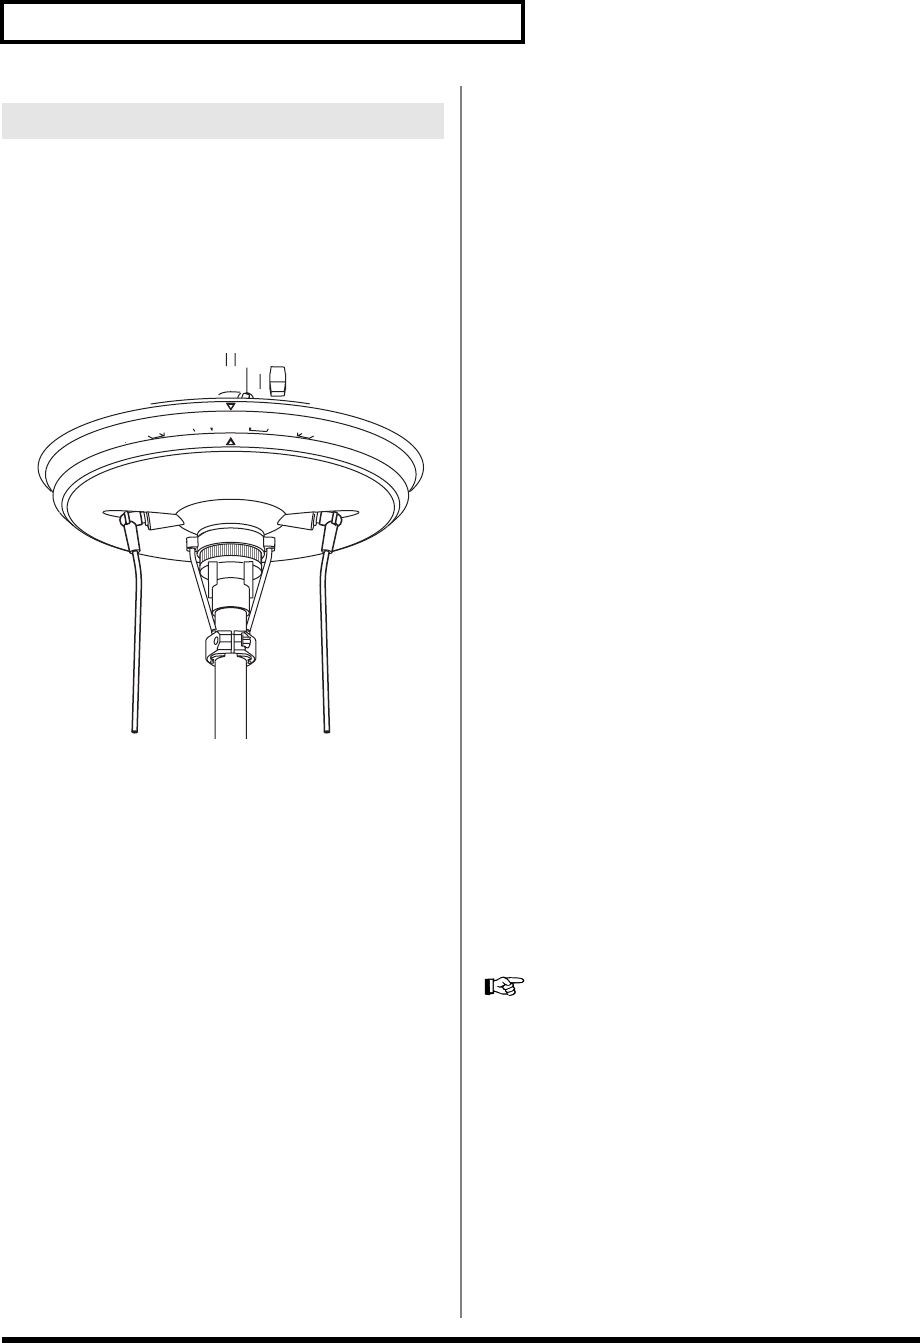
Mounting on the Hi-Hat Stand
921
* To prevent malfunction and/or damage to speakers or other
devices, always turn down the volume, and turn off the power
on all devices before making any connections.
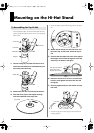
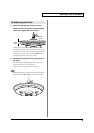
1.
Connect the VH-12’s TRIGGER OUTPUT jack to
the sound module’s TRIGGER INPUT HI-HAT
jack, and the VH-12’s CONTROL OUTPUT jack
to the sound module’s HH CTRL jack.
fig.Connect.e
* Use stereo (TRS) cables to make the connections. If monaural
cables are used, edge shots cannot be supported.
2.
Secure the cables in place with the cable tie,
while leaving some slack in the cables.
fig.CableTie.e
When using the VH-12, you will need to make the
settings for the sound module.
When Using with the TD-20
1.
Loosen the clutch screw, and set the hi-hat in
the closed position.
2.
Hold down the TD-20’s [KIT] button and press
the [TRIGGER] button.
The offset is adjusted automatically.
When Using with the TD-12
1.
Press the TD-12’s [TRIGGER] button, then
press the [F1 (BANK)] button.
2.
Press the [CURSOR] buttons to move the
cursor to the trigger type for TRIGGER INPUT 6.
3.
Use the [+/-] buttons or the [VALUE] dial to
select “VH12.”
4.
Press the [F3 (HI-HAT)] button.
5.
Press the [CURSOR (up/down)] to move the
cursor to “Hi-Hat Type.”
6.
Use the [+/-] buttons or the [VALUE] dial to set
the Hi-Hat Type to “VH12.”
7.
Loosen the clutch screw, and set the hi-hat in
the closed position.
8.
Hold down the TD-12’s [KIT] button and press
the [TRIGGER] button.
The offset is adjusted automatically.
For details, refer to the TD-12 owner’s manual.
(4) Connecting to a Sound Module