37
Overview Basic Operation Adv. 1 (Kit) Adv. 2 (Phrase) Adv. 3 (Other) Appendix
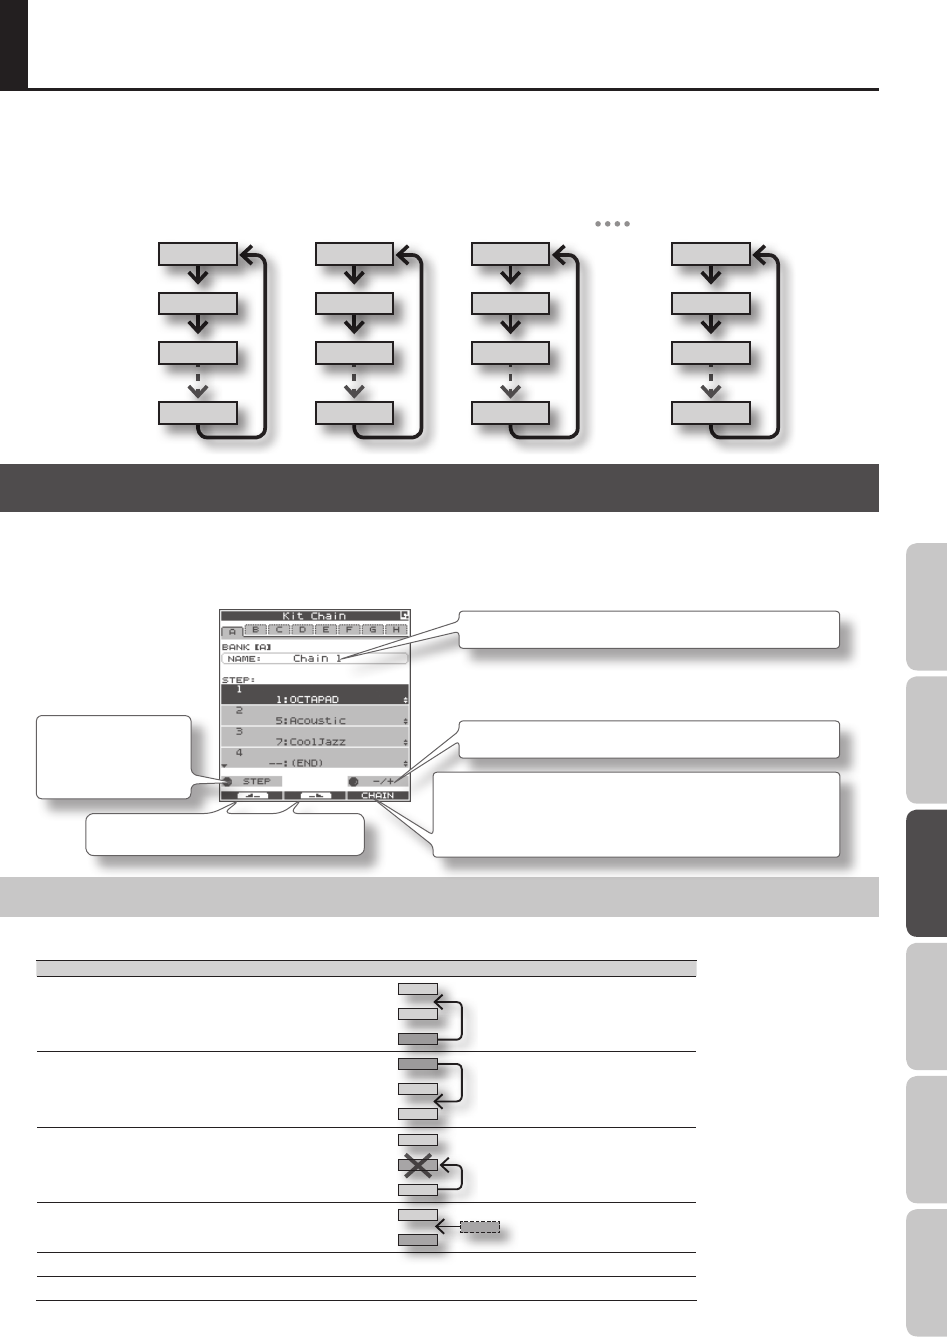
The Kit Chain function lets you decide a specic order in which kits will be switched. This makes it very easy, during live
performances, to switch kits in your desired order. You can use the [KIT] buttons or a foot switch (sold separately) to do the
switching.
You can create eight Kit Chain Banks (A–H) with 20 kits in each chain.
STEP 1 STEP 1 STEP 1 STEP 1
STEP 2 STEP 2 STEP 2 STEP 2
STEP 3 STEP 3 STEP 3 STEP 3
STEP 20 STEP 20 STEP 20 STEP 20
Chain Bank A Chain Bank B Chain Bank C Chain Bank H
Creating a Kit Chain (KIT CHAIN)
Here’s how to create a kit chain.
1. Choose MENU Ú Kit Chain (p. 16).
The KIT CHAIN screen appears. Use the following knobs and buttons to create your kit chain.
[Knob 1] (STEP)
changes the step
[Knob 3] (–/+) changes the kit (list display)
Chain bank name (use the QUICK MENU to edit)
[Button 3] (CHAIN) turns the chain on/o (When on, a bar is
shown above the button.)
This can also be switched from the KIT screen QUICK MENU.
[Button 1] and [Button 2] change banks
KIT CHAIN Screen QUICK MENU
From the KIT CHAIN screen, press the [QUICK] button to access the following QUICK MENU.
Menu Explanation
Move Up Moves the selected step up one place
Move Down
Moves the selected step down one
place
Delete
Deletes the selected step, moving up
subsequent steps
Insert Inserts a step at the selected position
Chain Name Assigns a chain bank name (p. 35)
Clear All Steps Deletes all steps
KIT CHAIN


