


7
Connecting and Adjusting
7.
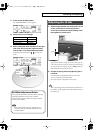
Press the [F3 (HI-HAT)] button.
The “TRIGGER HI-HAT” screen appears.
fig.TrigHH-12
8.
Confirm the TD-12’s settings.
9.
While reading the meter displayed on the right
side of the TD-12’s screen, adjust the offset
with the VH-11’s VH offset adjustment screw.
Adjust the offset so that a black appears in the
meter.
fig.TrigHH-OK
fig.Offset.e
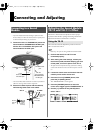
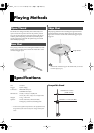
1.
Adjust the gap between the metal portion in the
center of the lower hi-hat and the sensor’s
center tip to a clearance of approximately 3 mm,
then tighten the clutch screw.
fig.HH-Adjust.e
* Although the gap can be adjusted to a clearance that makes
playing the hi-hat easier, setting too narrow or wide a gap can
cause improper function of the unit and prevent the hi-hat from
sounding as you intend. Setting the gap to
3 mm
provides the
most natural feel when playing the VH-11.
2.
Change the spring tension by adjusting the hi-
hat stand.
For instructions on adjusting the tension, refer to the
owner’s manual for your hi-hat stand.
* The tension may not be adjustable on some stands.
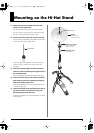
When performing, make sure that the name “Roland” on
the hi-hat is on the opposite side of the stand from the hi-
hat pedal (p. 5).
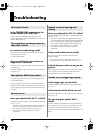
Parameter Value
Hi-Hat Type VH11/FD
CC Max 90
CC Resolution NORMAL
VH Offset
Adjustment
Screw
OPEN CLOSE
VH Offset Adjustment Points
If the closed hi-hat sound is difficult to attain, rotate the
VH offset adjustment screw towards “CLOSE.”
If the open hi-hat sound is difficult to attain, rotate the
screw towards “OPEN.”
If the sound cuts off when you strike the hi-hat
forcefully, rotate the VH offset adjustment screw
towards “OPEN.”
Adjusting the Hi-Hat
3 mm
VH-11_e 7ページ 2005年4月12日 火曜日 午後1時20分