


69
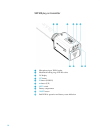
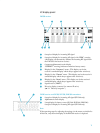
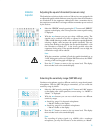
Battery status indication
The red LED ¹ and the lower 8-segment bargraph on the display provide
information on the (remaining) battery capacity.
Bargraph:
The bargraph indicates the (remaining) battery capacity in 3 steps:
8 segments: the full battery capacity is available,
4 segments: the battery capacity is sufficient,
1 segment: the battery is going flat,
immediately replace the battery.
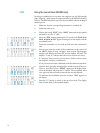
Note:
When switching on the transmitter with a partially used battery, it is
possible that all eight segments may show for a short period of time –
if this happens, re-check battery status after a few moments.
LED lit up:
The transmitter is switched on and the battery capacity is sufficient.
LED flashing:
The battery is going flat! You should immediately replace the battery!
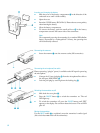
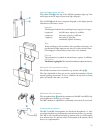
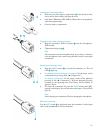
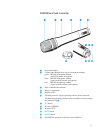
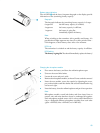
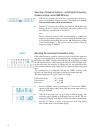
Changing the microphone module
Ǡ First remove the battery and leave the radiomicrophone open.
Ǡ Unscrew the sound inlet basket.
Ǡ Loosen the screw and put it aside.
Ǡ Remove the microphone module, as shown. Do not touch the contacts!
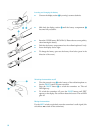
Ǡ Insert the new module, secure the capsule by tightening the screw,
put on the suitable sound inlet basket and coloured identification ring
and screw it tight.
Ǡ Insert the battery, close the radiomicrophone and put it into operation.
Note:
Microphone module, sound inlet basket and foam insert form an
acoustic unit and must therefore always be exchanged all together.
Each microphone module comes with a colour-coded identification
ring to distinguish different microphone modules from each other
(green = MD 835, blue = MD 845, red = ME 865).