


35
34
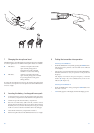
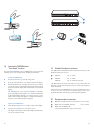
With only three buttons, you can adjust any function
on the receiver on the transmitter
15 Adjusting the sensitivity
When briefly pressing the SET button, the display indicates the preselected
sensitivity. The possible settings for the ME 3005 e microphone head are
the following:
0 dB for singers with soft voices
- 10 dB for singers with normal voices using
the microphone at a greater talking distance
- 20 dB for singers with loud voices
- 30 dB for rock singers / “close-miking”
The possible settings for the ME 3005 microphone head are the following:
0 dB for speakers with soft voices
- 10 dB for speakers with normal voices using
the microphone at a greater talking distance
- 20 dB for speakers with loud voices
- 30 dB for “close-miking” (e.g. presentations)
With the ̃/̅ buttons you can now select a different sensitivity. If you
do not press the ̃/̅ buttons or the SET button for more than 14 seconds,
the setting mode is automatically left and the microprocessor switches
back to the standard display.
Note:
In order that you can instantly test the new sensitivity, the
setting becomes effective immediately without having to
be stored.
Tip:
Try out each sensitivity several times. For soundchecks please
bear in mind that the volume may appear to be higher during
rehearsal in an empty room than later during the show. Experience
also shows that the user will normally speak louder in front of the
audience.
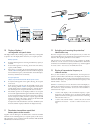
14 Basic functions of the
Sennheiser operating menu
A special feature of the Sennheiser 3000 series is the similar operation of
transmitters and receivers. In stressfull situations, for example on stage
or during a live show or presentation, it is important that the transmitter
is easy to operate and that adjustments to the transmitter settings can be
made quickly and “without looking”. Therefore, the necessary operating
steps for each device must be similar.
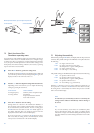
ᕡ Press the SET button to get into the setting mode.
By briefly pressing the SET button, the display begins to flash and
you enter the top menu level. By briefly pressing SET again, the
display switches to the next menu and so on.
ᕢ Press the ̃/̅ buttons to adjust the settings of the selected menu.
Depending on the menu selected, you can adjust the following
settings by pressing the t/s buttons:
on the receiver on the transmitter
receiving frequency sensitivity of the microphone input
receiving channel transmission
frequencytransmission channel
“lock mode” function
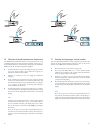
ᕣ Press the SET button to store the setting.
Settings which are “relevant to the transmission reliability” or
have an impact on the complete radiomicrophone system have to
be stored before they become effective. To store a setting, press
the SET button for more than a second. “Sto” briefly appears on
the display, indicating that your setting has been stored. The
display then switches back to the standard display.
If you do not press the ̃/̅ buttons or the SET button for more
than 14 seconds, the setting mode is automatically left and the
microprocessor switches back to the standard display.