


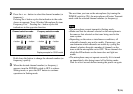

8(GB)
Channel selection
mode*
Freqency selection
mode
Attenuator adjustment
mode
Accumulated time
indication reset mode
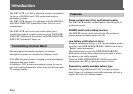
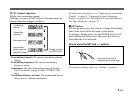
Press the
SET button.
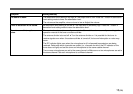
Display example
for CE62 model
Settings
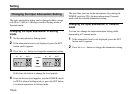
Initiating Setting Mode
Enter Setting mode to change the transmitting channel, the
transmitting frequency and the attenuation level, or to reset
the accumulated battery use time indication.
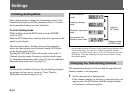
To enter Setting mode
While holding down the SET button, turn the POWER
switch to ON.
Hold the SET button down until an indication appears on the
liquid-crystal display.
The microphone enters Setting mode and the indication
before the microphone was previously turned OFF flashes
on the liquid-crystal display.
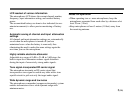
Pressing the SET button cycles the modes in the order of
Channel selection mode, Frequency selection mode (page
9), Attenuator adjustment mode (page 10) and Accumulated
time indication reset mode (see page 11).
Note
On the model available in Europe, the transmitting channels
are grouped in four sets as shown in “Sony Wireless
Microphone System Frequency List.”
* On the model available in Europe, set the channel group indication (the
left two digits) first. Press the + or – button to toggle the channel
group (e.g., for CE62 model: 00 y 62 y 63 y 64) and press the
SET button. Then, the remaining four digits start to flash for setting
the channel number.
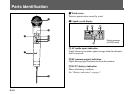
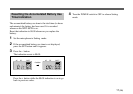
Changing the Transmitting Channel
The transmitting channel can be selected through either the
channel number or the frequency.
1 Set the microphone to Setting mode.
If the channel number (or frequency) indication does not
appear, press the SET button until the channel number
(or frequency) indication appears.