8
THE 60-SECOND GUIDE
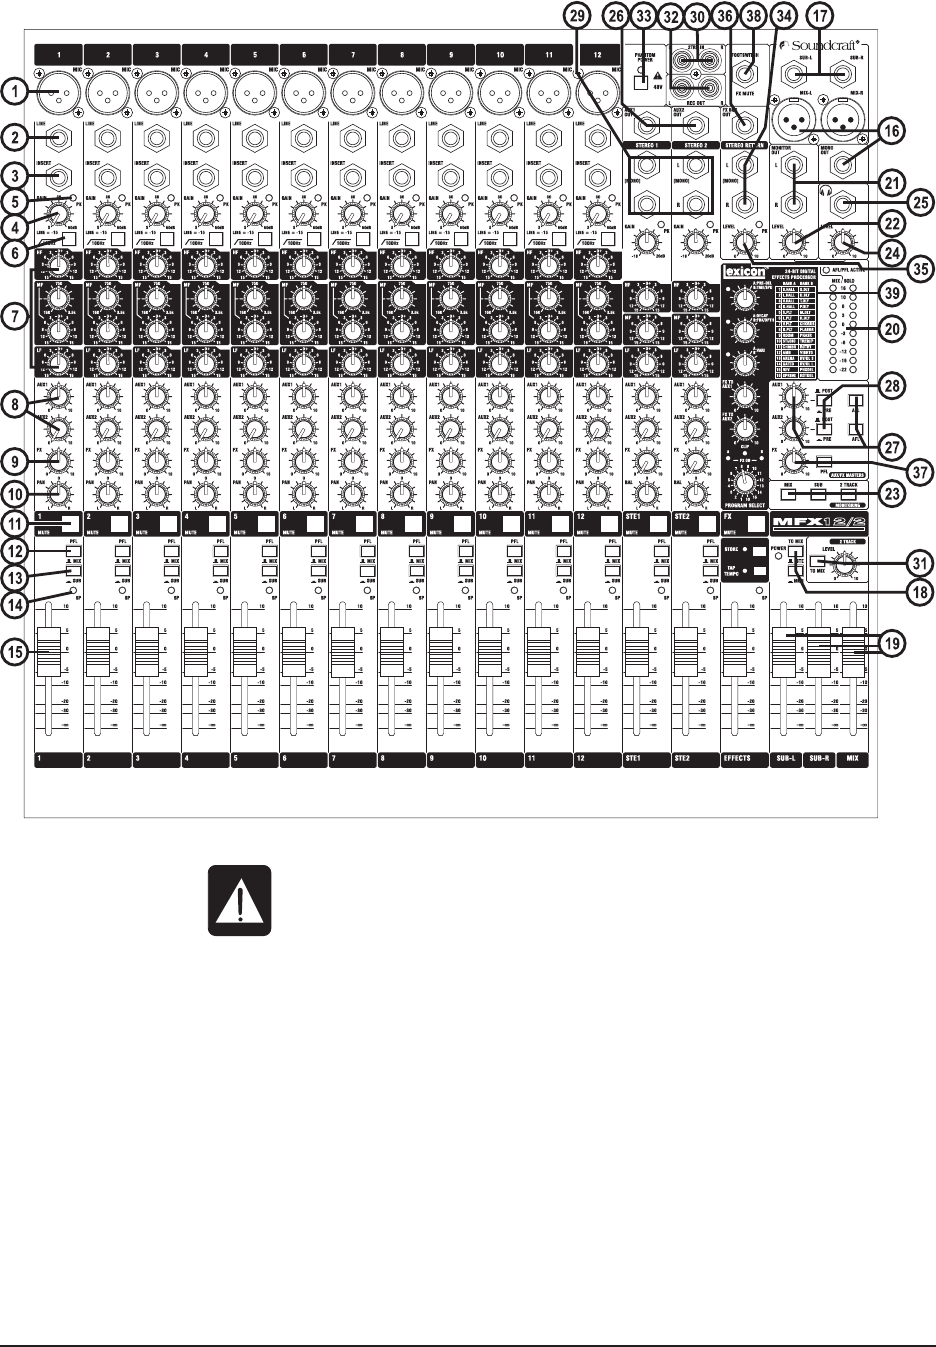
1 MIC INPUT (XLR) Connect Microphones here. If you are using a condenser mic, ensure phantom
power is supplied by pressing the switch at the top of the master section.
WARNING: Do Not apply Phantom Power before connecting a microphone.
2 LINE INPUT (¼” Jack) Connect Line level sources here, e.g. Synth, Drum Machine, DI etc.
3 INSERT POINT (¼” Jack) Connect Signal processors here, e.g. Compressor, Gate etc.
4 GAIN CONTROL Adjust this to increase or decrease the level of the incoming signal.
5 PEAK LED This is used to indicate that the signal is close to distorting (clipping) on a specific
channel.
6 HPF The high-pass filter reduces the level of bass frequencies only. Use this in live PA
situations to reduce stage rumble or ‘popping’ from mics.
7 EQ STAGE Adjust these controls to change the signal tone (the character of the signal).
8 AUX 1 & 2 SENDS Adjust these controls to change the level of the signal to an artist’s monitors (head-
phones/in-ear/stage monitors). Aux 1 & 2 are globally switchable pre/post fade.
9 FX SEND This control sets the level of the post-fade signal being sent to the FX bus; from
there it is routed to the FX processor.
10 PAN CONTROL Use this control to position the signal within the stereo field.
11 MUTE SWITCH When this is pressed you will hear no signal from the channel (post-mute signals).
To get you working as fast as possible, this manual begins with a 60-second guide. Here you can find quick
information on any feature of the console.


