


D1335603_T770_880_990_MXP_User_Manual
98
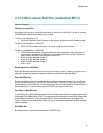
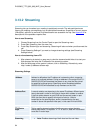
3.13.5 Camera Tracking
Through Camera Tracking and the use of two or three microphones, the camera can
automatically position itself on the current speaker. Before using camera tracking, the camera
positions used must be stored at Preset 7 (Mic1) and/or Preset 8 (Mic2).
How to use Camera Tracking:
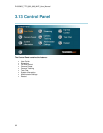
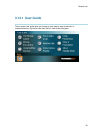
1. Open the Control Panel.
2. Enable Camera Tracking by choosing Camera Tracking in the Control Panel. An indicator
will appear as you enable Camera Tracking.
3. End Camera tracking by deselecting the button. Camera Tracking will also end if you
activate a Camera Preset or move the camera manually with the arrow keys.
Example: You have placed Microphone 1 on the table. Where should you position the camera
for Preset 7?
The camera position stored at Preset 7 must be related to Microphone 1. Therefore all
participants who are located closest to Mic1 should be included in the Preset 7 camera
position etc. When camera tracking is activated and a person close to Mic1 speaks, Preset 7
will be automatically selected.
When activating another video source (for instance document camera), camera tracking will be
temporarily disabled until you re-select Main Camera or a Main Camera Preset.
The camera tracking speeds may be altered in the Video Settings menu in Administrator Settings,
see 4.6.1 Camera Tracking Mode for further details.
A Voice Detector makes the system more tolerant of noise and ensures the camera not to be
moved by noise such as paper shuffling, etc.
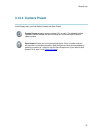
Note that pressing Mic Off will temporarily disable camera tracking until you turn on the
microphone again.